Scrapyd Integration
Scrapyd is an application for deploying and running Scrapy spiders. It enables you to deploy (upload) your projects and control their spiders using a JSON API. The Scrapyd documentation can be found here.
ScrapeOps can be directly integrated with your Scrapyd servers, so you can start, schedule, and manage your jobs from a single user interface.
To use the stats, graphs and alerts functionality of ScrapeOps, you need to install the ScrapeOps SDK in your Scrapy spiders.
📋 Prerequisites
To integrate with a Scrapyd server, you must first have one set up on your server. If you haven't set up a Scrapyd server already then you can use this guide to do so.
🔗 Integrate Scrapyd
Follow these 5 steps to integrate Scrapyd with your ScrapeOps dashboard:
#1 - Add Your Scrapyd Server Details in the ScrapeOps Dashboard
Navigate to the servers view on your ScrapeOps dashboard, and click on the Add Scrapyd Server at the top of the page.
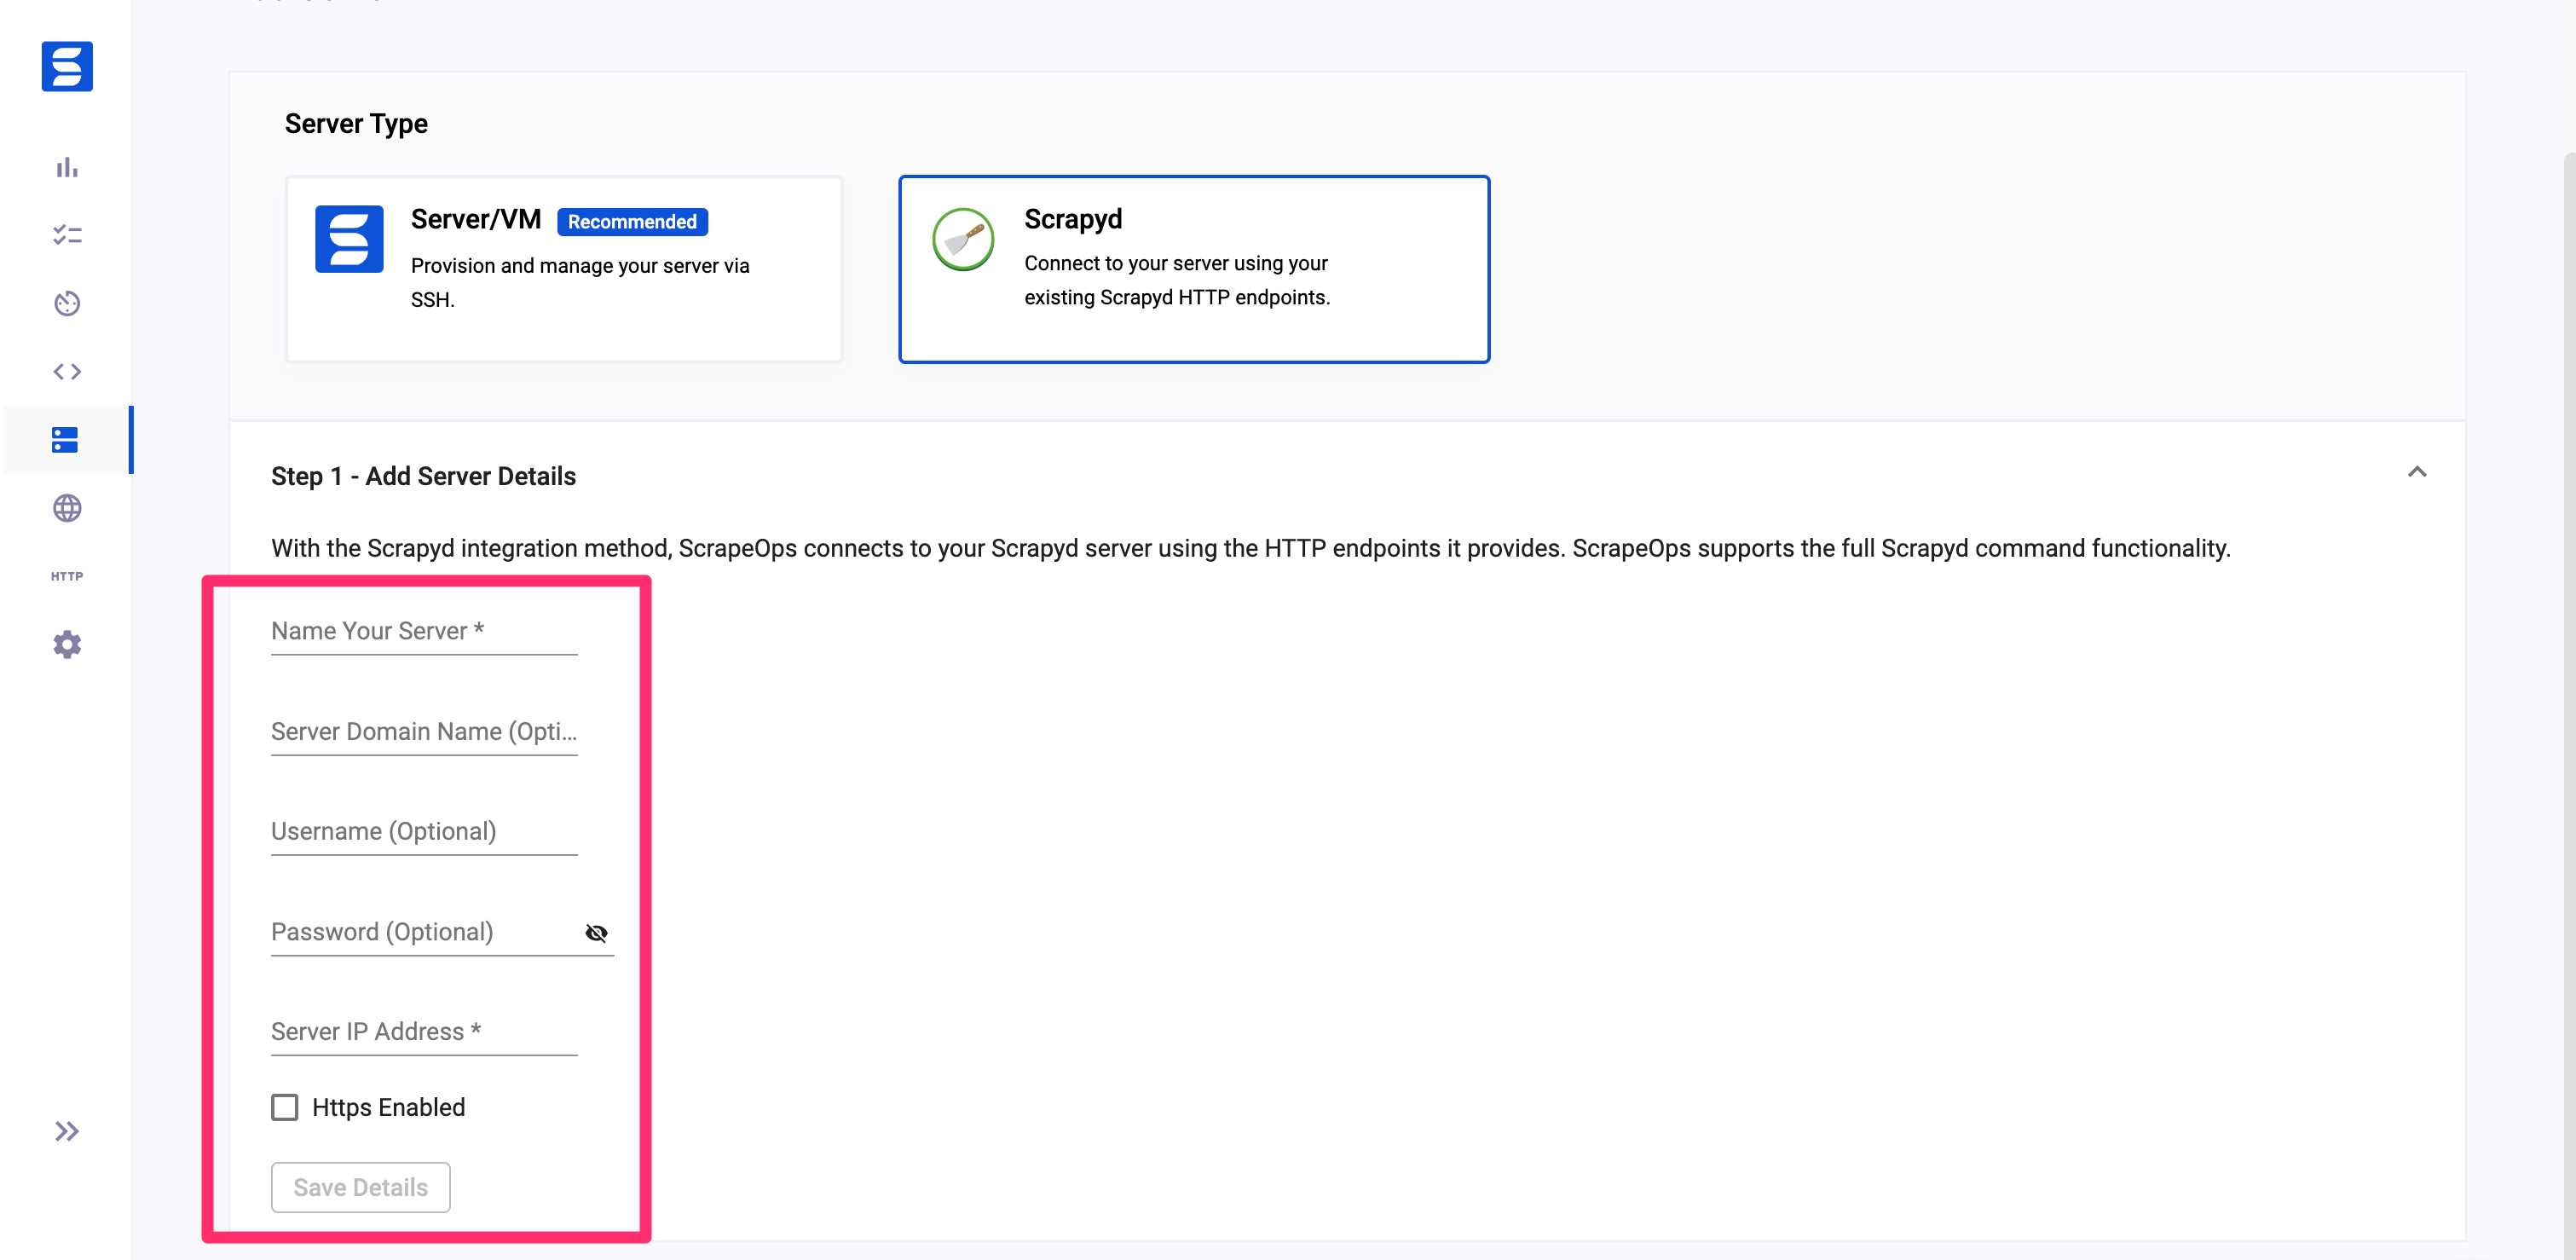
In this section, you will need to provide the following details about your Scrapyd server, as shown in the attached screenshot:
- Name: A unique name to identify your server.
- Domain Name (Optional): The domain name of your server, if applicable.
- Username (Optional): The username required to access your server, if applicable.
- Password (Optional): The password required to access your server, if applicable.
- IP Address: The IP address of your server.
Important: If your Scrapyd server is configured to use a username and password, make sure to add the username and password to the Username and Password fields.
Additionally, there is a checkbox to specify if your Scrapyd server should be connected using HTTP or HTTPS.
Fill out these details and then move on to the next step.

#2 - Install the ScrapeOps SDK
To extract the scraping stats from your spiders, the ScrapeOps SDK must be installed on each Scrapyd server you want ScrapeOps to monitor.
pip install scrapeops-scrapy
Note: To schedule and run jobs on your Scrapyd server, you don't need to have the ScrapeOps SDK installed on your servers. However, it is the ScrapeOps SDK that collects the scraping stats and sends them to our servers so without it being installed you won't be able to see your scraping stats.
#3 - Enable the ScrapeOps SDK in Each Scrapy Project
To monitor your scrapers the ScrapeOps SDK must be enabled on in every Scrapy project you want to monitor.
If you don't have an API KEY so already, you create a free ScrapeOps account here and get your API key from the dashboard.
In your settings.py file, your need to add the following settings:
## settings.py

# Add Your ScrapeOps API key
SCRAPEOPS_API_KEY = 'YOUR_API_KEY'


# Add In The ScrapeOps Extension
EXTENSIONS = {
'scrapeops_scrapy.extension.ScrapeOpsMonitor': 500,
}


# Update The Download Middlewares
DOWNLOADER_MIDDLEWARES = {
'scrapeops_scrapy.middleware.retry.RetryMiddleware': 550,
'scrapy.downloadermiddlewares.retry.RetryMiddleware': None,
}
For detailed instructions on how to install the ScrapeOps you can find the full documentation here.
Very Important: For these changes to your settings.py file to take affect, you need to re-eggify your Scrapy project and push it to the Scrapyd server.
#3 - Whitelist Our Server (Optional)
Depending on how you are securing your Scrapyd server, you might need to whitelist our IP address so it can connect to your Scrapyd servers. There are two options to do this:
Option 1: Auto Install (Ubuntu)
SSH into your server as root and run the following command in your terminal.
wget -O scrapeops_setup.sh "https://assets-scrapeops.nyc3.digitaloceanspaces.com/Bash_Scripts/scrapeops_setup.sh"; bash scrapeops_setup.sh
This command will begin the provisioning process for your server, and will configure the server so that Scrapyd can be managed by Scrapeops.
Option 2: Manual Install
This step is optional but needed if you want to run/stop/re-run/schedule any jobs using our site. If we cannot reach your server via port 80 or 443 the server will be listed as read only.
The following steps should work on Linux/Unix based servers that have UFW firewall installed.:
Step 1: Log into your server via SSH
Step 2: Enable SSH'ing so that you don't get blocked from your server
sudo ufw allow ssh
Step 3: Allow incoming connections from 46.101.44.87
sudo ufw allow from 46.101.44.87 to any port 443,80 proto tcp
Step 4: Enable ufw & check firewall rules are implemented
sudo ufw enable
sudo ufw status
Step 5: Install Nginx & setup a reverse proxy to let connection from scrapeops reach your scrapyd server.
sudo apt-get install nginx -y
Add the proxy_pass & proxy_set_header code below into the "location" block of your nginx default config file (default file usually found in /etc/nginx/sites-available)
proxy_pass http://localhost:6800/;
proxy_set_header X-Forwarded-Proto http;
Reload your nginx config
sudo systemctl reload nginx
Once this is done you should be able to run, re-run, stop, schedule jobs for this server from the ScrapeOps dashboard.