
Puppeteer Guide: How To Find Elements by XPath
While Puppeteer provides various methods for element discovery, XPath stands out as a versatile and precise technique. XPath allows developers to traverse the HTML DOM effortlessly, enabling pinpoint accuracy in identifying elements based on their attributes, structure, and relationships.
In this guide, we'll explore how to precisely locate and interact with DOM elements using XPath in Puppeteer.
- [TLDR - How To Find Elements by XPath](#tldr
Need help scraping the web?
Then check out ScrapeOps, the complete toolkit for web scraping.
---how-to-find-elements-by-xpath)
- What is XPath
- Understanding XPath Syntax
- Types of XPath
- Choosing Between XPath and CSS: What You Need to Know
- Understanding How to Find Elements with XPath
- Selecting Elements with XPath (
page.$x()method) - Waiting for XPath to be Available
- Performing Actions with XPath
- Real-world Applications: XPath in Practice
- XPath Best Practices: Maximizing Efficiency
- Conclusion
- More Puppeteer Web Scraping Guides
TLDR - How To Find Elements by XPath
While CSS selectors are widely used for selecting DOM elements on web pages, XPath provides greater flexibility for complex selections and also enables you to find elements based on their text content.
Scripts employing XPath to select elements follow a consistent design pattern. Initially, you utilize the $x() method provided by Puppeteer, which takes the XPath selector as an argument and returns an array of ElementHandle objects. These ElementHandle objects, serving as wrappers around the actual element data, are then further processed using Puppeteer's methods such as evaluate() and $eval().
Let's consider an example where we print a list of all countries on a scrapethissite.com to our console. Take a look at the following script:
const puppeteer = require('puppeteer');

(async () => {
  const browser = await puppeteer.launch({ headless: true });
  const page = await browser.newPage();
  await page.goto('http://www.scrapethissite.com/pages/simple/');

  const countries = await page.$x('//h3[@class="country-name"]');

  for (let i = 0; i < countries.length; i++) {
    let country = await page.evaluate(el => el.textContent.trim(), countries[i]);
    console.log(`${i + 1}: ${country}`);
  }

  await browser.close();
})();

// 1: Andorra
// 2: United Arab Emirates
// ... More
// 250: Zimbabwe
In this script:
-
We first navigated to the target page using the
page.goto()method. -
Subsequently, we utilized the
page.$x()method to select all elements matching the specified XPath,//h3[@class="country-name"]. This method returned an array ofElementHandleobjects, with each object containing one selected element on the page. -
A for loop was initiated to iterate through the array of selected elements, "countries". Within this loop, we used the
page.evaluate()method to retrieve thetextContentof each element. -
The retrieved
textContentwas further processed by trimming any leading or trailing whitespaces using thetrim()method. -
Finally, the formatted result, including the index, was printed to the console.
What is XPath
XPath, or "XML Path Language", uses a path-like syntax to select and navigate XML and HTML elements. Its strength lies in a versatile set of over 200 built-in functions, such as contains(), starts-with(), substring(), and others.
XPath also demonstrates powerful capabilities for complex axis-based navigation within HTML, supporting relationships like ancestor, descendant, precedent, and following.
While XPath expressions may appear a bit lengthy and verbose, with some practice, they can be quite effective in web scraping with Puppeteer.
Understanding XPath Syntax
XPath uses a descriptive, path-like syntax to navigate through XML and HTML documents. Let's explore XPath syntax through an example.
Consider the following HTML snippet:
<div>
  <a class="button-primary" href="https://example.com">Click me</a>
</div>
In this HTML, there is a div containing a link (a) element with the class "button-primary". If our goal is to extract the href value of this link, our XPath expression would resemble the following:
//div/a[contains(@class, "button")]/@href
Where:
- //: Select any descendant in the document.
- div: Represents the node name, specifying a
divelement. - /: Narrows down the selection to direct descendants (children) of the preceding node.
- a: Specifies an
a(link) element. - contains(@class, "button"): XPath function that ensures that the selected element has a "button" class.
- []: Implements constraints, selecting the element only if the condition inside evaluates to true.
- @href: Captures the value of the
hrefattribute from the chosen element.
This XPath expression precisely targets the href attribute of an a element that is a direct child of a div element and has the "button" class.
The
contains()function determines whether the first argument string contains the second argument string and returns a boolean true or false. If you want to learn more about XPath functions, refer to this article on MDN.
Types of XPath
XPath expressions come in two types: Absolute XPath and Relative XPaths
- Absolute XPath:
Absolute XPath starts from the root of the document and provides the full path to the element. It begins with a single forward slash ("/").
Example:
html/body/a or ./html/body/a
Note: Dot (.) refers to the current document or the current web page; using a dot is optional.
- Relative XPath:
Relative XPath starts from any node in the document and does not require the full path from the root. It is often more flexible and recommended for dynamic web pages. Typically, it starts with a double forward-slash ("//").
Example:
//form/input[2]
The advantage of a Relative path over an Absolute path is that even if an element is deleted or added in the DOM, the relative XPath for a specific element remains unaffected.
Here are some of the frequently used Relative XPath expressions:
| Expression | Description |
|---|---|
//div[@class='example'] | Select any div with the class attribute set to 'example'. |
//input[@id='username'] | Selects an input element with the id attribute 'username'. |
//a[contains(@href, 'example')] | Selects any a element where the href attribute contains 'example'. |
//button[text()='Submit'] | Select a button element with the exact text content 'Submit'. |
//*[@name='email'] | Selects any element with the name attribute set to 'email'. |
//h2/following-sibling::p | Select the p element that is a following sibling of an h2 element. |
Choosing Between XPath and CSS: What You Need to Know
When deciding between XPath and CSS selectors, there are several factors to consider:
-
Specificity: XPath provides more granular control over element selection, allowing for complex queries that target specific elements based on various criteria. CSS selectors, while powerful, may lack the specificity needed for certain tasks.
-
Browser Compatibility: While both XPath and CSS selectors are widely supported, there may be differences in browser compatibility. CSS selectors are generally more consistent across browsers, making them a safer choice for cross-browser compatibility.
-
Performance: In some cases, XPath expressions may be slower than CSS selectors, especially when dealing with large documents or complex queries. CSS selectors are often optimized by browsers, leading to faster selection times in many scenarios.
-
Readability and Maintainability: CSS selectors are often considered more readable and intuitive, especially for developers familiar with CSS styling. They follow a simple syntax that makes it easy to understand and maintain selectors over time.
Below, we explore the strengths and weaknesses of XPath in comparison to CSS:
-
Pros:
-
XPath excels when selecting elements based on intricate constraints, offering advanced options for navigating complex hierarchies and nested structures.
-
XPath allows element selection based on text content or partial matches using built-in functions like
contains()andtext(). -
XPath provides advanced functions, including
position()andlast(), enabling the selection of elements based on their position or index in the document.
-
-
Cons:
-
XPath expressions can be verbose, making them potentially harder to read and comprehend. A solid understanding of XPath is essential for effective usage.
-
XPath selections may be slower compared to CSS, potentially impacting the speed of element identification.
-
In many scenarios, a balanced approach incorporating both XPath and CSS may be the most pragmatic solution but there are scenarios where XPath is preferred over CSS selectors:
-
Complex Element Relationships: XPath excels at traversing complex element relationships, such as selecting an element based on its position relative to another element or its ancestors. If your target element cannot be easily selected using CSS selectors due to its intricate relationship with other elements, XPath may provide a more effective solution.
-
Non-Standard Attributes: XPath allows for the selection of elements based on attributes that are not easily accessible with CSS selectors, such as attributes with dynamic values generated by JavaScript. If you need to target elements based on non-standard attributes or attributes not supported by CSS selectors, XPath is often the way to go.
-
Dynamic Content: XPath can traverse the entire DOM tree, including dynamically generated elements, making it suitable for scenarios where CSS selectors may not be able to locate elements reliably.
-
Cross-Frame or Cross-Window Selection: XPath enables selection across different frames or windows within a web page, whereas CSS selectors are limited to elements within the same frame. If you need to interact with elements in multiple frames or windows, XPath is essential for targeting elements outside the current frame context.
-
Text-based Selection: XPath offers more robust text-based selection capabilities, such as selecting elements based on their text content, partial text matches, or text within specific descendant elements. If your element selection criteria heavily rely on text content, XPath provides more flexibility and precision compared to CSS selectors.
XPath and CSS selectors each have their strengths and weaknesses, and the choice between them depends on the specific requirements of your project.
Understanding the differences and trade-offs between XPath and CSS selectors is essential for making informed decisions and optimizing your web automation workflows.
Understanding How to Find Elements with XPath
When it comes to finding elements using XPath, you have two primary approaches:
- Copying them from Dev Tools, which often yields the Absolute XPath, or
- Manually inspecting the webpage for a more adaptable Relative XPath.
The decision is yours, but relative paths tend to be more resilient, remaining less affected even when the HTML structure changes.
Finding XPath Using Dev Tools
The two most widely used browser developer tools are found in Chrome and Firefox. Both developer tools are equipped with built-in XPath generation engines capable of producing XPaths for any desired element.
To showcase the differences, we will utilize both developer tools to extract the XPath of an element from a target website.
- For Firefox:
- Navigate to the desired URL in Firefox.
- Press F12 to open the developer tools.
- In the "Inspector" tab, select the target element.
- Right-click on the selected element, go to "Copy", and choose "XPath"
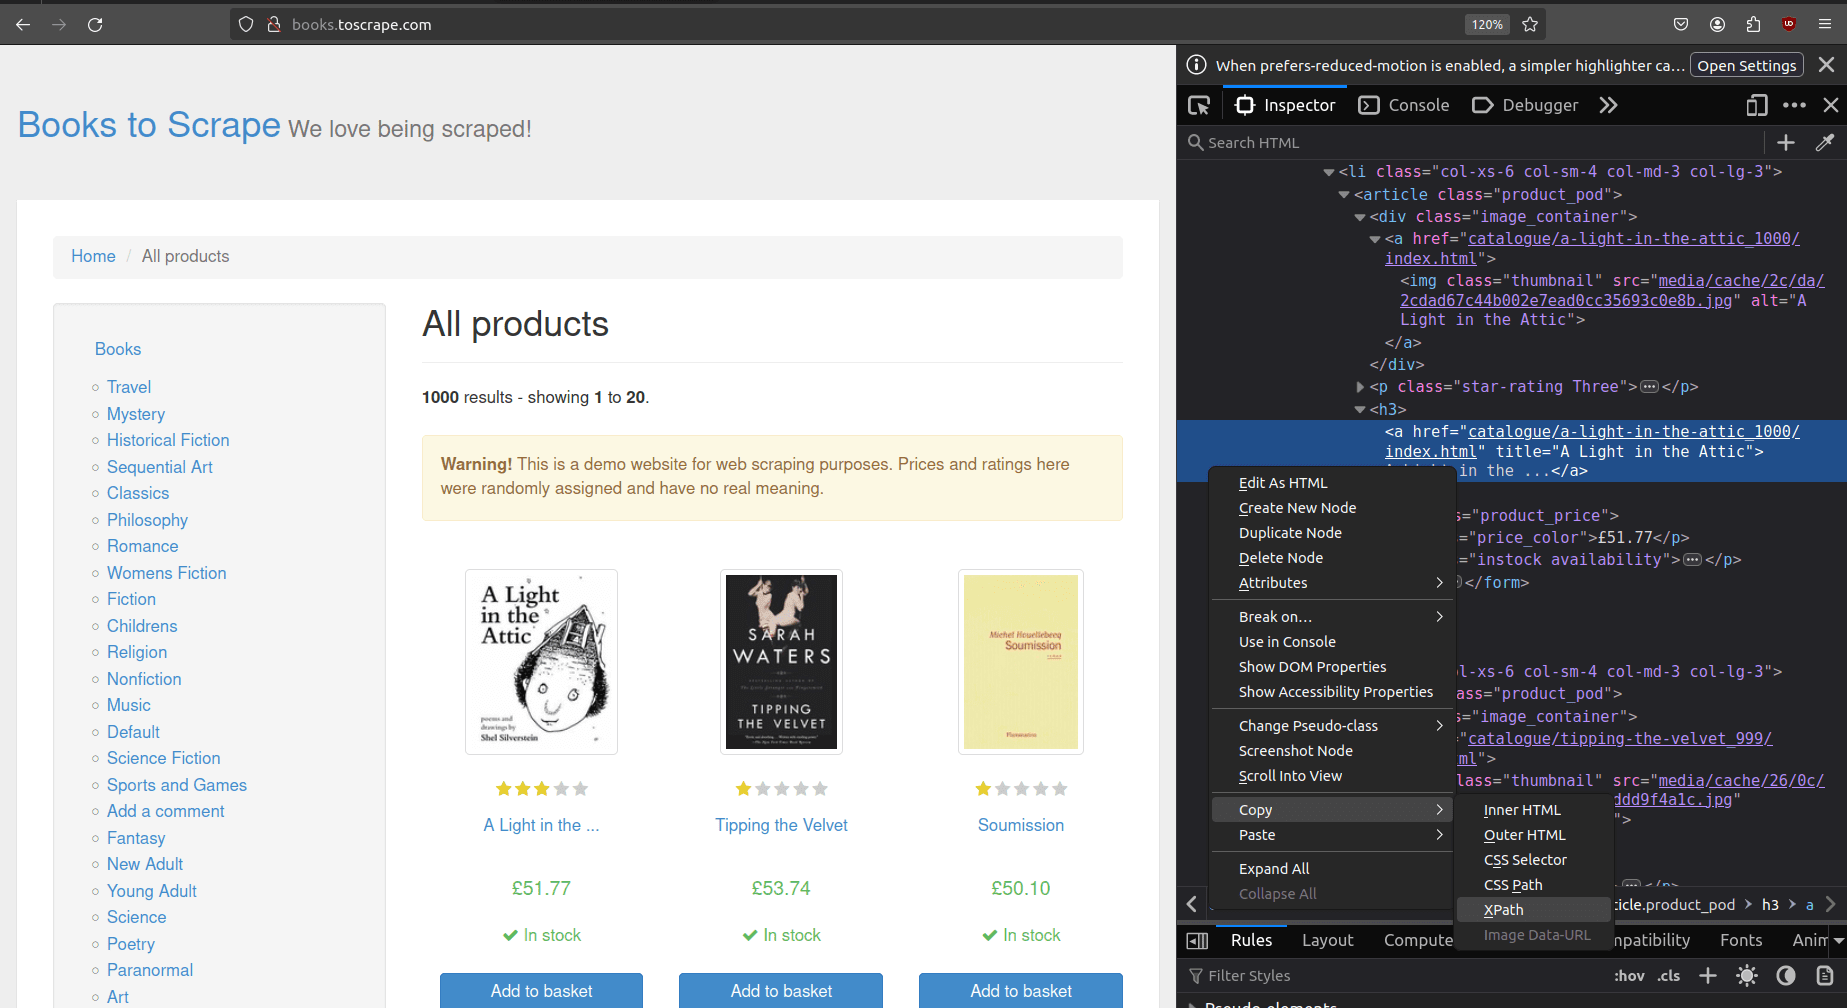
The copied XPath, in my case, appears as an absolute XPath starting from the root element (html):
/html/body/div/div/div/div/section/div[2]/ol/li[1]/article/h3/a
- For Chrome:
- Open the desired URL in Chrome.
- Press F12 to open the Chrome developer tools.
- In the "Elements" tab, select the target element.
- Right-click on the selected element, choose "Copy," and then select "Copy XPath."
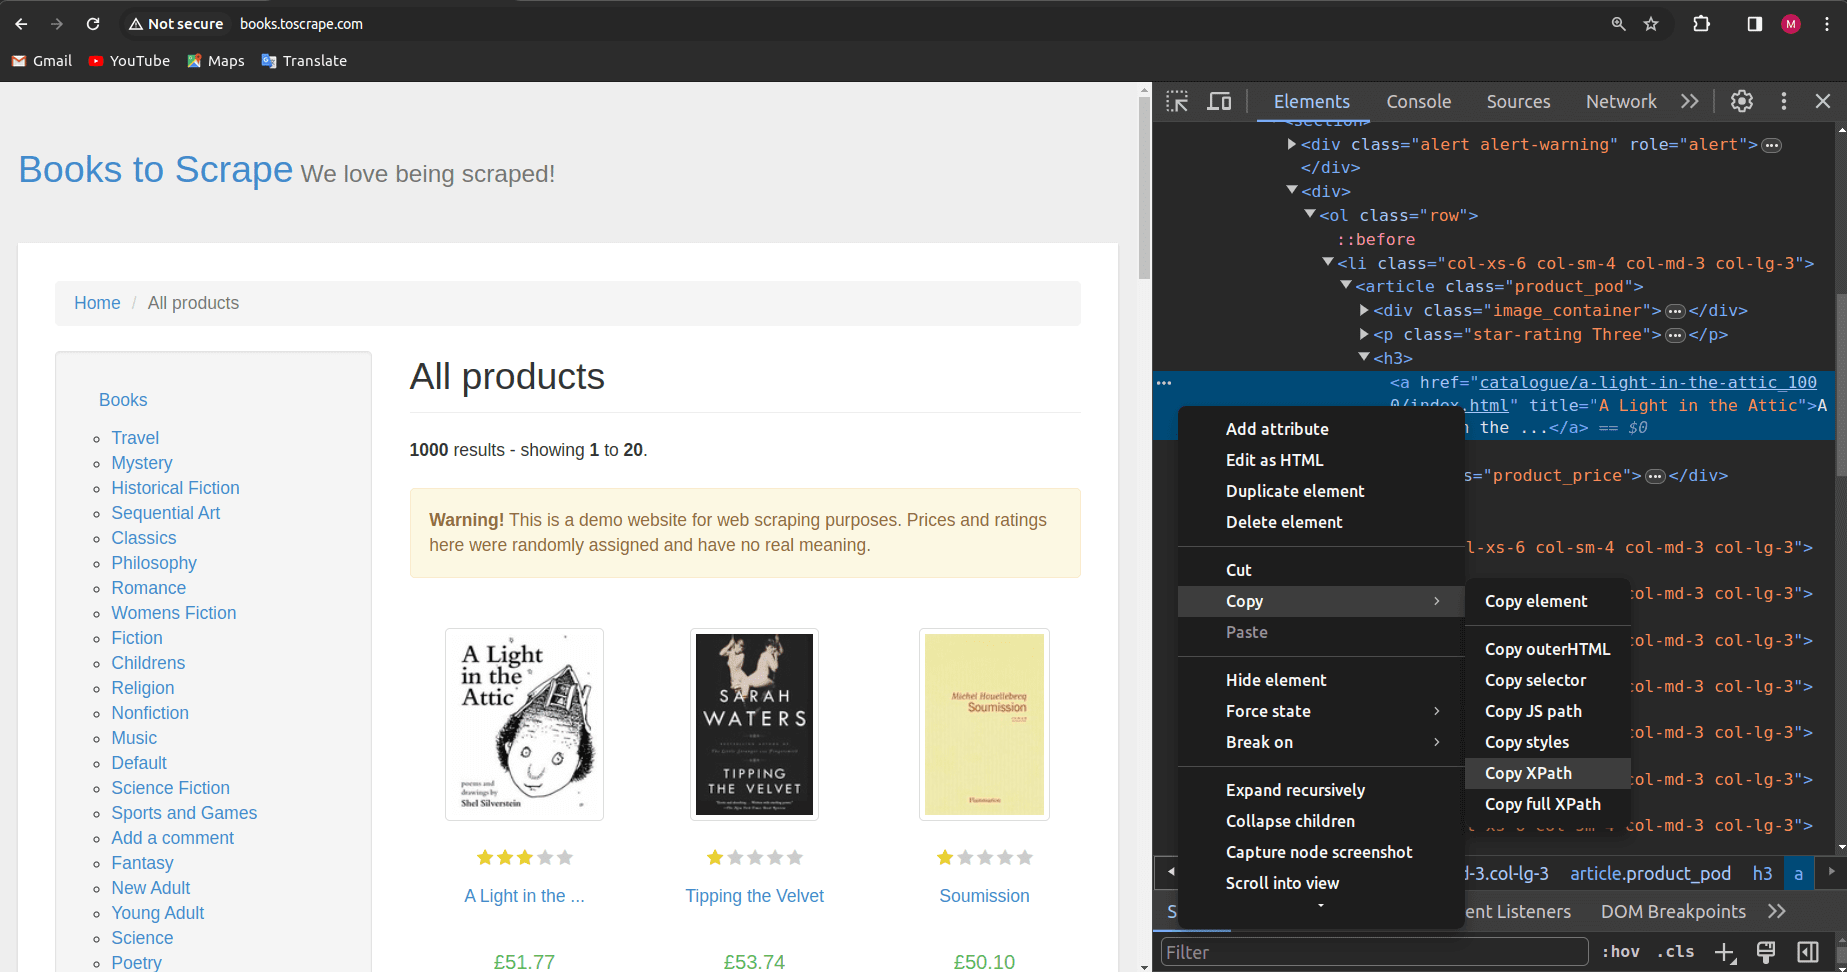
The generated XPath from Chrome's developer tools, in my case, looks like this:
//*[@id="default"]/div[1]/div/div/div/section/div[2]/ol/li[1]/article/h3/a
Comparing the two XPaths, you'll notice that the Firefox-generated XPath is absolute, starting from the root element (html/body). On the other hand, the Chrome-generated XPath is relative and specifically references an element with an ID (//*[@id="default"]). Both XPaths serve the purpose of uniquely identifying the target element but have differences in their structure and specificity.
When generating XPaths using browser developer tools, it's important to note that by default, the XPath provided is typically tailored for selecting a single element. If you intend to target multiple elements with a single XPath selector, manual adjustments are necessary.
In such cases, you may modify the XPath to broaden its scope, ensuring it captures all the desired elements.
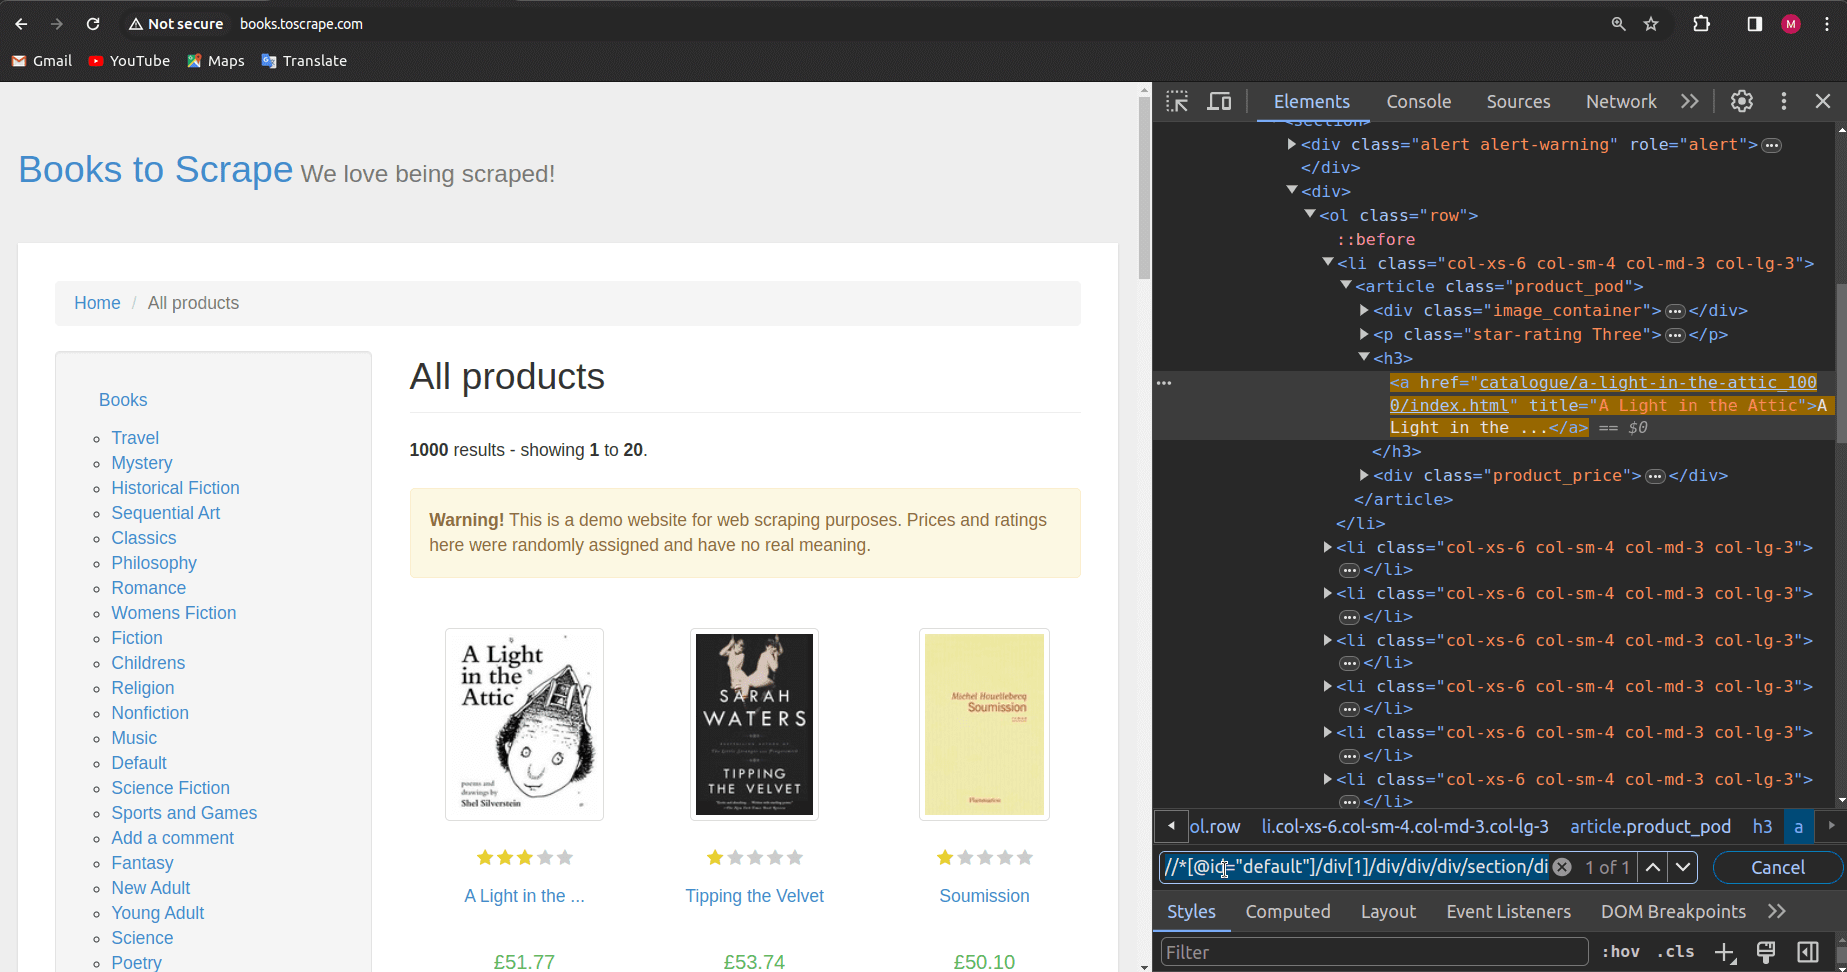
For instance, let's consider the XPath generated for the first book element:
//*[@id="default"]/div[1]/div/div/div/section/div[2]/ol/li[1]/article/h3/a
To adapt this XPath for selecting all book elements, one can simply remove the square brackets:
//*[@id="default"]/div/div/div/div/section/div/ol/li/article/h3/a
In doing so, we eliminate specific conditions, allowing the XPath to encompass all elements at each corresponding level in the hierarchy. However, it's crucial to thoroughly test the modified XPath in the browser's inspect tab. This involves inputting the XPath into the search box ("CTRL + F" on DevTools) and iteratively verifying that the selector successfully identifies all the desired elements.
Selecting Elements with XPath (page.$x() method)
Once you obtain the XPath expression corresponding to the target element(s), you can utilize Puppeteer's $x() method to retrieve and store these elements in a variable for future use.
The page.$x() method is akin to the page.$$() method, which accepts a CSS selector and returns an array of all matching elements.
The page.$x() method evaluates the XPath expression within the context of the page document. If no such elements are found, the method resolves to an empty array. It can identify multiple elements, thus always returning an array, even if only one element or none is found. The resulting array comprises several promises (<Promise<Array<ElementHandle>>>) that resolve into ElementHandle objects.
ElementHandle objects lack the necessary methods for further element processing (e.g.Getting the textContent). Consequently, they need to be passed to other Puppeteer methods, such as evaluate(), for subsequent processing. The page.evaluate() uses the browser's native document.evaluate to query for elements.
Let's explore an example where we extract book titles from book.toscrape.com. The XPath in this case remains the same as identified in the previous section:
const puppeteer = require('puppeteer');

(async () => {
  const browser = await puppeteer.launch({ headless: true });
  const page = await browser.newPage();
  await page.goto("http://books.toscrape.com");

  let xpath = '//*[@id="default"]/div/div/div/div/section/div/ol/li/article/h3/a';

  const books = await page.$x(xpath);

  for (let i = 0; i < books.length; i++) {
    let title = await page.evaluate(book => book.title, books[i]);
    console.log(`${i + 1}: ${title}`);
  }

  await browser.close();
})();

// 1: A Light in the Attic
// 2: Tipping the Velvet
// 3: Soumission
// 4: Sharp Objects
// ... More
Upon executing this script, you will observe that the console prints the titles of all the books present on the page.
Waiting for XPath to be Available
I intentionally omitted a crucial detail in the previous script to emphasize its significance in this section. Specifically, page.$x() might attempt to locate elements before the page has fully loaded, especially on dynamic JavaScript pages such as Single Page Applications (SPAs).
To ensure the readiness of the XPath and its corresponding element, we can utilize the page.waitForSelector() method, which waits for both availability and visibility.
Even though our script worked seamlessly without using the waitForSelector() method in the previous example on books.toscrape.com, it's noteworthy that this site is simple and doesn't employ lazy loading or dynamic loading of DOM elements. Nevertheless, it is considered as a good practice to wait for the target element to appear on the page before selecting it.
Additionally, there used to be a separate Puppeteer method called waitForXPath() designed specifically for waiting for elements selected with XPath. However, this method has been deprecated in the latest versions of Puppeteer. Instead, Puppeteer developers recommend using the waitForSelector() method and indicating that it is waiting for an XPath element by appending 'xpath/' before the actual XPath expression, as shown below:
await page.waitForSelector('xpath/' + xpath);
Now, let's consider an example involving the SalesForce site, which loads content dynamically. We aim to print the h1 heading on the main page, identified by the following XPath:
//*[@id="1682325589592_4ma"]/div[1]/article/div[2]/header/h1
Here is the script:
const puppeteer = require('puppeteer');

(async () => {
  const browser = await puppeteer.launch({ headless: true });
  const page = await browser.newPage();
  await page.goto("https://www.salesforce.com/in/?ir=1", { waitUntil: "networkidle2" });

  let xpath = '//*[@id="1682325589592_4ma"]/div[1]/article/div[2]/header/h1';

  await page.waitForSelector('xpath/' + xpath);

  const elemHandle = await page.$x(xpath);

  let h1 = await page.evaluate(el => el.textContent.trim(), elemHandle[0]);
  console.log(h1);

  await browser.close();
})();

// Try Salesforce Starter Suite for free.
Note that we are using the waitForSelector() method with the 'xpath/' prefix. Additionally, we are waiting for the page to almost completely load using { waitUntil: "networkidle2" }.
For further details on waiting for pages and elements to load before proceeding with additional actions, refer to our Puppeteer Guide - Waiting For Page or Element To Load.
Performing Actions with XPath
Having explored the process of discovering XPaths and selecting elements using the $x() method, let's delve into executing various actions on these elements.
Clicking Elements
In HTML, elements such as buttons (<button>) and links (<a>) inherently possess clickable behavior. While other elements like <input>, <img>, and <div> can be made clickable through JavaScript, the act of clicking is commonly associated with interactive elements like buttons and links.
As discussed earlier, ElementHandle objects returned by the $x() method lack the necessary methods for performing additional actions on these elements.
Typically, you would need to pass these objects to methods like evaluate or $eval for further processing. However, when it comes to clicking, Puppeteer simplifies the process by providing a direct method, ElementHandle.click(), which can be executed directly on the ElementHandle object without the need for additional methods.
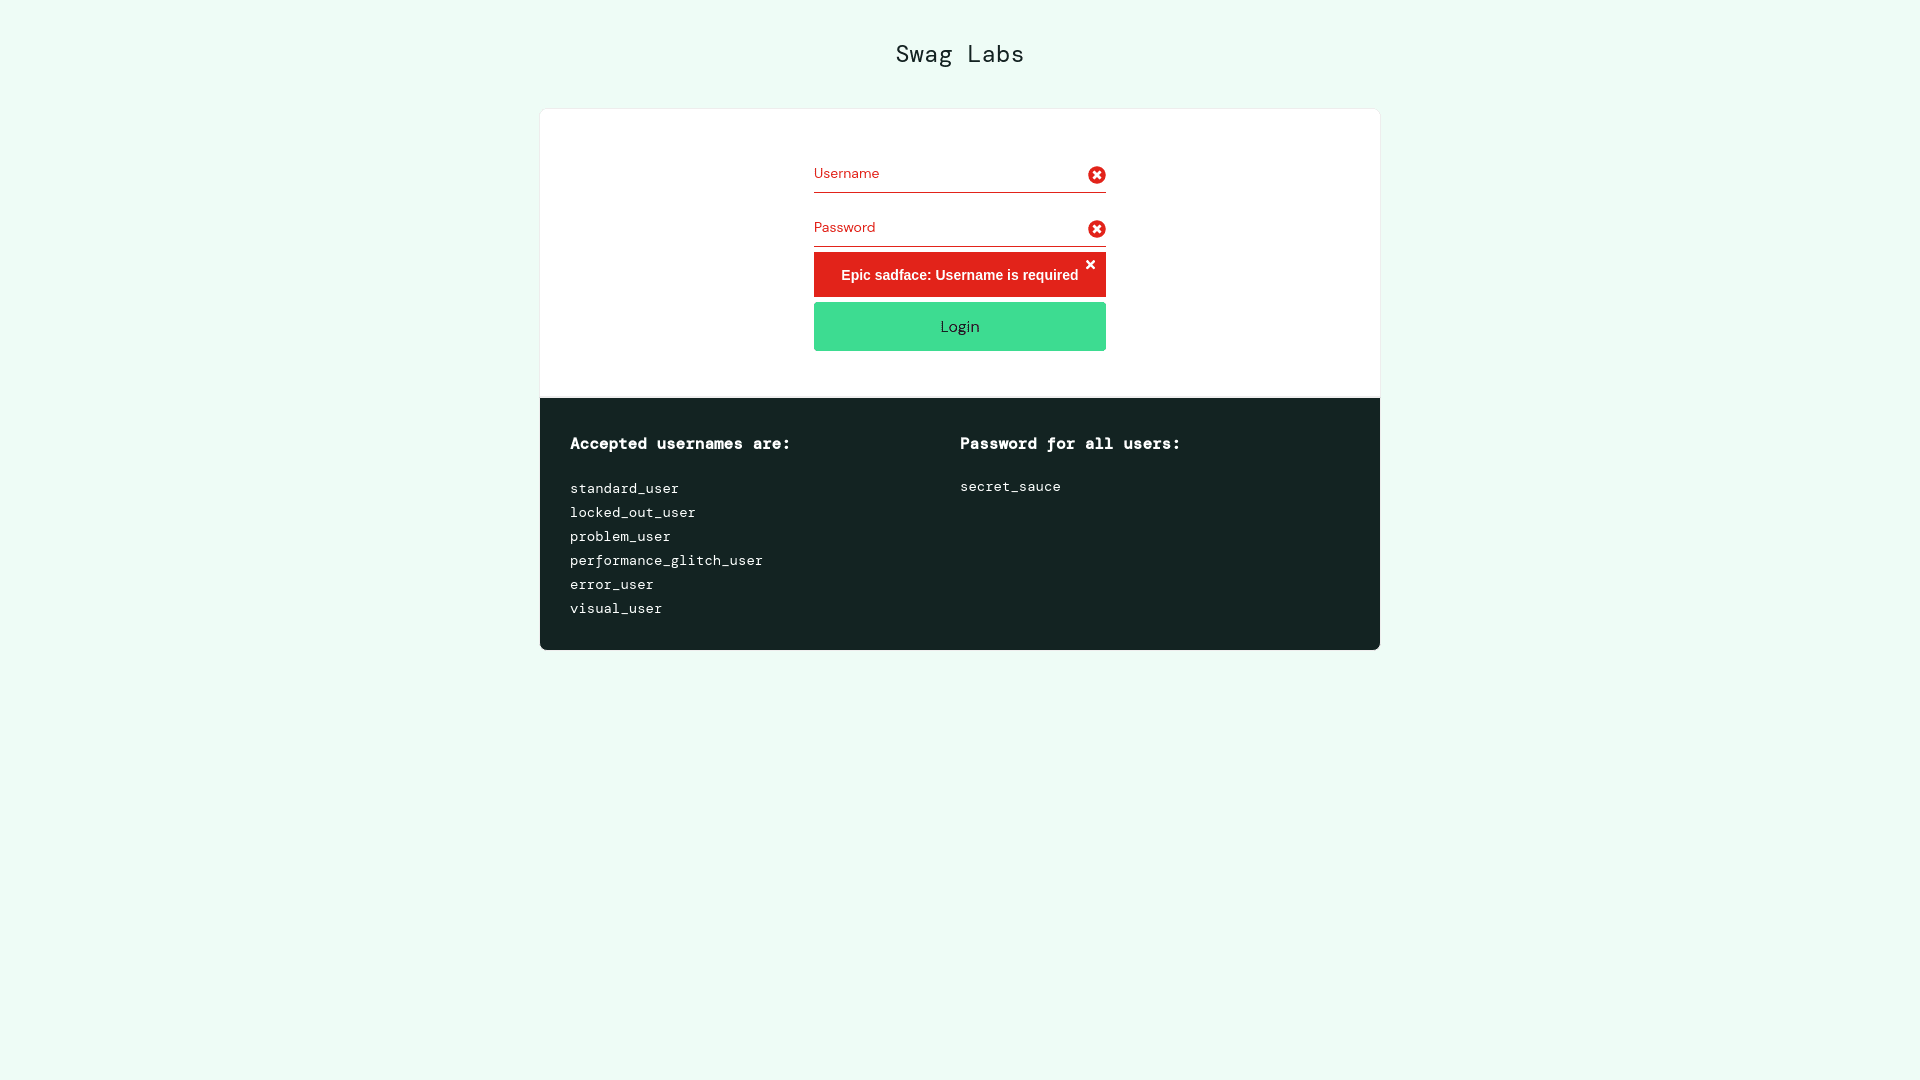
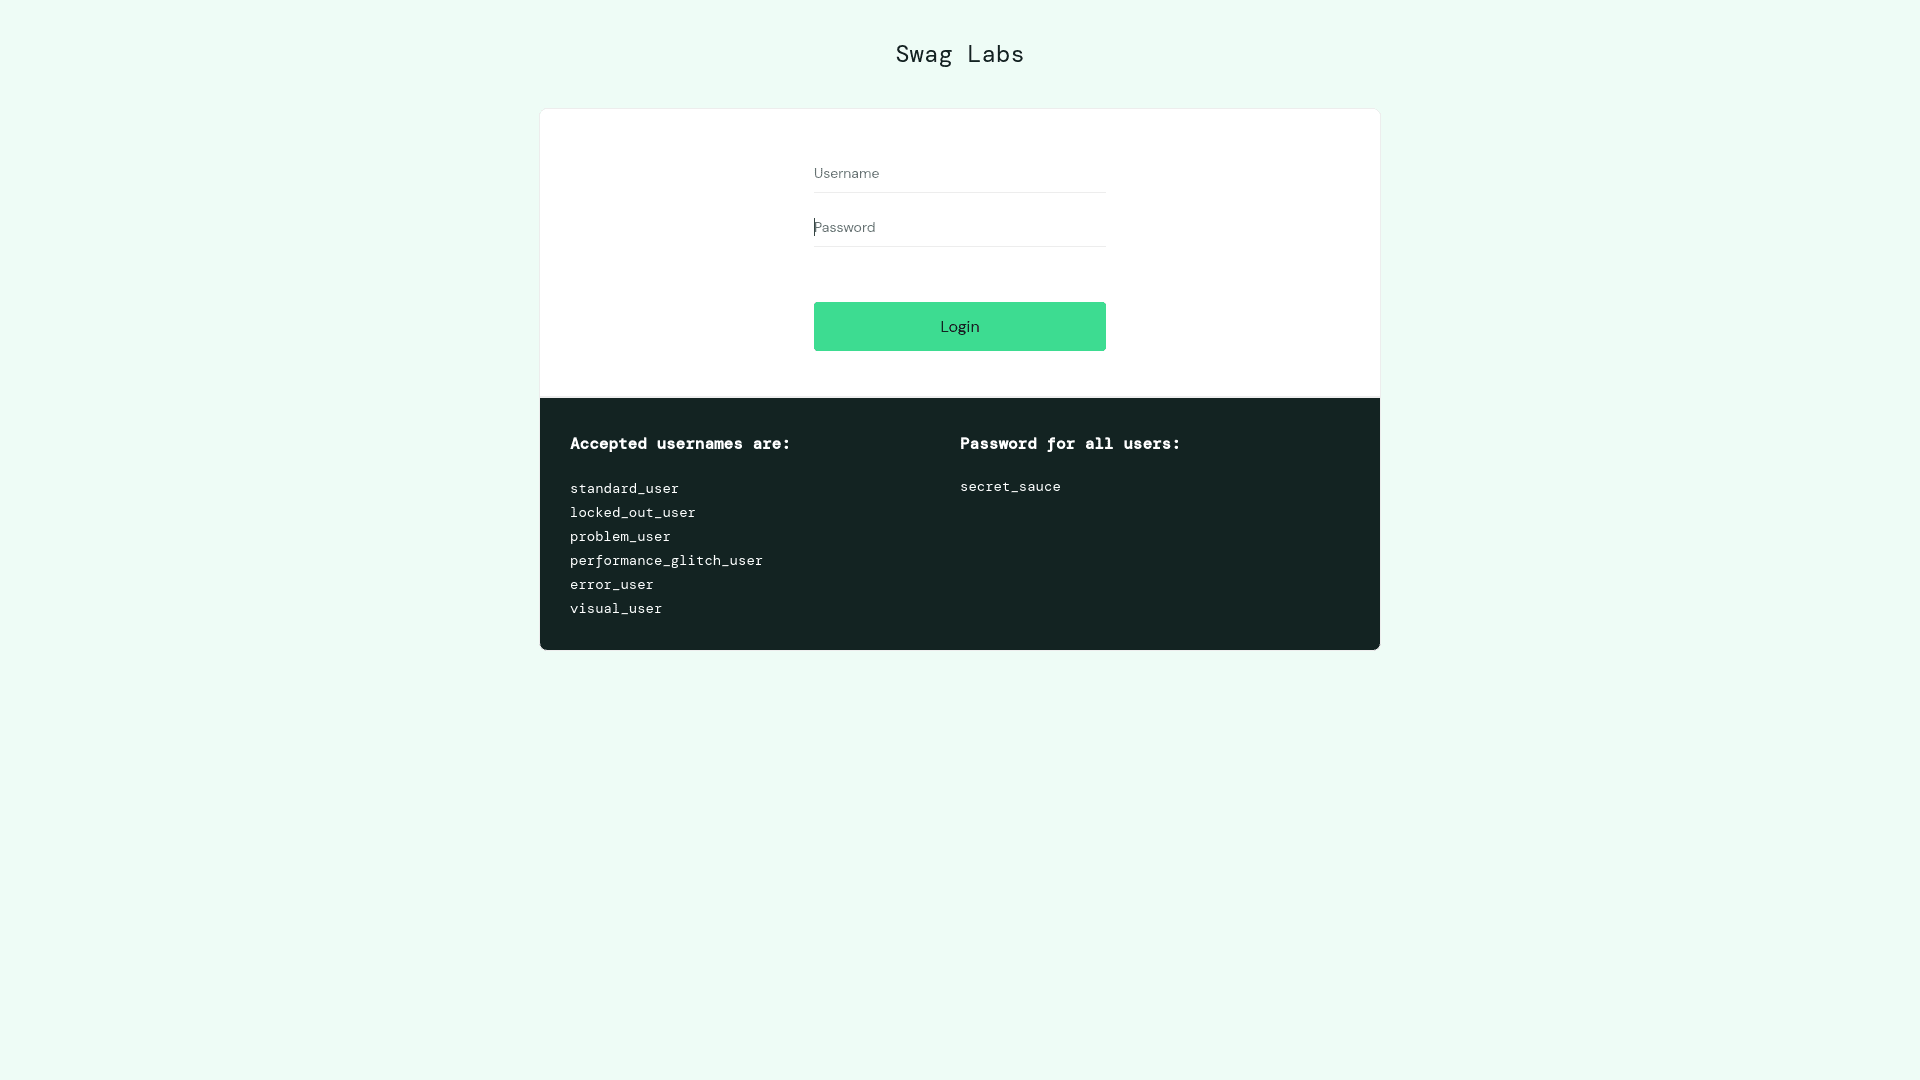
Let's explore a practical example where we click on the login button on SauceDemo.com and capture a screenshot:
const puppeteer = require('puppeteer');

(async () => {
  const browser = await puppeteer.launch({
    headless: true,
    defaultViewport: { width: 1920, height: 1080 }
  });
  const page = await browser.newPage();
  await page.goto("https://www.saucedemo.com/");

  const loginButtonXPath = '//*[@id="login-button"]';

  await page.waitForSelector('xpath/' + loginButtonXPath);

  const loginButton = await page.$x(loginButtonXPath);
  await loginButton[0].click();

  await page.screenshot({path: "./login-button.png"});

  await browser.close();
})();
In this script, we utilized $x() with the XPath //*[@id="login-button"] to target the login button element. Subsequently, we directly applied the click() method to the first element using the index [0]. This step is essential because $x() consistently returns an array, even if only one element matches the criteria. When you execute this script with node index.js, it will generate a screenshot named login-button.png in the current working directory.
The
page.launch()method accepts thedefaultViewPortflag to modify the browser window's width and height. This adjustment is made for capturing a screenshot of a standard resolution screen.
Typing Input
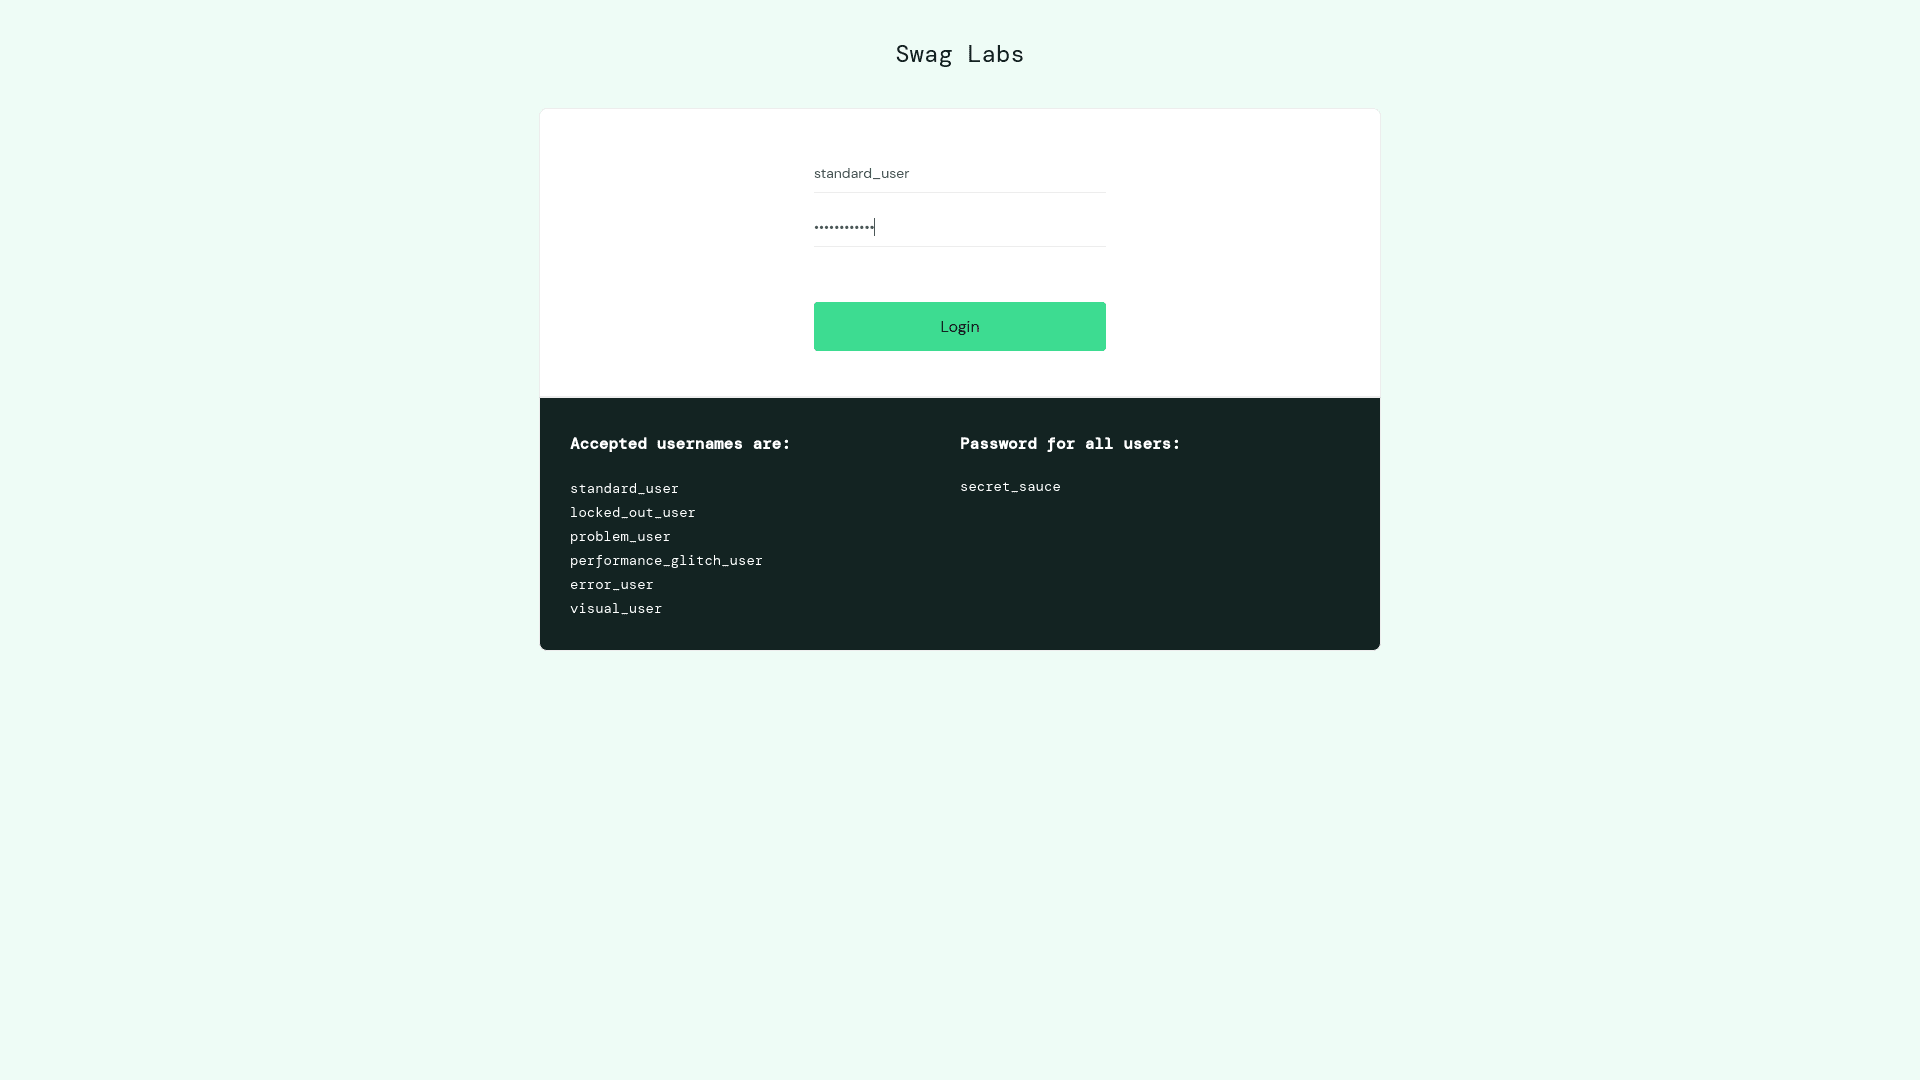
In the preceding example, we initially clicked on the login button of the SauceDemo site using the click() method. Now, let's explore how to select input fields by utilizing their xpath selectors and input text into them. Puppeteer provides a type() method specifically designed for entering text into input fields such as username and password. Take a look at the following script:
const puppeteer = require('puppeteer');

(async () => {
  const browser = await puppeteer.launch({
    headless: true,
    defaultViewport: { width: 1920, height: 1080 }
  });
  const page = await browser.newPage();
  await page.goto("https://www.saucedemo.com/");

  const username = await page.$x('//*[@id="user-name"]');
  const password = await page.$x('//*[@id="password"]');

  await username[0].type('standard_user');
  await password[0].type('secret_sauce');

  await page.screenshot({path: "./input-type.png"});

  await browser.close();
})();
In this script, after selecting the input fields, we use the type() method to input text into the username and password fields. Subsequently, a screenshot of the page is captured using the screenshot() method.
Capturing Screenshots
XPaths are also applicable for choosing elements to capture their screenshots. Puppeteer offers a screenshot() method that allows the capture of the entire page, a designated area, or a specific element.
Let's explore this through an example:
const puppeteer = require('puppeteer');

(async () => {
  const browser = await puppeteer.launch({
    headless: true,
    defaultViewport: { width: 1920, height: 1080 }
  });
  const page = await browser.newPage();
  await page.goto("https://quotes.toscrape.com/");

  const quote = await page.$x('/html/body/div[1]/div[2]/div[1]/div[1]');

  await quote[0].screenshot({path: "./quote.png"});

  await browser.close();
})();
In the provided script, we target the first quote block on the quotes.toscrape.com site and then capture its screenshot. The resulting screenshot will resemble the following:

If you want to learn more about taking screenshots with Puppeteer, you can check our Puppeteer How To Take Screenshots guide.
Focusing on Elements
In HTML, <input>, <textarea>, and <select> elements can be brought into focus using Puppeteer's focus() method. An element is considered "focused" when it becomes the active element, ready to receive user input. The following script provides an example of selecting an input element by its XPath, focusing on it, and capturing a screenshot of the entire page to visualize its appearance after gaining focus:
const puppeteer = require('puppeteer');

(async () => {
  const browser = await puppeteer.launch({ headless: true });
  const page = await browser.newPage();
  await page.goto("https://www.saucedemo.com/");

  const password = await page.$x('//*[@id="password"]');
  await password[0].focus();

  await page.screenshot({path: "./focus.png"});
  await browser.close();
})();
When executed, this script focuses on the password field on the Saucedemo website, making it ready for user input. Subsequently, a screenshot named "focus.png" will be generated in the current working directory, providing a visual representation of the page after the specified element has gained focus.
Navigating iFrames with XPath:
An <iframe>, or inline frame, functions as an independent HTML document nested within the primary HTML, facilitating the embedding of various content types such as videos, Google Maps, and rich text editors within a webpage.
When dealing with iFrames in Puppeteer using XPaths, the preferred approach involves obtaining the iFrame's contentFrame using the contentFrame() method. Subsequent element selections using XPaths within the iFrame are executed within the context of that iframe, not the main HTML.
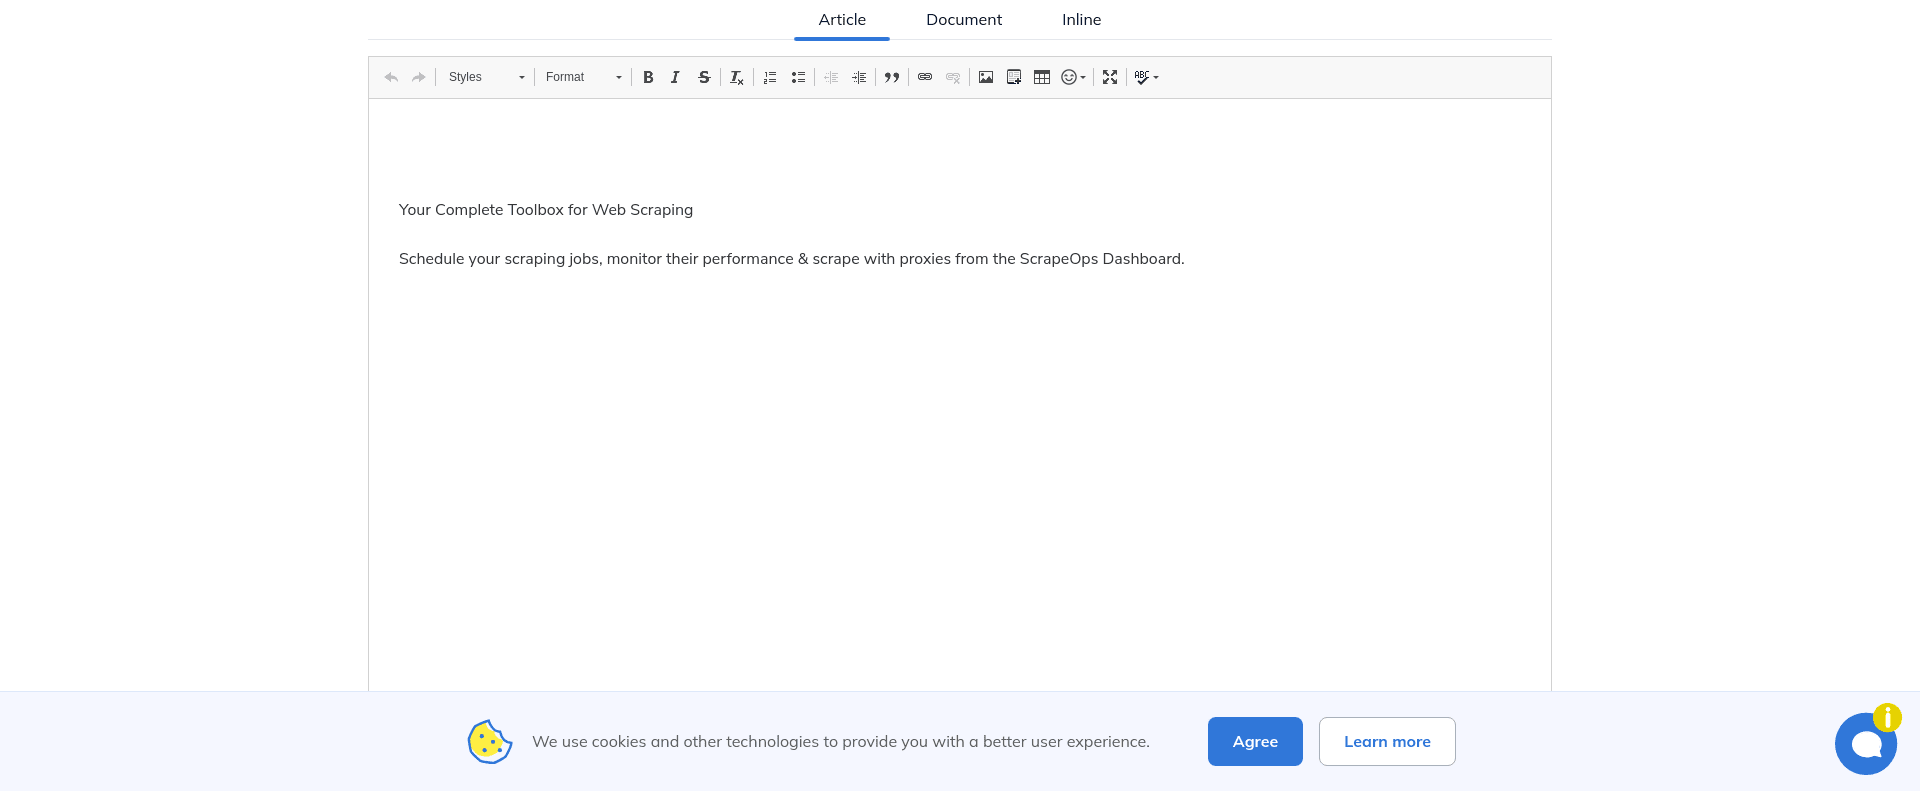
To illustrate this methodology, consider the following code snippet, which interacts with a text editor within an iFrame on ckeditor.com:
const puppeteer = require('puppeteer');

(async () => {
  const browser = await puppeteer.launch({
    headless: true,
    defaultViewport: { width: 1920, height: 1080 }
  });
  const page = await browser.newPage();

  await page.goto("https://ckeditor.com/ckeditor-4/demo/", {
    waitUntil: "networkidle2"
  });

  const iframeXPath = '//*[@id="cke_1_contents"]/iframe';
  await page.waitForSelector(`xpath/${iframeXPath}`);
  const iframeHandle = await page.$x(iframeXPath);
  const iframe = await iframeHandle[0].contentFrame();

  const editableFieldXPath = '/html/body';
  await iframe.waitForSelector(`xpath/${editableFieldXPath}`);
  const editableField = await iframe.$x(editableFieldXPath);

  const textToSet = `
    <h1>ScrapeOps:</h1>
    <p>Your Complete Toolbox for Web Scraping</p>
    <p>Schedule your scraping jobs, monitor their performance & scrape with proxies from the ScrapeOps Dashboard.</p>
  `;

  await editableField[0].evaluate((field, text) => {
    field.innerHTML = text;
  }, textToSet);

  const textEditorXPath = '/html/body/main/div[2]';
  const textEditor = await page.$x(textEditorXPath);
  await textEditor[0].screenshot({ path: "text-editor.png" });

  await browser.close();
})();
In the script provided earlier, we utilized the networkidle2 option to ensure waiting for the complete page load. This practice is strongly advised, especially when dealing with pages containing integrated iFrames. Subsequently, we employed XPath to pinpoint the desired iFrame, obtained its contentFrame, and within that iframe context, selected the text editor using its XPath. We proceeded to insert text into the editor and captured a screenshot.
Navigating Shadow DOM with XPath:
Shadow DOM is a distinct Document Object Model (DOM) that exists within the main DOM tree. Its primary objective is to encapsulate specific HTML and shield it from the global CSS styles and JavaScript applied to the main DOM. The root node of the Shadow DOM is known as the "Shadow Root," which has its own set of CSS styles, distinct from the overarching document.
When interacting with Shadow DOM using Puppeteer, your options for selecting and manipulating elements are limited to CSS selectors or JavaScript paths, and XPath selectors are not applicable.
Unfortunately, XPath selectors do not work with Shadow DOM, making CSS selectors the preferred choice when working within this encapsulated environment.
Therefore, when utilizing Puppeteer for tasks involving Shadow DOM, opting for CSS selectors becomes essential for effective element selection and interaction.
const shadowRoot = await page.$eval(
  "element-with-shadow-dom",
  (el) => el.shadowRoot
);
const shadowDomElement = await shadowRoot.$(".element-inside-shadow-dom");
Real-world Applications: XPath in Practice
In the preceding sections, we delved into the diverse applications of XPath. Once you grasp the idea of selecting elements using $x() and XPath expressions, the rest of your code structure remains almost same when opting for CSS selectors with the $() or $$() methods.
However, writing scripts for various scenarios, such as clicking buttons and capturing screenshots with XPath, was aimed at providing hands-on experience. This ensures your adeptness in incorporating XPath selectors into your routine web scraping tasks.
Now, let's explore two specific real-world scenarios and understand the use of XPath in writing Puppeteer scripts for practical tasks like form submission and data collection:
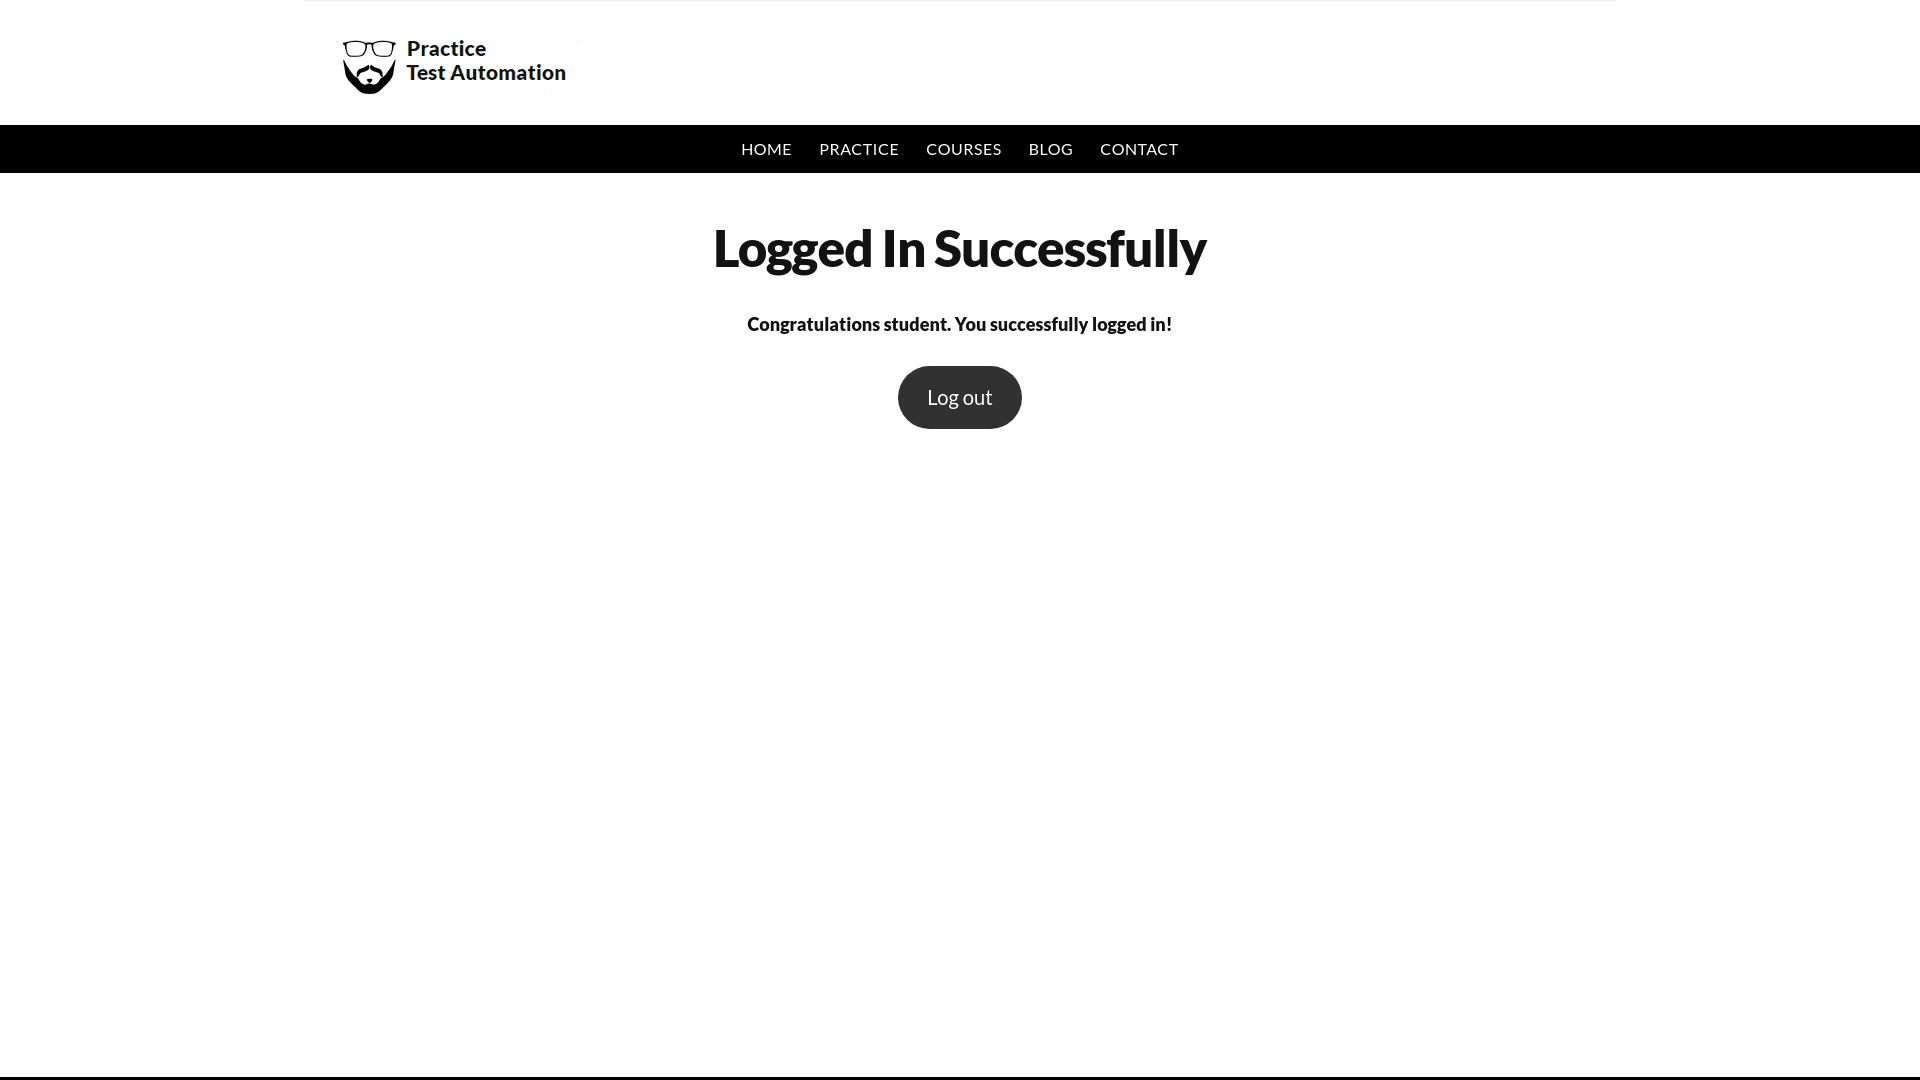
Submitting Forms
Submitting forms typically involves three methods. We've previously covered the use of el.type() and el.click() methods for entering text into input elements and clicking submit buttons.
There is a third method, waitForNavigation(), which waits until the next page or response appears after the form submission.
In the code below, we select input elements for username and password, as well as the submit button, using their XPath expressions from the PracticeTestAutomation.com site. Subsequently, we perform additional actions and capture a screenshot of the new page using the screenshot() method.
const puppeteer = require('puppeteer');

(async () => {
  const browser = await puppeteer.launch({
    headless: true,
    defaultViewport: { width: 1920, height: 1080 }
  });

  const page = await browser.newPage();
  await page.goto("https://practicetestautomation.com/practice-test-login/");

  const username = await page.$x('//*[@id="username"]');
  const password = await page.$x('//*[@id="password"]');
  const submit = await page.$x('//*[@id="submit"]');

  await username[0].type('student');
  await password[0].type('Password123');

  await Promise.all([
    page.waitForNavigation(),
    submit[0].click(),
  ]);

  await page.screenshot({path: 'form-submission.png'});
  await browser.close();
})();
Except for the Promise.all() method, the script is self-explanatory. The Promise.all() is used here to avoid race conditions between clicking and navigation events. Upon execution, the form will be successfully submitted, and a screenshot named form-submission.png will be generated in the current working directory due to the path flag passed to the screenshot() method.
Extracting Data
The main reason web scrapers like ScrapOps exist is to pull out information from websites, and data extraction is at the core of it. Data extraction involves carefully selecting desired elements using XPaths and retrieving their content in a structured JSON-like format.
In this demonstration, we'll utilize ScrapeThisSite.com to extract information about hockey teams, including details like their total wins and losses. Let's take a look at the code first:
const puppeteer = require('puppeteer');

(async () => {
  const browser = await puppeteer.launch({headless: true});
  const page = await browser.newPage();
  await page.goto('https://www.scrapethissite.com/pages/forms/');

  const data = await page.evaluate(() => {
    const rowCount = 24;

    const extractData = (rowIndex, colIndex) => {
      const xpath = `//table[@class="table"]//tbody//tr[@class="team"][${rowIndex}]/td[${colIndex}]`;
      const element = document.evaluate(xpath, document, null, XPathResult.FIRST_ORDERED_NODE_TYPE, null).singleNodeValue;
      return element ? element.textContent.trim() : null;
    };

    const result = [];
    for (let row = 2; row <= rowCount + 1; row++) {
      const teamName = extractData(row, 1);
      const year = extractData(row, 2);
      const wins = extractData(row, 3);
      const losses = extractData(row, 4);
      const otLosses = extractData(row, 5);
      const winPercentage = extractData(row, 6);
      const goalsFor = extractData(row, 7);
      const goalsAgainst = extractData(row, 8);
      const plusMinus = extractData(row, 9);

      result.push({
        teamName,
        year,
        wins,
        losses,
        otLosses,
        winPercentage,
        goalsFor,
        goalsAgainst,
        plusMinus,
      });
    }

    return result;
  });

  console.log(data);

  await browser.close();
})();
In the provided script, we streamline the selection of each td element by creating a separate function called extractData() to eliminate redundancy. Instead of using $x(), we opt for the document.evaluate() method, an alternative approach for selecting elements using XPath. This method proves useful in various scenarios.
In this method, we specifically use XPathResult.FIRST_ORDERED_NODE_TYPE, indicating the desired result type from the XPath query. The FIRST_ORDERED_NODE_TYPE signifies that we want the first node that matches the XPath expression.
Upon running this script, you'll obtain all the data in a JavaScript object. The output will resemble the following:
[
  {
    teamName: 'Buffalo Sabres',
    year: '1990',
    wins: '31',
    losses: '30',
    otLosses: '',
    winPercentage: '0.388',
    goalsFor: '292',
    goalsAgainst: '278',
    plusMinus: '14'
  },
  {
    teamName: 'Calgary Flames',
    year: '1990',
    wins: '46',
    losses: '26',
    otLosses: '',
    winPercentage: '0.575',
    goalsFor: '344',
    goalsAgainst: '263',
    plusMinus: '81'
  },
... More
XPath Best Practices: Maximizing Efficiency
To maximize efficiency and effectiveness when using XPath, it's essential to follow best practices. Here are some tips to help you harness the full potential of XPath:
-
Use the return value of page.waitForSelector(): A common anti-pattern that we used across our code examples involves using
page.waitForSelector()followed by an additional call to the$x()method to retrieve the selected element, as illustrated below:await page.waitForSelector('xpath/' + '/html/body/div/section/div/div[1]/div/h1');
const [el] = await page.$x('/html/body/div/section/div/div[1]/div/h1');
const text = await page.evaluate(el => el.textContent.trim(), el);
console.log(text);However, a more optimized and cleaner approach is to directly assign the result of
page.waitForSelector()to the variable representing the selected element, eliminating the need for an additional$x()call:const el = await page.waitForSelector('xpath/' + '/html/body/div/section/div/div[1]/div/h1');
const text = await page.evaluate(el => el.textContent.trim(), el);
console.log(text); -
Use evaluate () directly on the Element: Throughout our code examples, we consistently employed
page.evaluate()within the context of page. However, a more streamlined approach is to leverage theElementHandledirectly. Instead of usingpage.evaluate(el => el.textContent, elem), consider utilizingelem.evaluate(el => el.textContent), once you have obtained theElementHandle. -
Avoid using page.waitForXPath(): For puppeteer 19 and newer,
page.waitForXPath()is deprecated. Instead, employ the'xpath/'prefix within thewaitForSelector()method as follows::await page.waitForSelector('xpath/' + XPathExpression); -
Don't overuse DevTools generated XPath Expressions: Be cautious with browser-generated XPaths from DevTools, as they can make scripts easily break. Although convenient, these paths may be too strict and cause issues if the page structure changes. Take a moment to think about the overall context, site behavior, and script goals when using them.
-
Use latest version of Puppeteer when working with XPaths: Ensure you are using Puppeteer version 1.0.0 or newer to access methods like
page.$x(). Otherwise, you may encounter errors like this:TypeError: page.$x is not a function -
Use "headless: false" when testing: In our code examples, we consistently included
{ headless: true }in thelaunch()method for executing code in headless mode. However, during code writing and testing, it is recommended to use{ headless: false }. This allows you to observe the entire automation process on your screen, aiding in debugging and providing valuable insights into the execution flow.
Conclusion
In this tutorial, we gained an understanding of XPath and explored various reasons for employing a combination of CSS and XPath in web scraping.
The provided code examples immersed you in the hands-on experience, allowing you to familiarize yourself with the overall style and design patterns when utilizing XPath for element selection.
Subsequently, we delved into practical demonstrations of form submission and data extraction using XPath.
For more information, check the official document of Puppeteer.
More Puppeteer Web Scraping Guides
There is still much to discover about Puppeteer, including interacting with elements through clicking and typing, capturing screenshots, and, most importantly, mitigating bot detection while patiently waiting for page and element loading.
To further enhance your mastery of puppeteer, consider exploring the following essential articles:
- The NodeJS Puppeteer Guide
- Using Proxies With NodeJS Puppeteer
- How to Scrape The Web Without Getting Blocked Guide
- The Ethics of Web Scraping