The NodeJS Puppeteer Guide
Puppeteer is a Node.js library that offers a high-level, user-friendly API for automating tasks and interacting with dynamic web pages.
Puppeteer communicates directly with the browser, primarily Chrome/Chromium, providing a smooth experience for tasks such as DOM interaction and navigation. It controls Chrome/Chromium in headless mode, resulting in faster execution.
Headless browsers are those without a graphical user interface (GUI). They operate in the background and render pages without a visible display, thereby making them faster and more efficient.
In this tutorial, we'll take you through:
- How To Install NodeJS Puppeteer
- How To Use Puppeteer
- How To Scrape Pages With Puppeteer
- How To Wait For The Page To Load
- How To Click On Buttons With Puppeteer
- How To Scroll The Page With Puppeteer
- How To Take Screenshots With Puppeteer
- How to Use A Proxy With Puppeteer
- More Puppeteer Functionality
- More Web Scraping Tutorials
Need help scraping the web?
Then check out ScrapeOps, the complete toolkit for web scraping.
How To Install NodeJS Puppeteer
Before you install Puppeteer, make sure Node.js is installed on your system. To install Node.js, go to the Node.js website and install the most recent version. Now let's install and configure Puppeteer.
Open the terminal and create a new folder for your project with any name (in our case, puppeteer_guide).
mkdir puppeteer_guide
Now, using the cd command, change the directory to the above-created directory.
cd puppeteer_guide
Great, you're now in the right directory. Run the following command to initialize the package.json file:
npm init -y
Finally, install Puppeteer using the following command:
npm install puppeteer
This is how the installation process looks.

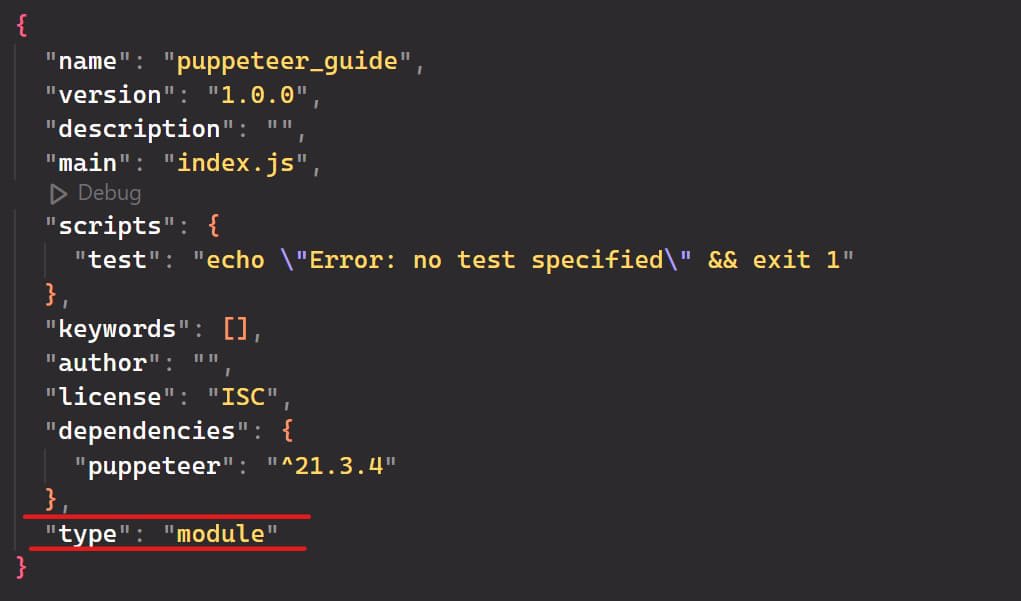
Attention, head over to the package.json file and add "type": "module" to load the ES module and handle ES6 features such as template literals, classes, and promises.
How To Use Puppeteer
We’ll use the toscrape website to understand Puppeteer. This website is mainly designed for web scraping and is easy to use and navigate.
Before we jump into the code, create a JavaScript file (index.js) in the directory we created above and run the following code:
// index.js

// Import the Puppeteer module
import puppeteer from "puppeteer";

// Define a function to scrape quotes from a website
const scrapeData = async () => {

    // Launch a new browser instance
    const browser = await puppeteer.launch({
        headless: false, // Set to true to run in headless mode
        defaultViewport: null,
    });

    // Open a new page in the browser
    const page = await browser.newPage();

    // Navigate to the URL of the website you want to scrape
    await page.goto("http://quotes.toscrape.com/");

    // Take a screenshot of the webpage
    await page.screenshot({ path: 'screenshot.png' });

    // Close the browser instance
    await browser.close();
};

// Call the scrapeData function to initiate the scraping process
scrapeData();
Here’s the code result:

This code takes a screenshot of a web page. The scrapeData() function launches a new browser instance with puppeteer.launch() and sets the headless mode to false so that you can see the web pages in your browser.
Next, the function creates a new page in the browser using browser.newPage(). It then passes the webpage URL to the page.goto() function to navigate there. The function then captures a screenshot of the page using the page.screenshot() function.
Finally, the function closes the browser instance by calling the browser.close() method.
Remember, when you run Puppeteer for the first time, according to the official documentation.
It automatically downloads a recent version of Chrome for Testing (~170MB macOS, ~282MB Linux, ~280MB Windows) that is guaranteed to work with Puppeteer.
How To Scrape Pages With Puppeteer
The common use of Puppeteer is web scraping. Let's scrape the first quote from the website. As shown in the image below, there is a parent class called quote with some child classes, such as text (class="text"), author (class="author"), and tags (class="tags").

Let's understand the code. Here, the querySelector() method selects an element on the web page based on the .quote class. After that, we extract the text and the author by passing .text and .author to the querySelector() method.
// Import the Puppeteer module
import puppeteer from "puppeteer";

// Define a function to handle web scraping
const scrapeData = async () => {
    // Launch a new browser instance
    const browser = await puppeteer.launch({
        headless: false, // Set to true to run without a visible browser window
        defaultViewport: null, // Default viewport settings
    });

    // Create a new page in the browser
    const page = await browser.newPage();

    // Navigate to the target URL
    await page.goto("http://quotes.toscrape.com/");

    // Extract data from the web page
    const quotes = await page.evaluate(() => {
        // Use querySelector to select an element on the web page based on its CSS selector
        const quote = document.querySelector(".quote");

        // Extract the text of the quote
        const text = quote.querySelector(".text").innerText;

        // Extract the author of the quote
        const author = quote.querySelector(".author").innerText;

        // Extract the tags associated with the quote
        const tags = quote.querySelector(".tags").innerText;

        return { text, author, tags };
    });

    // Print the scraped data (quote, author, tags)
    console.log(quotes);

    // Close the browser instance
    await browser.close();
};

// Call the scraping function
scrapeData();
Here’s the code result:
{
  text: '“The world as we have created it is a process of our thinking. It cannot be changed without changing our thinking.”',
  author: 'Albert Einstein',
  tags: 'Tags: change deep-thoughts thinking world'
}
How To Wait For The Page To Load
When using headless browsers, a common requirement is to make sure that the page is fully loaded and ready for interaction. Here are some common methods:
- Wait for a specific amount of time.
- Wait for a page element to appear.
Wait Specific Amount of Time
To wait for a specific amount of time before carrying out the next steps in our script, you use the waitForTimeout() method, defining a time in milliseconds.
import puppeteer from "puppeteer";
const scrapeData = async () => {
    const browser = await puppeteer.launch({
        headless: false,
        defaultViewport: null,
    });
    const page = await browser.newPage();
    await page.goto("http://quotes.toscrape.com/");

    // Wait for 5 seconds
    await page.waitForTimeout(5000);

    await browser.close();
};
scrapeData();
Wait For Page Element To Appear
The other approach is to wait for a page element to appear on the page before moving on. You can do this using the page.waitForSelector() method.
import puppeteer from "puppeteer";
const scrapeData = async () => {
    const browser = await puppeteer.launch({
        headless: false,
        defaultViewport: null,
    });
    const page = await browser.newPage();
    await page.goto("http://quotes.toscrape.com/");

    // Wait for an element with the class "quote" to appear on the page
    await page.waitForSelector('.quote', { visible: true });

    await browser.close();
};
scrapeData();
How To Click On Buttons With Puppeteer
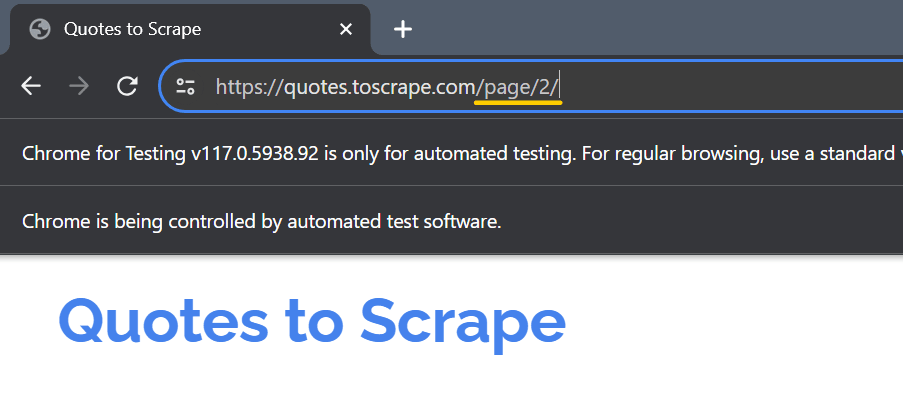
Clicking a button with Puppeteer is quite simple. You only need to locate the button using a selector and then tell Puppeteer to click on it. The click() method is used for this purpose. In the http://quotes.toscrape.com/ website, the next button can be found at the path .next > a.

Here, we’re using the waitForSelector() so that the button query will be loaded before passing the query to the click method. We’re not using the close() method here, just to show you that the button is clicked. You’ll observe that a new page will be opened.
import puppeteer from "puppeteer";
const scrapeData = async () => {
    const browser = await puppeteer.launch({
        headless: false,
        defaultViewport: null,
    });
    const page = await browser.newPage();
    await page.goto("http://quotes.toscrape.com/");

    // Click on the Next button
    const button_query = ".next > a";
    await page.waitForSelector(button_query);
    await page.click(button_query);
};
scrapeData();
Here’s the code result:
How To Scroll The Page With Puppeteer
Many websites use infinite scrolls to load more results onto the page. You can scroll to the bottom of the page using the code below and scrape all the data you need.
import puppeteer from "puppeteer";

const scrapeData = async () => {
    const browser = await puppeteer.launch({
        headless: false,
        defaultViewport: null,
    });

    const page = await browser.newPage();
    await page.goto("http://quotes.toscrape.com/scroll");

    async function scrollToBottom() {
        let previousHeight;
        while (true) {
            // Get the current scroll height
            const { scrollHeight } = await page.evaluate(() => ({
                scrollHeight: document.documentElement.scrollHeight,
            }));

            // Scroll to the bottom
            await page.evaluate(() => {
                window.scrollTo(0, document.documentElement.scrollHeight);
            });
            // Wait for a short time to allow the page to load other content
            await page.waitForTimeout(1000);

            // Check if the scroll height has not increased
            if (previousHeight === scrollHeight) {
                break;
            }

            previousHeight = scrollHeight;
        }
    }

    await scrollToBottom();

    // await browser.close();
};

scrapeData();
How To Take Screenshots With Puppeteer
Another common use case is taking screenshots, which Puppeteer makes very easy. To capture a screenshot with Puppeteer, you only need to use page.screenshot() and specify the path to save the file.
To capture the entire webpage, use the fullPage option. When this option is set to true, it takes a screenshot of the entire scrollable page.
import puppeteer from "puppeteer"

const browser = await puppeteer.launch({
    headless: false,
    defaultViewport: null,
});

const page = await browser.newPage();
await page.goto('http://quotes.toscrape.com/');

// full-page screenshot
await page.screenshot({ path: 'scrapeops.jpeg', fullPage: true });

await browser.close()
You can also capture a specific section of the page by defining a viewport size:
import puppeteer from "puppeteer"

const browser = await puppeteer.launch({
    headless: false,
    defaultViewport: null,
});

const page = await browser.newPage();
await page.goto('http://quotes.toscrape.com/');

// specified viewport
await page.setViewport({ width: 800, height: 600 });
await page.screenshot({ path: 'scrapeops.png' });

await browser.close()
You can use either jpeg, png, or webp. One thing to keep in mind is that taking screenshots in jpeg ****format is faster than in png format.
Note: If no path is specified, the image will not be saved.
How to Use A Proxy With Puppeteer
If you’re scraping web pages, you’ll surely want to add a proxy. With Puppeteer, you can set the proxy when you launch the browser.
import puppeteer from "puppeteer";

async function scrapeInfo() {
    // const proxyServer = 'your-proxy-server-ip:your-proxy-server-port';
    const proxyServer = '139.144.110.175:8080';

    // Launch Puppeteer with proxy configuration
    const browser = await puppeteer.launch({
        headless: false,
        args: [`--proxy-server=${proxyServer}`]
    });

    // Open a new page in the current browser context
    const page = await browser.newPage();

    // Navigate to the target page
    await page.goto('https://quotes.toscrape.com/');

    // Close the browser when done
    await browser.close();
}

// Call the scrapeInfo function
scrapeInfo();
If you need to authenticate the proxy, you can do like this:
import puppeteer from "puppeteer";

async function scrapeInfo() {
    // Define the proxy server in the format 'ip:port'
    const proxyServer = '139.144.110.175:8080';

    // Launch Puppeteer with proxy configuration
    const browser = await puppeteer.launch({
        headless: false,
        args: [`--proxy-server=${proxyServer}`]
    });

    // Open a new page in the current browser context
    const page = await browser.newPage();

    // Specify proxy credentials
    await page.authenticate({
        username: 'user',
        password: 'passw'
    });

    // Navigate to the target page
    await page.goto('https://quotes.toscrape.com/');

    // Close the browser when done
    await browser.close();
}

// Call the scrapeInfo function
scrapeInfo();
More Puppeteer Functionality
Puppeteer has a huge amount of functionality and is highly customizable, but it is difficult to cover everything properly in a single guide.
So if you would like to learn more about Puppeteer, check out the official documentation. It covers everything from setting user agents:
await page.setUserAgent(
  'Mozilla/5.0 (Macintosh; Intel Mac OS X 10_14_0) AppleWebKit/537.36 (KHTML, like Gecko) Chrome/84.0.4147.125 Safari/537.36'
);
To running the browser in headless mode:
const browser = await puppeteer.launch({
    headless: true,
});
More Web Scraping Tutorials
In this guide, we’ve introduced you to the fundamental functionality of Node.js Puppeteer and how to use it in your own projects.
If you would like to learn more about Web Scraping with Puppeteer, then be sure to check out The Puppeteer Web Scraping Playbook.
Or check out one of our more in-depth guides: