The Best Node.js Headless Browsers for Web Scraping
While website data can be accessed directly using HTTP requests, web scraping requires loading pages as a real browser would in order to fully render dynamic content and execute JavaScript.
For scraping modern websites, a headless browser is essential. A headless browser runs without a visible GUI, allowing websites to be loaded and parsed in an automated way. Node.js provides many excellent headless browsing options to choose from for effective web scraping.
In this article, we will cover the top Node.js headless browsers used for web scraping today, explaining their key features and providing code examples including:
- The Best NodeJs Headless Browsers Overview
- Why Use Headless Browsers
- Puppteer
- Playwright
- ZombieJS
- CasperJS
- Nightmare.js
- Conclusion
By the end, you'll have a good understanding of the available options and be able to choose the headless browser that best suits your needs.
Need help scraping the web?
Then check out ScrapeOps, the complete toolkit for web scraping.
The Best Node.js Headless Browsers Overview:
When it comes to automating tasks on the web or scraping data from websites, Node.js offers a selection of headless browsers that simplify website interaction and data extraction.
Here are the top 5 best headless browsers in Node.js that we will cover in this article:
-
Puppeteer: Puppeteer is a popular Node.js library, automates tasks in web browsers, notably used for web scraping and automated testing, and known for its user-friendly API.
-
Playwright: Playwright is used for browser automation that excels in cross-browser testing and automating web interactions.
-
ZombieJS: ZombieJS is a lightweight, headless browser for Node.js designed for testing and is known for its simplicity and ease of use.
-
CasperJS: CasperJS is a navigation scripting and testing utility for PhantomJS and SlimerJS, primarily used for automating interactions with web pages due to its ability to simulate user behaviour and various test scenarios.
-
Nightmare.js: Nightmare.js is a high-level browser automation library for Node.js, known for its simplicity and capability to perform complex browser automation tasks.
Before we look at how to use each of these headless browsers and discuss their pros and cons, let's review why we should use headless browsers and the advantages they provide.
Why Should We Use Headless Browsers
Headless browsers offer several advantages for web developers and testers, such as the ability to automate testing, perform web scraping, and execute JavaScript, all without the need for a graphical user interface.
They provide a streamlined and efficient way to interact with web pages programmatically, enabling tasks that would be impractical or impossible with traditional browsers.
Use Case 1: When Rendering the Page is Necessary to Access Target Data
A website might use JavaScript to make an AJAX call and insert product details into the page after the load. Those product details won't be scraped by looking only at the initial response HTML.
Headless browsers act like regular browsers, allow JavaScript to finish running and modifying the DOM before scraping, so that your script will have access to all rendered content.
Rendering the entire page also strengthens your scraping process, especially for pages that change their content frequently. Instead of guessing where the data might be, a headless browser shows you the final version of the page, just as it appears to a visitor.
So in cases where target data is dynamically inserted or modified by client-side scripts after load, a headless browser is essential for proper rendering and a reliable scraping experience.
Use Case 2: When Interaction with the Page is Necessary for Data Access
Headless browsers empower JavaScript-based scraping by simulating all user browser interactions programmatically to unlock hidden or dynamically accessed data. Here are some use cases:
-
Load more: Scrape product listings from an e-commerce site that loads more results when you click "Load More" button. The scraper needs to programmatically click the button to load all products.
-
Next page: Extract job postings from a site that only lists 10 jobs per page and makes you click "Next" to view the next batch of jobs. The scraper clicks "Next" in a loop until there are no more results.
-
Fill a form: Search a classifieds site and scrape listings. The scraper would fill the search form, submit it, then scrape the results page. It can then modify the search query and submit again to gather more data.
-
Login: Automate download of files from a membership site that requires logging in. The scraper fills out the login form to simulate being a signed in user before downloading files.
-
Mouse over: Retrieve user profile data that requires mousing over a "More" button to reveal and scrape additional details like education history.
-
Select dates: Collect options for a date range picker flight search. The scraper needs to simulate date selections to populate all calendar options.
-
Expand content: Extract product specs from any modals or expandable content on a product page. It clicks triggers to reveal this supplemental data.
-
Click links: Crawl a SPA site by programmatically clicking navigation links to trigger route changes and scraping the newly rendered content.
Use Case 3: When Bypassing Anti-Bot Measures for Data Access
Some websites implement anti-bot measures to prevent excessive automated traffic that could potentially disrupt their services or compromise the integrity of their data.
Headless browsers are often used to bypass certain anti-bot measures or security checks implemented by websites. By simulating the behavior of real users, headless browsers can make requests and interact with web pages similarly to how regular browsers do.
Use Case 4: When Needing to View the Page as a User
Headless browsers provide a way to interact with web pages without the need for a graphical user interface, making it possible to perform tasks such as taking screenshots and testing user flows due to their ability to simulate user interactions in an automated manner.
By simulating user behavior, headless browsers allow for comprehensive testing of user interactions, ensuring that user flows function correctly and that the visual elements appear as intended.
Here are some ways headless browsers can be used to view web pages like a user, including taking screenshots and testing user flows:
-
Screenshots: Headless browsers allow taking full-page or element screenshots at any point. This is useful for visual testing, debugging scraping, or archiving page snapshots.
-
User Interactions: Actions like clicking, typing, scrolling, etc., can be scripted to fully test all user workflows and edge cases. This ensures all parts of the site are accessible and function as intended.
-
View Source Updates: Pages can be inspected after each interaction to check that the DOM updated properly based on simulated user behavior.
-
Form Testing: All kinds of forms can be filled, submitted and verified both visually and by inspecting the post-submission page/DOM.
-
Accessibility Testing: Tools like Puppeteer allow retrieving things like color contrasts to programmatically check compliance with standards.
-
Multi-browser Testing: Playwright's ability to launch Chrome/Firefox/WebKit from a single test allows thorough cross-browser validation.
-
Visual Regression: Periodic snapshots can detect UI/design changes and regressions by comparing to a baseline image.
-
Performance Metrics:Tracing tools provide data like load times, resources used, responsiveness to optimize critical user paths.
-
Emulate Mobile/Tablet: By changing viewport sizes headless browsers enable simulating screensize contexts for responsive design testing.
Let's look at how to use each of these headless browsers and discuss their strengths and weaknesses.
Puppeteer��
Puppeteer, a powerful Node.js library developed by the Chrome team, is designed for controlling headless or full Chrome/Chromium browsers. By far the most popular choice, it has an intuitive and easy-to-use API based around browser, page, and element handling promises.
Puppeteer has more than 84K starts on Github.
Ideal Use Case
Puppeteer excels at scraping complex sites that rely heavily on JavaScript to dynamically generate content. It can fully render pages before extracting data.
Pros
-
Full Browser Functionality: Renders pages like a real Chrome browser, including JS, CSS, images, etc.
-
Fast and Lightweight: Built on top of Chromium, it's highly optimized for automation tasks.
-
Mature API: Offers a wide range of high-level methods to drive browser actions simply.
-
Cross-Platform: Runs on Windows, macOS and Linux without changes.
-
Page Interaction Capabilities: Allows click, type, wait, and more to control pages fully.
-
Debugging Tools: Provides access to browser debugging protocols for inspection.
-
Open Source: Free to use and extend with a robust community.
Cons
-
Resource Intensive: Running a full browser uses more memory/CPU than simpler tools.
-
Speed of Interactions: Still slower than direct requests due to full browser overhead.
-
Quirkier Browser Behaviors: May have to work around some browser rendering nuances.
-
Version Dependencies: Updates to Chromium may break compatibility.
-
Learning Curve: Requires more setup than simple libraries; expertise needed for advanced uses.
-
Debugging Complexity: Full browser environment makes certain bugs harder to isolate.
Installation
To install Puppeteer for Node.js, you can use the Node Package Manager (npm), a popular package manager for JavaScript. Alternatively, you can use Yarn Package Manager or pnpm Package Manager with the following commands:
# Using npm
npm install puppeteer

# or using yarn
yarn add puppeteer

# or using pnpm
pnpm i puppeteer
Example: How to use Puppeteer?
In the following example, we show you how to use Puppeteer to automate the process of launching a Chromium browser, navigating to a specific web page (in this case, 'https://quotes.toscrape.com/'), and scraping the page.
const puppeteer = require('puppeteer');

(async () => {
  const browser = await puppeteer.launch();
  const page = await browser.newPage();

  await page.goto('https://quotes.toscrape.com/');

  // Scrape page
  const content = await page.content();

  await browser.close();
})();
-
Required the Puppeteer module to get access to its API for controlling headless Chrome or Chromium.
-
Launched a new Chromium browser instance in headless mode using
puppeteer.launch(). -
Opened a new blank page from the browser using
browser.newPage(). -
Navigated the page to the example.com URL using
page.goto(). -
Scraped the full HTML content of the rendered page and stored it in the 'content' variable using
page.content(). -
Closed the browser instance started earlier using
browser.close().
Puppeteer loads pages quickly and allows waiting for network requests and JavaScript to finish. It seamlessly handles single page apps, forms, and authentication and has advanced features such as taking screenshots, PDF generation and browser emulation.
Due to its robustness and performance, Puppeteer remains the standard for new NodeJS scraping projects.

Playwright
Playwright aims to provide a unified API for controlling Chromium, Firefox, WebKit, and Electron environments, offering multi-browser compatibility out of the box using a single Playwright script.
Playwright has more than 55k stars on Github.
Ideal Use Case
Playwright excels at writing tests once and running them across multiple browsers without changes. This ensures compatibility across Chrome, Firefox, Safari, etc.
Pros
- Cross-Browser Support: Supports Chromium, Firefox, Webkit out of the box.
- Portable Test Code: Write tests once and run on any browser.
- Flow-Based Syntax: Intuitive and readable asynchronous code style.
- Powerful Locator Strategies: ID, text, CSS selectors, XPath etc.
- Console Logging: View browser console logs within test logs.
- Screenshots on Failure Automatically capture visual bugs.
- Open Source: Free to use, contribute to, and extend.
Cons
- Additional Complexity: Need to manage multiple browser installs.
- Installation Difficulties: Additional tooling required compared to simpler libraries.
- Immaturity: Younger than other options so API/support still evolving.
- Larger Resource Usage: Uses full browser engines versus headless-only tools.
- Steep Learning Curve: Takes time to learn full Playwright capabilities.
- Version Dependencies: Breaking changes possible between releases.
Installing Playwright
To install Playwright, you can use npm (Node Package Manager):
- Open your terminal or command prompt.
- Use the following npm command to install Playwright:
npm init playwright@latest
During the installation process of Playwright, you may encounter several questions or prompts that require user input. 1. Do you want to use TypeScript or JavaScript?
- Select the appropriate option based on your preference and familiarity with the languages. Choose either "TypeScript" or "JavaScript" by typing the corresponding option and pressing Enter.
- Specify the location where you want to place your tests. You can provide the desired directory path relative to your project's root directory.
- This question asks whether you want to add a GitHub Actions workflow for your Playwright project. If you plan to use GitHub Actions for automated testing, deployment, or other workflows, you can respond with "y" for "yes" to add a GitHub Actions workflow.
- Playwright supports different browsers like Chromium, Firefox, and WebKit. If you want to install the browsers during the setup, you can respond with "Y" for "yes". Alternatively, you can manually install the browsers later using the command 'npx playwright install'.
After the installation is complete, you can begin using Playwright in your Node.js project.
Example: How to Use Playwright?
In the following example, we show you how to use Playwright to automate the process of launching a Chromium browser, navigating to a specific web page (in this case, 'https://quotes.toscrape.com/'), and scraping the title of the page.
const { chromium } = require('playwright');

(async () => {
  const browser = await chromium.launch();
  const page = await browser.newPage();

  await page.goto('https://quotes.toscrape.com/');

  // Scrape page
  const title = await page.title();

  await browser.close();
})();
-
Imported the 'chromium' module from the 'Playwright' library.
-
Launched a new Chromium browser instance headlessly using the launch method.
-
Opened a new blank page in the browser with
browser.newPage(). -
Navigated the page to the Quotes to Scrape website - https://quotes.toscrape.com/
-
Scraped the page title using the
page.title()method. -
Closed the browser instance when done.
While it may lack certain Puppeteer features, Playwright excels in automation testing across different platforms. Its support for Firefox and WebKit makes it particularly valuable for addressing cross-browser rendering issues.
Playwright proves to be an excellent choice when ensuring browser interoperability is crucial for a project.
ZombieJS
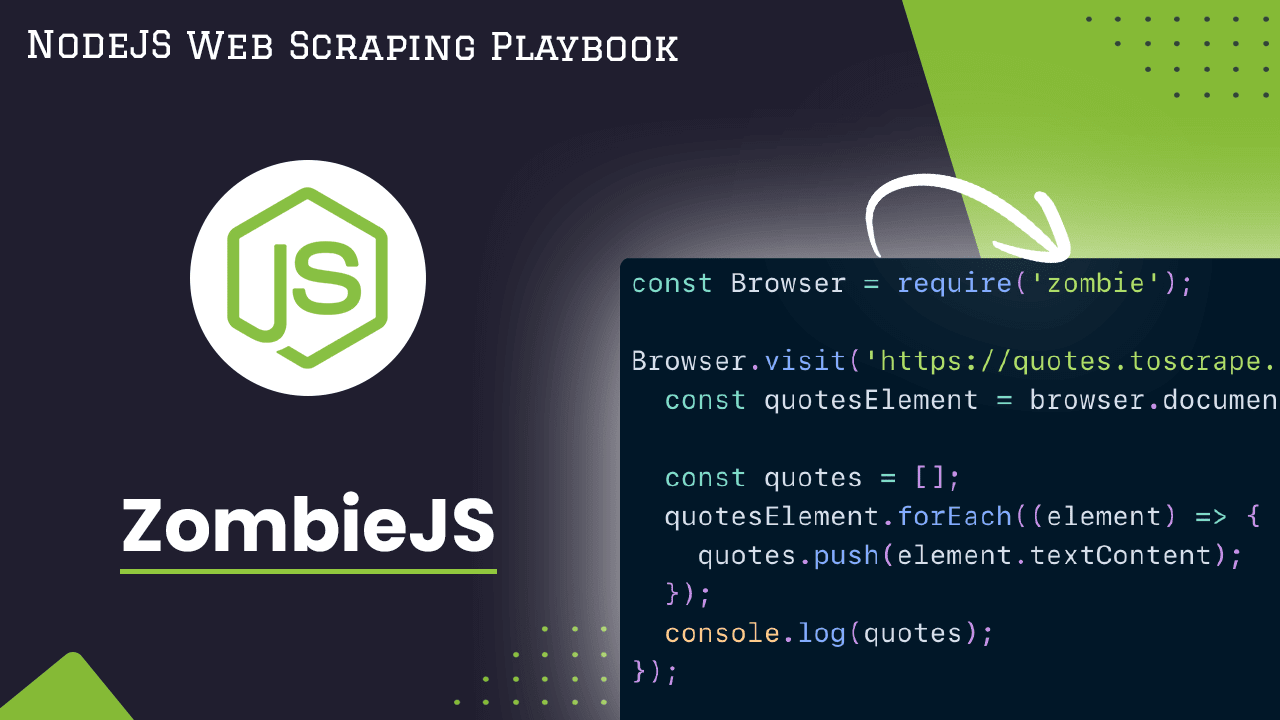
ZombieJS is a lightweight framework for testing client-side JavaScript code in a simulated environment with no browser required.
Zombie has more than 5K stars on Github.
Ideal Use Case:
Zombie.js works on Node.js, making it suitable for testing HTTP requests and backend logic like browser interactions with APIs, improving overall testing capabilities. You can use it for web scraping, but it may be less efficient than other tools specifically designed for that purpose, like Puppeteer or Playwright.
Pros
- Fast Test Execution: No browser GUI means tests run very quickly.
- Simple API: Offers a familiar asynchronous style similar to other frameworks.
- Focus on DOM: Well-suited for DOM element validation and property testing.
- Node.js Environment: Tests execute similarly to server code, making debugging easier.
- Headless Operation: Runs tests silently in the background without a browser.
- Free and Open Source: Can be used freely for any purpose.
Cons
- Limited Browser Support: Depends on a single engine (WebKit) only.
- Lighter Weight: Offers fewer testing capabilities than full-featured browsers.
- Immature Ecosystem: Has a smaller community and less documentation compared to others.
- Inaccurate Rendering: May not catch all layout/styling issues like real browsers.
- Partial JavaScript support: Full JavaScript execution is not guaranteed.
- Debugging Challenges: Can be harder to debug complex runtime issues without browser tools.
- Abandoned Project: No longer actively maintained.
Installing ZombieJS
To install Zombie.js, you can use npm, the Node.js package manager. Simply run the following command in your terminal or command prompt:
npm install zombie
Example: How to Use ZombieJS?
In the following example, we show you how to use ZombieJS to visit a webpage, and extract specific information from that webpage.
const Browser = require('zombie');

Browser.visit('https://quotes.toscrape.com/', {}, function (error, browser) {
  const quotesElement = browser.document.querySelectorAll('.quote > .text');

  const quotes = [];
  quotesElement.forEach((element) => {
    quotes.push(element.textContent);
  });
  console.log(quotes);
});
-
Required the Zombie.js module and initialized it as Browser.
-
Initiated a visit to the webpage at the specified URL ('https://quotes.toscrape.com/') using
browser.visit() -
Used the
querySelectorAllmethod to select all elements that have the class name.quoteand have a child element with the class name.text. -
Iterated over the selected elements and retrieved the text content of each element using the
textContentproperty. -
Logged the contents of the quotes array to the console, displaying the extracted text content from the webpage.
With a focus on client-side JavaScript, ZombieJS offers a lightweight testing framework capable of simulating user interactions on web pages.
CasperJS
CasperJS is a navigation scripting & testing utility for PhantomJS and SlimerJS (still experimental). It eases the process of defining a full navigation scenario and provides useful high-level functions, methods & syntactic sugar for doing common tasks such as:
- defining & ordering navigation steps.
- filling forms.
- clicking links.
- capturing screenshots of a page (or an area).
- making assertions on remote DOM.
- logging & events.
- downloading resources, even binary ones.
- catching errors and react accordingly.
- writing functional test suites, exporting results as JUnit XML (xUnit).
CasperJS has more than 7K stars on Github.
Ideal Use Case
CasperJS streamlines and simplifies the process of automating UI and front-end functionality validation across various browsers, making it an ideal choice for such testing needs.
Pros
- Easy to Use API: Simple and intuitive JavaScript-based API for browser control.
- Cross-Browser: Tests can be run on PhantomJS and SlimerJS for cross-browser validity.
- Screenshots: Errors are easy to debug with screenshots capabilities.
- UI Testing: Ideal for automating and testing frontend interactions and flows.
- Minimal Dependencies: Small footprint and minimal requirements to set up.
- Navigation Support: Powerful utilities for navigation, clicking, form filling, etc.
- Community Support: Active community for help and multitude of usage examples.
Cons
- Speed: Slower than other headless browsers due to JavaScript execution.
- Instability: Being JS-based, tests are fragile to runtime errors than others.
- Browser Limitations: Depends entirely on PhantomJS/SlimerJS rendering quirks.
- Partial ES6 Support: Still catching up with latest language/API features.
- Debugging Challenges: Native debugging support is still limited.
- Maintenance: PhantomJS defunct, CasperJS also seems less maintained now.
- Flakiness: Tests are prone to inconsistencies across environments.
- Steeper Learning Curve: Comparatively longer to ramp up than other options.
Installing CasperJS
CasperJS is built on top of PhantomJS (for the WebKit engine) or SlimerJS (for the Gecko engine). These are headless web browsers that allow CasperJS to operate and manipulate web pages.
First, download PhantomJS from the official website and follow the instructions for your specific operating system. After installation, verify the installation by running the following command in your terminal:
phantomjs --version
After installing PhantomJS, you can install CasperJS.
To install CasperJS, you can use npm, the Node.js package manager, by running the following command in your terminal:
npm i casperjs
Example: How to Use CasperJS?
In the following examples, we show you how to use CasperJS to load a webpage, click on an element in that webpage and take a screenshot of the page. We still continue using Quotes to Scrape for learning purposes.
Loading a Page
Let's load the webpage first.
casper.start('https://quotes.toscrape.com/');
casper.then(function() {
  // page has loaded
});
casper.run();
- Initiated the process by opening the specified URL, in this case, 'https://quotes.toscrape.com/'.
- After the page has finished loading, the
casper.then()function is executed, which signifies that the subsequent actions should be performed once the page has loaded - Executed the entire script using
casper.run().
Clicking an Element
casper.thenClick('#submit', function() {
  // element clicked
});
- Utilized the
casper.thenClick()function to simulate a click action on an HTML element with the specified CSS selector, in this case, '#submit'. - This approach is commonly used in scenarios where automated interaction with specific elements on a web page is required, such as form submissions or navigation.
Taking a Screenshot:
The provided code is using the CasperJS framework to capture a screenshot of the current page.
casper.then(function() {
  this.capture('screen.png');
});
- Within the
casper.then()block, the capture function is invoked, specifying the file name 'screen.png' for the captured image. - This is a common method used to take screenshots during the execution of a web scraping or testing script.
CasperJS is a powerful navigation scripting and testing utility for PhantomJS and SlimerJS, designed to simplify the process of defining complex navigation scenarios and automating common tasks like form filling, clicking, and capturing screenshots.
Browse the sample examples repository and read the full documentation on CasperJS documentation website.
Nightmare.js
Nightmare is a high-level browser automation library from Segment.
The goal is to expose a few simple methods that mimic user actions (like goto, type and click), with an API that feels synchronous for each block of scripting, rather than deeply nested callbacks. Initially designed for automating tasks across non-API sites, it is commonly used for UI testing and crawling.
Nightmare.js has more than 19K stars on Github.
Ideal Use Case
Nightmare.js enables you to easily simulate user interactions and actions like clicks, typing, navigating etc. Additionally, it facilitates the scalability of tests, allowing them to run concurrently across various processes and browsers, making it well-suited for load and performance testing.
Pros:
-
Fast and Lightweight: Uses Electron for speed and reduced overhead compared to full browsers.
-
Flexible API: Promises-based and fully asynchronous for ease of use.
-
Cross-Browser: Supports Chrome, Firefox, headless browsers for wider compatibility.
-
Dev Tools Access: Inspect state, take screenshots, evaluate contexts seamlessly.
-
Dynamic Content Handling: Supports JavaScript execution for dynamic/rendered content.
-
Browser Focus: Dedicated to browser testing needs with extensive tool support.
-
Active Community: Vibrant community with comprehensive documentation and support resources.
Cons:
-
Steeper Learning Curve: More involved due to its asynchronous nature compared to simpler libraries.
-
Instability Ris:k Runtime errors can lead to random test failures when executing JavaScript.
-
Heavy Dependency: Loading full Electron framework impacts installation size.
-
Speed Tradeoff: Slower compared to lighter headless options due to full Electron usage.
-
Partial Support: Further work needed for features like mobile or touch emulation.
-
Less Maintenance: Current maintainer has shifted focus, leading to less active development.
Installing Nightmare.js:
To install Nightmare.js, you can use the Node Package Manager (npm) with the following command:
npm i nightmare
Example: How to use Nightmare.js?
In the example below, we will use the Nightmare.js headless browser to repeat the example we did previously with ZombieJS and extract the quotes from Quotes to Scrape.
const Nightmare = require('nightmare');
const nightmare = Nightmare({ show: false });

nightmare
    .goto('https://quotes.toscrape.com/')
    .evaluate(() => {
        const elements = Array.from(document.querySelectorAll('.quote > .text'));
        return elements.map(element => element.innerText);
    })
    .end()
    .then(console.log)
    .catch(error => {
        console.error('Scraping failed:', error);
    });
-
Required the Nightmare.js module and initialized it as Browser.
-
Initiated a visit to the webpage at the specified URL ('https://quotes.toscrape.com/') using
gotomethod. -
Used the
querySelectorAllmethod to select all elements that have the class name.quoteand have a child element with the class name.text. -
Iterated over the selected elements and retrieved the text content of each element using the
textContentproperty. -
Logged the contents of the quotes array to the console, displaying the extracted text content from the webpage.
-
If any error occurs during the scraping process, it is caught and logged to the console using the catch method.
Conclusion
There is no single best Node.js headless browser for web scraping - the optimal choice depends on your specific use case and priorities. To sum up each option for use case scenario:
- Puppeteer: Best used for web scraping and automated testing due to its user-friendly API and robust browser automation capabilities.
- Playwright: Ideal for cross-browser testing and automating web interactions, offering extensive support for multiple browser environments.
- ZombieJS: Particularly useful for testing purposes, serving as a lightweight, headless browser for Node.js known for its simplicity and ease of use in testing scenarios.
- CasperJS: Preferred for automating interactions with web pages, known for its ability to simulate user behavior and execute various test scenarios, especially when navigation scripting and testing are required.
- Nightmare.js: A top choice for high-level browser automation tasks in Node.js, appreciated for its simplicity and effectiveness in handling complex browser automation tasks programmatically.
Choosing the right headless browser involves considering task requirements, browser compatibility, performance, community support, user-friendliness, and regular updates for long-term compatibility.
Based on their features and performance, Puppeteer and Playwright generally tend to be top recommendations for most frontend web scraping needs due to their capabilities and active maintenance.
More Web Scraping Tutorials
We compared the best 5 NodeJS headless browsers and reviewed the use cases of each one.
If you would like to learn more about Web Scraping, then be sure to check out The Web Scraping Playbook.
Or check out one of our more in-depth guides: