Web Scraping Guide Part 1: How To Build Our First Scraper
Whether you prefer lightweight HTTP requests or full‑browser automation, this series walks you through building a production‑ready scraper step‑by‑step. In Part 1, we use a single e‑commerce site as the common target and implement five separate stacks - Python Requests + BeautifulSoup, Selenium, Node.js Axios + Cheerio, Puppeteer, and Playwright; so you can see exactly how each tool retrieves, parses, paginates, and exports data.
The goal is pragmatic execution, not theory: every section covers environment setup, resilient request patterns, CSS selector strategies, basic data cleaning, and a CSV hand‑off you can drop straight into a workflow. Choose the stack that fits your project’s scale and move on with confidence.
- Python Requests + BeautifulSoup
- Python Selenium
- Node.js Axios + Cheerio
- Node.js Puppeteer
- Node.js Playwright

Python Requests/BS4 Beginners Series Part 1: How To Build Our First Scraper
When it comes to web scraping Python is the go-to language for web scraping because of its highly active community, great web scraping libraries and popularity within the data science community.
There are lots of articles online, showing you how to make your first basic Python scraper. However, there are very few that walk you through the full process of building a production ready Python scraper.
To address this, we are doing a 6-Part Python Requests/BeautifulSoup Beginner Series, where we're going to build a Python scraping project end-to-end from building the scrapers to deploying on a server and run them every day.
Python Requests/BeautifulSoup 6-Part Beginner Series
-
Part 1: Basic Python Requests/BeautifulSoup Scraper - We'll go over the basics of scraping with Python, and build our first Python scraper. (Part 1)
-
Part 2: Cleaning Dirty Data & Dealing With Edge Cases - Web data can be messy, unstructured, and have lots of edge cases. In this tutorial we'll make our scraper robust to these edge cases, using data classes and data cleaning pipelines. (Part 2)
-
Part 3: Storing Data in AWS S3, MySQL & Postgres DBs - There are many different ways we can store the data that we scrape from databases, CSV files to JSON format, and S3 buckets. We'll explore several different ways we can store the data and talk about their pros, and cons and in which situations you would use them. (Part 3)
-
Part 4: Managing Retries & Concurrency - Make our scraper more robust and scalable by handling failed requests and using concurrency. (Part 4)
-
Part 5: Faking User-Agents & Browser Headers - Make our scraper production ready by using fake user agents & browser headers to make our scrapers look more like real users. (Part 5)
-
Part 6: Using Proxies To Avoid Getting Blocked - Explore how to use proxies to bypass anti-bot systems by hiding your real IP address and location. (Part 6)
For this beginner series, we're going to be using one of the simplest scraping architectures. A single scraper, being given a start URL which will then crawl the site, parse and clean the data from the HTML responses, and store the data all in the same process.
This architecture is suitable for the majority of hobby and small scraping projects, however, if you are scraping business critical data at larger scales then we would use different scraping architectures.
The code for this project is available on Github here!
If you prefer to follow along with a video then check out the video tutorial version here:
Need help scraping the web?
Then check out ScrapeOps, the complete toolkit for web scraping.
Part 1: Basic Python Scraper
In this tutorial, Part 1: Basic Python Scraper we're going to cover:
- Our Python Web Scraping Stack
- How to Setup Our Python Environment
- Creating Our Scraper Project
- Laying Out Our Python Scraper
- Retrieving The HTML From Website
- Extracting Data From HTML
- Saving Data to CSV
- How to Navigate Through Pages
- Next Steps
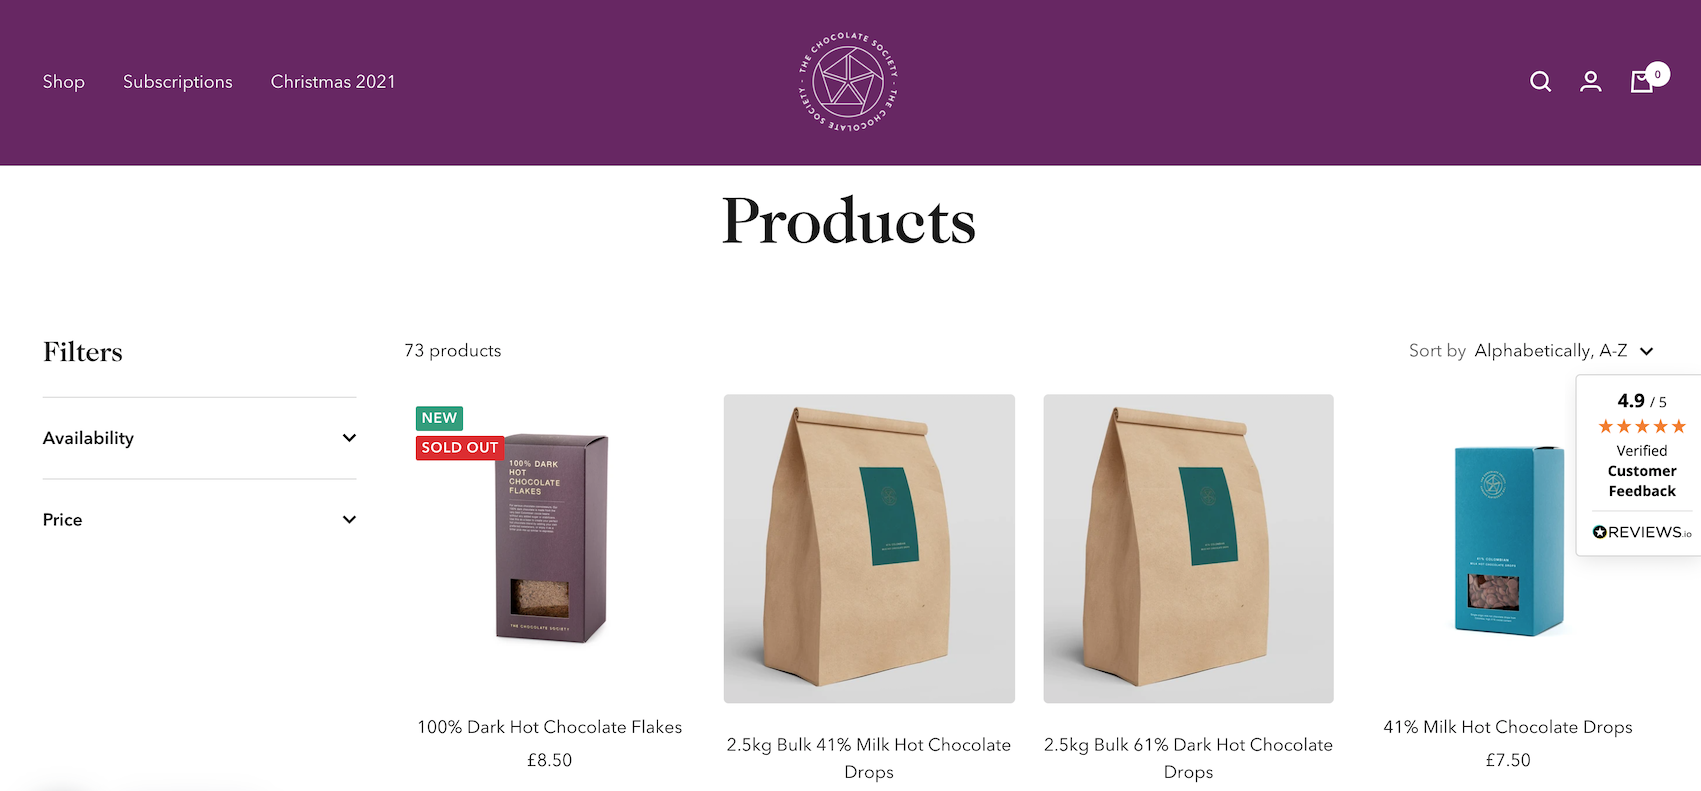
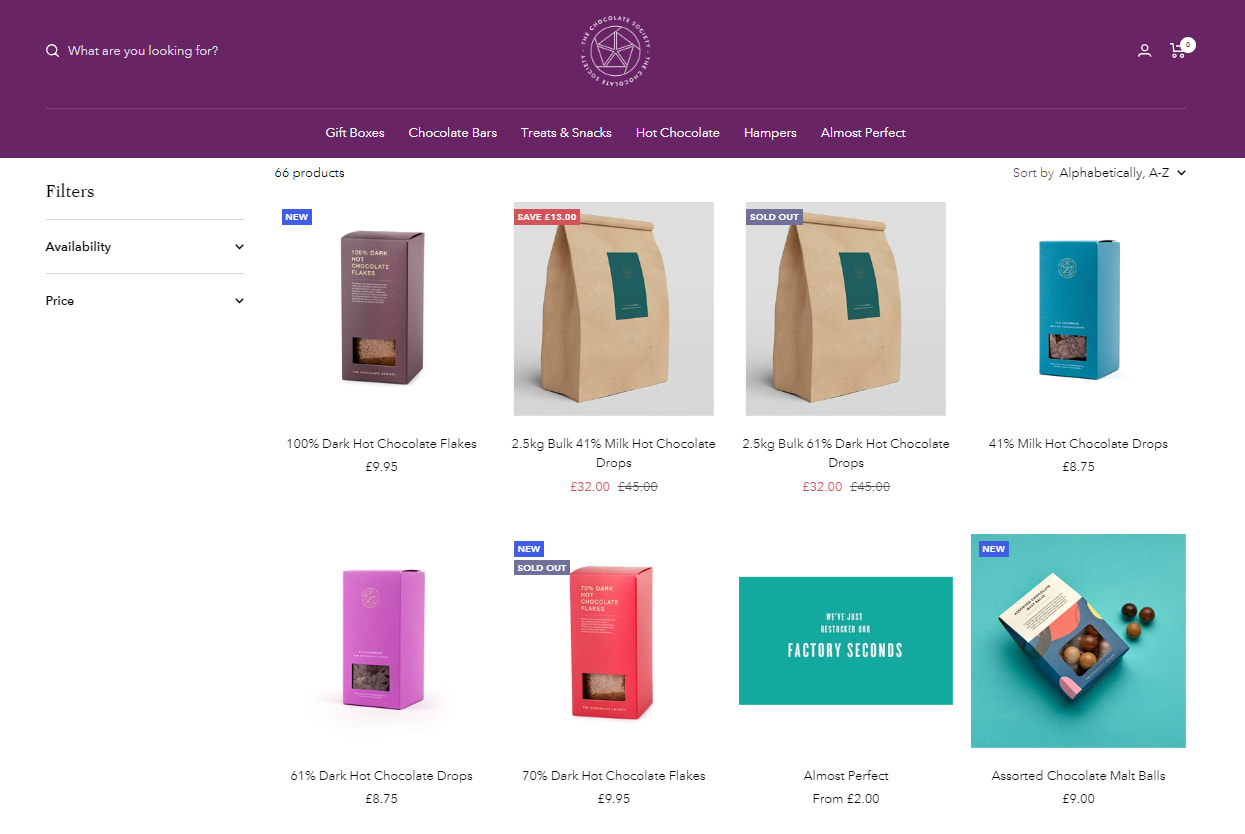
For this series, we will be scraping the products from Chocolate.co.uk as it will be a good example of how to approach scraping a e-commerce store. Plus, who doesn't like Chocolate!
Our Python Web Scraping Stack
When it comes to web scraping stacks there are two key components:
- HTTP Client: Which sends a request to the website to retrieve the HTML/JSON response from the website.
- Parsing Library: Which is used to extract the data from the web page.
Due to the popularity of Python for web scraping, we have numerous options for both.
We can use Python Requests, Python HTTPX or Python aiohttp as HTTP clients.
And BeautifulSoup, Lxml, Parsel, etc. as parsing libraries.
Or we could use Python web scraping libraries/frameworks that combine both HTTP requests and parsing like Scrapy, Python Selenium and Requests-HTML.
Each stack has its own pros and cons, however, for the puposes of this beginners series we will use the Python Requests/BeautifulSoup stack as it is by far the most common web scraping stack used by Python developers.
Using the Python Requests/BeautifulSoup stack you can easily build highly scalable scrapers that will retrieve a pages HTML, parse and process the data, and store it the file format and location of your choice.
How to Setup Our Python Environment
With the intro out of the way, let's start developing our scraper. First, things first we need to setup up our Python environment.
Step 1 - Setup your Python Environment
To avoid version conflicts down the raod it is best practice to create a seperate virtual environment for each of your Python projects. This means that any packages you install for a project are kept seperate from other projects, so you don't inadverently end up breaking other projects.
Depending on the operating system of your machine these commands will be slightly different.
MacOS or Linux��
Setup a virtual environment on MacOS or any Linux distro.
First, we want to make sure we've the latest version of our packages installed.
$ sudo apt-get update
$ apt install tree
Then install python3-venv if you haven't done so already
$ sudo apt install -y python3-venv
Next, we will create our Python virtual environment.
$ python3 -m venv venv
$ source venv/bin/activate
Windows
Setup a virtual environment on Windows.
Install virtualenv in your Windows command shell, Powershell, or other terminal you are using.
pip install virtualenv
Navigate to the folder you want to create the virtual environment, and start virtualenv.
virtualenv venv
Activate the virtual environment.
source venv\Scripts\activate
Step 2 - Install Python Requests & BeautifulSoup
Finally, we will install Python Requests and BeautifulSoup in our virtual environment.
pip install requests beautifulsoup4
Creating Our Scraper Project
Now that we have our environment setup, we can get onto the fun stuff. Building our first Python scraper!
The first thing we need to do is create our scraper script. This project will hold all the code for our scrapers.
To do this we will create a new file called chocolate_scraper.py in our project folder.
ChocolateScraper
└── chocolate_scraper.py
This chocolate_scraper.py file will contain all the code we will use to scrape the Chocolate.co.uk website.
In the future we will run this scraper by entering the following into the command line:
python chocolate_scraper.py
Laying Out Our Python Scraper
Now that we have our libraries installed and our chocolate_scraper.py created lets layout our scraper.
import requests
from bs4 import BeautifulSoup

list_of_urls = [
    'https://www.chocolate.co.uk/collections/all',
        ]

scraped_data = []

## Scraping Function
def start_scrape():

    ## Loop Through List of URLs
    for url in list_of_urls:

        ## Send Request

        ## Parse Data


        ## Add To Data Output
        pass


if __name__ == "__main__":
    start_scrape()
    print(scraped_data)
Let's walk through what we have just defined:
- Imported both Python Requests and BeautifulSoup into our script so we can use them to retrieve the HTML pages and parse the data from the page.
- Defined a
list_of_urlswe want to scrape. - Defined a
scraped_datalist where we will store the scraped data. - Defined a
start_scrapefunction which is where we will write our scraper. - Created a
__main__which will kick off our scraper when we run the script and a print function that will print out the scraped data.
If we run this script now using python chocolate_scraper.py then we should get a empty list as an output.
python chocolate_scraper.py
## []
Retrieving The HTML From Website
The first step every web scraper must do is retrieve the HTML/JSON response from the target website so that it can extract the data from the response.
We will use the Python Requests library to do this so let's update our scraper to send a request to our target URLs.
import requests
from bs4 import BeautifulSoup

list_of_urls = [
    'https://www.chocolate.co.uk/collections/all',
        ]

scraped_data = []

## Scraping Function
def start_scrape():

    ## Loop Through List of URLs
    for url in list_of_urls:

        ## Send Request
        response = requests.get(url)

        if response.status_code == 200:

            ## Parse Data
            print(response.text)

            ## Add To Data Output

        pass

if __name__ == "__main__":
    start_scrape()
    print(scraped_data)
Here you will see that we added 3 lines of code:
response = requests.get(url)this sends a HTTP request to the URL and returns the response.if response.status_code == 200:here we check if the response is valid (200 status code) before trying to parse the data.print(response.text)for debugging purposes we print the response to make sure we are getting the correct response.
Now when we run the script we will get something like this:
<!doctype html><html class="no-js" lang="en" dir="ltr">
  <head>
    <meta charset="utf-8">
    <meta name="viewport" content="width=device-width, initial-scale=1.0, height=device-height, minimum-scale=1.0, maximum-scale=1.0">
    <meta name="theme-color" content="#682464">

    <title>Products</title><link rel="canonical" href="https://www.chocolate.co.uk/collections/all"><link rel="preconnect" href="https://cdn.shopify.com">
    <link rel="dns-prefetch" href="https://productreviews.shopifycdn.com">
    <link rel="dns-prefetch" href="https://www.google-analytics.com"><link rel="preconnect" href="https://fonts.shopifycdn.com" crossorigin><link rel="preload" as="style" href="//cdn.shopify.com/s/files/1/1991/9591/t/60/assets/theme.css?v=88009966438304226991661266159">
    <link rel="preload" as="script" href="//cdn.shopify.com/s/files/1/1991/9591/t/60/assets/vendor.js?v=31715688253868339281661185416">
    <link rel="preload" as="script" href="//cdn.shopify.com/s/files/1/1991/9591/t/60/assets/theme.js?v=165761096224975728111661185416"><meta property="og:type" content="website">
  <meta property="og:title" content="Products"><meta property="og:image" content="http://cdn.shopify.com/s/files/1/1991/9591/files/Chocolate_Logo1_White-01-400-400_c4b78d19-83c5-4be0-8e5f-5be1eefa9386.png?v=1637350942">
  <meta property="og:image:secure_url" content="https://cdn.shopify.com/s/files/1/1991/9591/files/Chocolate_Logo1_White-01-400-400_c4b78d19-83c5-4be0-8e5f-5be1eefa9386.png?v=1637350942">
  <meta property="og:image:width" content="1200">
  ...
  ...
Extracting Data From HTML
Now that our scraper is successfully retrieving HTML pages from the website, we need to update our scraper to extract the data we want.
We will do this using the BeautifulSoup library and CSS Selectors (another option are XPath Selectors).
XPath and CSS selectors are like little maps our scraper will use to navigate the DOM tree and find the location of the data we require.
First things first though, we need to load the HTML response into BeautifulSoup so we can navigate the DOM.
if response.status_code == 200:
    soup = BeautifulSoup(response.content, 'html.parser')
Find Product CSS Selectors
To find the correct CSS selectors to parse the product details we will first open the page in our browsers DevTools.
Open the website, then open the developer tools console (right click on the page and click inspect).
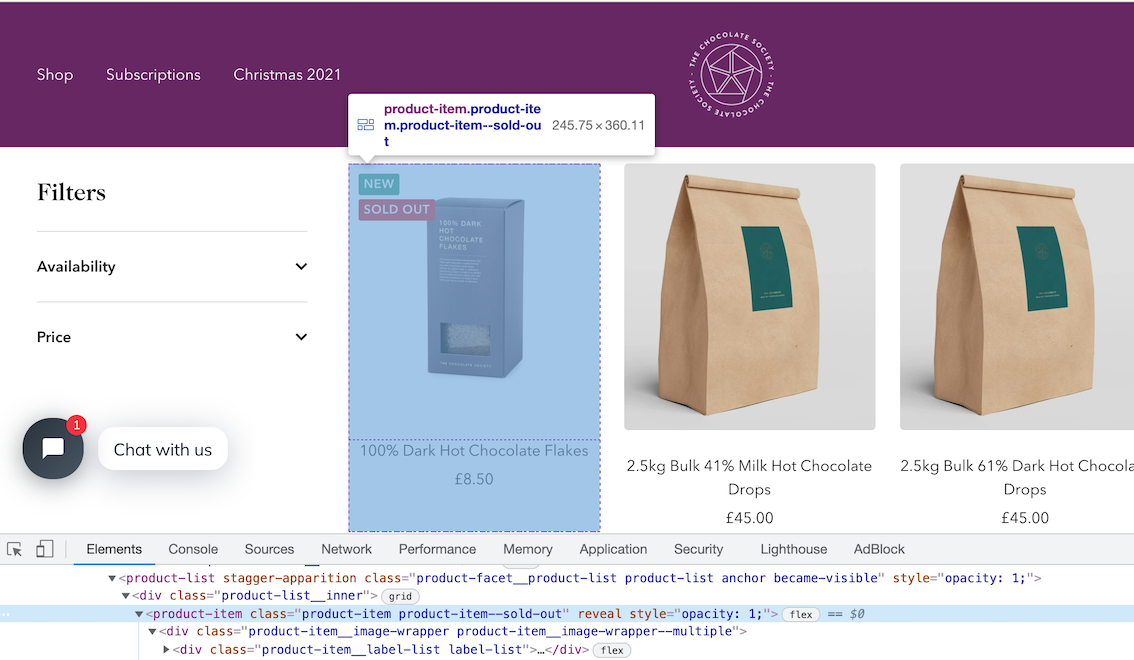
Using the inspect element, hover over the item and look at the id's and classes on the individual products.
In this case we can see that each box of chocolates has its own special component which is called product-item. We can just use this to reference our products (see above image).
soup.select('product-item')
We can see that it has found all the elements that match this selector.
[
    <product-item class="product-item product-item--sold-out" reveal=""><div class="product-item__image-wrapper product-item__image-wrapper--multiple"><div class="product-item__label-list label-list"><span class="label label--custom">New</span><span class="label label--subdued">Sold out</span></div><a class="product-item__aspect-ratio aspect-ratio aspect-ratio--square" href="/products/100-dark-hot-chocolate-flakes" style="padding-bottom: 100.0%; --aspect-ratio: 1.0">... </product-item>,
    <product-item class="product-item product-item--sold-out" reveal=""><div class="product-item__image-wrapper product-item__image-wrapper--multiple"><div class="product-item__label-list label-list"><span class="label label--custom">New</span><span class="label label--subdued">Sold out</span></div><a class="product-item__aspect-ratio aspect-ratio aspect-ratio--square" href="/products/100-dark-hot-chocolate-flakes" style="padding-bottom: 100.0%; --aspect-ratio: 1.0">... </product-item>,
    <product-item class="product-item product-item--sold-out" reveal=""><div class="product-item__image-wrapper product-item__image-wrapper--multiple"><div class="product-item__label-list label-list"><span class="label label--custom">New</span><span class="label label--subdued">Sold out</span></div><a class="product-item__aspect-ratio aspect-ratio aspect-ratio--square" href="/products/100-dark-hot-chocolate-flakes" style="padding-bottom: 100.0%; --aspect-ratio: 1.0">... </product-item>,
 ...
]
Get First Product
To just get the first product we use .get() appended to the end of the command.
soup.select('product-item')[0]
This returns all the HTML in this node of the DOM tree.
'<product-item class="product-item product-item--sold-out" reveal><div class="product-item__image-wrapper product-item__image-wrapper--multiple"><div class="product-item__label-list label-list"><span class="label label--custom">New</span><span class="label label--subdued">Sold out</span></div><a href="/products/100-dark-hot-chocolate-flakes" class="product-item__aspect-ratio aspect-ratio " style="padding-bottom: 100.0%; --aspect-ratio: 1.0">\n...'
Get All Products
Now that we have found the DOM node that contains the product items, we will get all of them and save this data into a response variable and loop through the items and extract the data we need.
So can do this with the following command.
products = soup.select('product-item')
The products variable, is now an list of all the products on the page.
To check the length of the products variable we can see how many products are there.
len(products)
## --> 24
Extract Product Details
Now lets extract the name, price and url of each product from the list of products.
The products variable is a list of products. When we update our spider code, we will loop through this list, however, to find the correct selectors we will test the CSS selectors on the first element of the list products[0].
Single Product - Get single product.
product = products[0]
Name - The product name can be found with:
product.select('a.product-item-meta__title')[0].get_text()
## --> '100% Dark Hot Chocolate Flakes'
Price - The product price can be found with:
product.select('span.price')[0].get_text()
## --> '\nSale price£9.95'
You can see that the data returned for the price has some extra text.
To remove the extra text from our price we can use the .replace() method. The replace method can be useful when we need to clean up data.
Here we're going to replace the \nSale price£ text with empty quotes '':
product.select('span.price')[0].get_text().replace('\nSale price£', '')
## --> '9.95'
Product URL - Next lets see how we can extract the product url for each individual product. To do that we can use the attrib function on the end of product.select('div.product-item-meta a')[0]
product.select('div.product-item-meta a')[0]['href']
## --> '/products/100-dark-hot-chocolate-flakes'
Updated Scraper
Now, that we've found the correct CSS selectors let's update our scraper.
Our updated scraper code should look like this:
import requests
from bs4 import BeautifulSoup

list_of_urls = [
    'https://www.chocolate.co.uk/collections/all',
        ]

scraped_data = []

## Scraping Function
def start_scrape():

    ## Loop Through List of URLs
    for url in list_of_urls:

        ## Send Request
        response = requests.get(url)

        if response.status_code == 200:

            ## Parse Data
            soup = BeautifulSoup(response.content, 'html.parser')
            products = soup.select('product-item')
            for product in products:
                name = product.select('a.product-item-meta__title')[0].get_text()
                price = product.select('span.price')[0].get_text().replace('\nSale price£', '')
                url = product.select('div.product-item-meta a')[0]['href']

                ## Add To Data Output
                scraped_data.append({
                    'name': name,
                    'price': price,
                    'url': 'https://www.chocolate.co.uk' + url
                })


if __name__ == "__main__":
    start_scrape()
    print(scraped_data)
Here, our scraper does the following steps:
- Makes a request to
'https://www.chocolate.co.uk/collections/all'. - When it gets a response, it extracts all the products from the page using
products = soup.select('product-item'). - Loops through each product, and extracts the name, price and url using the CSS selectors we created.
- Adds the parsed data to the
scraped_datalist so they can be stored in a CSV, JSON, DB, etc later.
When we run the scraper now using python chocolate_scraper.py then we should get a output like this.
[{'name': '100% Dark Hot Chocolate Flakes',
  'price': '9.95',
  'url': 'https://www.chocolate.co.uk/products/100-dark-hot-chocolate-flakes'},
 {'name': '2.5kg Bulk 41% Milk Hot Chocolate Drops',
  'price': '45.00',
  'url': 'https://www.chocolate.co.uk/products/2-5kg-bulk-of-our-41-milk-hot-chocolate-drops'},
 {'name': '2.5kg Bulk 61% Dark Hot Chocolate Drops',
  'price': '45.00',
  'url': 'https://www.chocolate.co.uk/products/2-5kg-of-our-best-selling-61-dark-hot-chocolate-drops'},
 {'name': '41% Milk Hot Chocolate Drops',
  'price': '8.75',
  'url': 'https://www.chocolate.co.uk/products/41-colombian-milk-hot-chocolate-drops'},
 {'name': '61% Dark Hot Chocolate Drops',
  'price': '8.75',
  'url': 'https://www.chocolate.co.uk/products/62-dark-hot-chocolate'},
 {'name': '70% Dark Hot Chocolate Flakes',
  'price': '9.95',
  'url': 'https://www.chocolate.co.uk/products/70-dark-hot-chocolate-flakes'},
 {'name': 'Almost Perfect',
  'price': '\nSale priceFrom £1.50\n',
  'url': 'https://www.chocolate.co.uk/products/almost-perfect'},
 {'name': 'Assorted Chocolate Malt Balls',
  'price': '9.00',
  'url': 'https://www.chocolate.co.uk/products/assorted-chocolate-malt-balls'},
  ...
]
Saving Data to CSV
In Part 4 of this beginner series, we go through in much more detail how to save data to various file formats and databases.
However, as a simple example for part 1 of this series we're going to save the data we've scraped and stored in scraped_data into a CSV file once the scrape has been completed.
To do so we will create the following function:
import csv

def save_to_csv(data_list, filename):
    keys = data_list[0].keys()
    with open(filename + '.csv', 'w', newline='') as output_file:
        dict_writer = csv.DictWriter(output_file, keys)
        dict_writer.writeheader()
        dict_writer.writerows(data_list)
And update our scraper to use this function with our scraped_data:
import csv
import requests
from bs4 import BeautifulSoup

list_of_urls = [
    'https://www.chocolate.co.uk/collections/all',
        ]

scraped_data = []

## Scraping Function
def start_scrape():

    ## Loop Through List of URLs
    for url in list_of_urls:

        ## Send Request
        response = requests.get(url)

        if response.status_code == 200:

            ## Parse Data
            soup = BeautifulSoup(response.content, 'html.parser')
            products = soup.select('product-item')
            for product in products:
                name = product.select('a.product-item-meta__title')[0].get_text()
                price = product.select('span.price')[0].get_text().replace('\nSale price£', '')
                url = product.select('div.product-item-meta a')[0]['href']

                ## Add To Data Output
                scraped_data.append({
                    'name': name,
                    'price': price,
                    'url': 'https://www.chocolate.co.uk' + url
                })


def save_to_csv(data_list, filename):
    keys = data_list[0].keys()
    with open(filename + '.csv', 'w', newline='') as output_file:
        dict_writer = csv.DictWriter(output_file, keys)
        dict_writer.writeheader()
        dict_writer.writerows(data_list)

if __name__ == "__main__":
    start_scrape()
    save_to_csv(scraped_data, 'scraped_data')
Now when we run the scraper it will create a scraped_data.csv file with all the data once the scrape has been completed.
The output will look something like this:
name,price,url
100% Dark Hot Chocolate Flakes,9.95,https://www.chocolate.co.uk/products/100-dark-hot-chocolate-flakes
2.5kg Bulk 41% Milk Hot Chocolate Drops,45.00,https://www.chocolate.co.uk/products/2-5kg-bulk-of-our-41-milk-hot-chocolate-drops
2.5kg Bulk 61% Dark Hot Chocolate Drops,45.00,https://www.chocolate.co.uk/products/2-5kg-of-our-best-selling-61-dark-hot-chocolate-drops
41% Milk Hot Chocolate Drops,8.75,https://www.chocolate.co.uk/products/41-colombian-milk-hot-chocolate-drops
61% Dark Hot Chocolate Drops,8.75,https://www.chocolate.co.uk/products/62-dark-hot-chocolate
70% Dark Hot Chocolate Flakes,9.95,https://www.chocolate.co.uk/products/70-dark-hot-chocolate-flakes
Almost Perfect,"Sale priceFrom £1.50",https://www.chocolate.co.uk/products/almost-perfect
Assorted Chocolate Malt Balls,9.00,https://www.chocolate.co.uk/products/assorted-chocolate-malt-balls
Blonde Caramel,5.00,https://www.chocolate.co.uk/products/blonde-caramel-chocolate-bar
Blonde Chocolate Honeycomb,9.00,https://www.chocolate.co.uk/products/blonde-chocolate-honeycomb
Blonde Chocolate Honeycomb - Bag,8.50,https://www.chocolate.co.uk/products/blonde-chocolate-sea-salt-honeycomb
Blonde Chocolate Malt Balls,9.00,https://www.chocolate.co.uk/products/blonde-chocolate-malt-balls
Blonde Chocolate Truffles,19.95,https://www.chocolate.co.uk/products/blonde-chocolate-truffles
Blonde Hot Chocolate Flakes,9.95,https://www.chocolate.co.uk/products/blonde-hot-chocolate-flakes
Bulk 41% Milk Hot Chocolate Drops 750 grams,17.50,https://www.chocolate.co.uk/products/bulk-41-milk-hot-chocolate-drops-750-grams
Bulk 61% Dark Hot Chocolate Drops 750 grams,17.50,https://www.chocolate.co.uk/products/750-gram-bulk-61-dark-hot-chocolate-drops
Caramelised Milk,5.00,https://www.chocolate.co.uk/products/caramelised-milk-chocolate-bar
Chocolate Caramelised Pecan Nuts,8.95,https://www.chocolate.co.uk/products/chocolate-caramelised-pecan-nuts
Chocolate Celebration Hamper,55.00,https://www.chocolate.co.uk/products/celebration-hamper
Christmas Cracker,5.00,https://www.chocolate.co.uk/products/christmas-cracker-chocolate-bar
Christmas Truffle Selection,19.95,https://www.chocolate.co.uk/products/pre-order-christmas-truffle-selection
Cinnamon Toast,5.00,https://www.chocolate.co.uk/products/cinnamon-toast-chocolate-bar
Collection of 4 of our Best Selling Chocolate Malt Balls,30.00,https://www.chocolate.co.uk/products/collection-of-our-best-selling-chocolate-malt-balls
Colombia 61%,5.00,https://www.chocolate.co.uk/products/colombian-dark-chocolate-bar
As you might have noticed in the above CSV file, we seem to have a data quality issue with the price for the "Almost Perfect" perfect product. We will deal with this in the Part 2: Data Cleaning & Edge Cases
Navigating to the "Next Page"
So far the code is working great but we're only getting the products from the first page of the site, the URL which we have defined in the list_of_urls list.
So the next logical step is to go to the next page if there is one and scrape the item data from that too! So here's how we do that.
To do so we need to find the correct CSS selector to get the next page button.
And then get the href attribute that contains the url to the next page.
soup.select('a[rel="next"]')[0]['href']
## --> '/collections/all?page=2'
Now, we just need to update our scraper to extract this next page url and add it to our list_of_urls to scrape.
import csv
import requests
from bs4 import BeautifulSoup

list_of_urls = [
    'https://www.chocolate.co.uk/collections/all',
        ]

scraped_data = []

## Scraping Function \{#scraping-function}
def start_scrape():

    ## Loop Through List of URLs
    for url in list_of_urls:

        ## Send Request
        response = requests.get(url)

        if response.status_code == 200:

            ## Parse Data
            soup = BeautifulSoup(response.content, 'html.parser')
            products = soup.select('product-item')
            for product in products:
                name = product.select('a.product-item-meta__title')[0].get_text()
                price = product.select('span.price')[0].get_text().replace('\nSale price£', '')
                url = product.select('div.product-item-meta a')[0]['href']

                ## Add To Data Output
                scraped_data.append({
                    'name': name,
                    'price': price,
                    'url': 'https://www.chocolate.co.uk' + url
                })

            ## Next Page
            next_page = soup.select('a[rel="next"]')
            if len(next_page) > 0:
                list_of_urls.append('https://www.chocolate.co.uk' + next_page[0]['href'])


def save_to_csv(data_list, filename):
    keys = data_list[0].keys()
    with open(filename + '.csv', 'w', newline='') as output_file:
        dict_writer = csv.DictWriter(output_file, keys)
        dict_writer.writeheader()
        dict_writer.writerows(data_list)

if __name__ == "__main__":
    start_scrape()
    save_to_csv(scraped_data, 'scraped_data')
Now when we run our scraper it will continue scraping the next page until it has completed all available pages.

Python Selenium Beginners Series Part 1: How To Build Our First Scraper
When it comes to web scraping, Python is the go-to language due to its highly active community, excellent web scraping libraries, and popularity within the data science community.
Many articles online show how to create a basic Python scraper. However, a few articles walk you through the full process of building a production-ready scraper.
To address this gap, we are doing a 6-Part Python Selenium Beginner Series. In this series, we'll build a Python scraping project from scratch, covering everything from creating the scraper to making it production-ready.
Python Selenium 6-Part Beginner Series
-
Part 1: Basic Python Selenium Scraper - We'll go over the basics of scraping with Python, and build our first Python scraper. (This article)
-
Part 2: Cleaning Dirty Data & Dealing With Edge Cases - Web data can be messy, unstructured, and have lots of edge cases. In this tutorial we'll make our scraper robust to these edge cases, using data classes and data cleaning pipelines. Part 2
-
Part 3: Storing Data in AWS S3, MySQL & Postgres DBs - There are many different ways we can store the data that we scrape from databases, CSV files to JSON format, and S3 buckets. We'll explore several different ways we can store the data and talk about their pros, and cons and in which situations you would use them. Part 3
-
Part 4: Managing Retries & Concurrency - Make our scraper more robust and scalable by handling failed requests and using concurrency. Part 4
-
Part 5: Faking User-Agents & Browser Headers - Make our scraper production ready by using fake user agents & browser headers to make our scrapers look more like real users. (Coming Soon)
-
Part 6: Using Proxies To Avoid Getting Blocked - Explore how to use proxies to bypass anti-bot systems by hiding your real IP address and location. (Coming Soon)
In this tutorial, Part 1: Basic Python Selenium Scraper we're going to cover:
- Our Python Web Scraping Stack
- How to Setup Our Python Environment
- Creating Our Scraper Project
- Laying Out Our Python Scraper
- Launching the Browser
- Switching to Headless Mode
- Extracting Data
- Saving Data to CSV
- Navigating to the Next Page
- Next Steps
For this series, we'll be scraping the products from Chocolate.co.uk because it's a good example of how to approach scraping an e-commerce store. Plus, who doesn't love chocolate?
Need help scraping the web?
Then check out ScrapeOps, the complete toolkit for web scraping.
Our Python Web Scraping Stack
To scrape data from a website, we need two key components: an HTTP client and a parsing library. The HTTP client is responsible for sending a request to retrieve the HTML content of the web page, while the parsing library is used to extract the data from that HTML content.
Due to the popularity of Python for web scraping, we've numerous options for both. We can use libraries like Requests, HTTPX, or AIOHTTP (an asynchronous HTTP client) for the HTTP client. Similarly, for the parsing library, we can use BeautifulSoup, lxml, Parsel, and others.
Alternatively, we could use Python web scraping libraries/frameworks such as Scrapy, Selenium, and Requests-HTML that combine both functionalities of making HTTP requests and parsing the retrieved data.
Each stack has its pros and cons. However, for this beginner series, we'll be using Python Selenium. It is a popular open-source library that offers cross-language and cross-browser support and is particularly useful for handling dynamic websites, complex interactions, and browser-specific rendering, such as JavaScript-heavy elements.
How to Setup Our Python Environment
Before we start building our scraper, we need to set up our Python environment. Here's how you can do it:
Step 1: Set up your Python Environment
To prevent any potential version conflicts in the future, it is recommended to create a distinct virtual environment for each of your Python projects. This approach guarantees that any packages you install for a particular project are isolated from other projects.
For MacOS or Linux:
-
Make sure you've the latest version of your packages installed:
$ sudo apt-get update
$ apt install tree -
Install
python3-venvif you haven't done so already:$ sudo apt install -y python3-venv -
Create your Python virtual environment:
$ python3 -m venv venv
$ source venv/bin/activate
For Windows:
-
Install
virtualenvD:\selenium-series> pip install virtualenv -
Navigate to the folder where you want to create the virtual environment and run the command to create a virtual environment with the name myenv.
D:\selenium-series> Python -m venv myenv -
Activate the virtual environment.
D:\selenium-series> myenv\Scripts\activate
Step 2: Install Python Selenium and WebDriver
Finally, we’ll install Python Selenium and WebDriver in our virtual environment. WebDriver acts as an interface that allows you to control and interact with web browsers.
There are two ways to install Selenium and WebDriver:
-
WebDriver Manager (Recommended): This method is simpler and recommended for beginners as it automatically downloads and manages the appropriate WebDriver version. Open the command prompt and run:
pip install selenium==4.17.2 webdriver-manager==4.0.1 -
Manually Setting up WebDriver: This method requires more manual setup. To begin, install the Chrome driver that matches your Chrome browser version. Once the Chrome driver is set up in your preferred location, you can proceed with installing Python Selenium.
pip install selenium==4.17.2
Creating Our Scraper Project
Now that our environment is set up, let's dive into the fun stuff: building our first Python scraper! The first step is creating our scraper script. We'll create a new file called chocolate_scraper.py within the ChocolateScraper project folder.
ChocolateScraper
└── chocolate_scraper.py
This chocolate_scraper.py file will contain all the code we use to scrape the Chocolate.co.uk website. In the future, we can run this scraper by entering the following command into the command line:
python chocolate_scraper.py
Laying Out Our Python Scraper
Now that we've our libraries installed and chocolate_scraper.py created, let's lay out our scraper.
from webdriver_manager.chrome import ChromeDriverManager
from selenium.webdriver.chrome.service import Service
from selenium.webdriver.chrome.options import Options
from selenium.webdriver.common.by import By
from selenium import webdriver

list_of_urls = [
    'https://www.chocolate.co.uk/collections/all',
]

scraped_data = []

def start_scrape():
    """
    Function to initiate the scraping process
    """
    for url in list_of_urls:
        # Perform scraping for each URL
        pass

def save_to_csv(data_list, filename="scraped_data.csv"):
    """
    Function to save scraped data to a CSV file
    """
    pass

if __name__ == "__main__":
    start_scrape()
    save_to_csv(scraped_data)
Let's go over what we've just defined:
- We imported necessary classes from Selenium and WebDriver Manager to automate Chrome interactions and data retrieval.
- We created a
list_of_urlscontaining the product pages we want to scrape. - We defined a
scraped_datalist to store the extracted data. - We created a
start_scrapefunction where the scraping logic will be written. - We defined a
save_to_csvfunction to save scraped data in a CSV file. - We created a
__main__block that will kick off our scraper when you run the script.
Launching the Browser
The first step is to open the browser and navigate to the website. This allows you to retrieve the HTML, to extract the data you need. You can open the browser with the webdriver module.
from selenium import webdriver
from selenium.webdriver.chrome.service import Service

chromedriver_path = r"C:\Program Files\chromedriver.exe"
driver = webdriver.Chrome(service=Service(chromedriver_path))

list_of_urls = [
    "https://www.chocolate.co.uk/collections/all",
]

scraped_data = []

def start_scrape():
    for url in list_of_urls:
        driver.get(url)
        print(driver.page_source)

if __name__ == "__main__":
    start_scrape()
    driver.quit()
Here’s how the code works:
driver = webdriver.Chrome(chromedriver_path)created a new Chrome WebDriver instance.driver.get(url)navigates to the provided URL.print(driver.page_source)prints the HTML source code.
Now, when you run the script, you'll see the HTML source code of the webpage printed to the console.
<html class="js" lang="en" dir="ltr" style="--window-height:515.3333129882812px;--announcement-bar-height:53.0625px;--header-height:152px;--header-height-without-bottom-nav:152px;">
<head>
    <meta charset="utf-8">
    <meta name="viewport" content="width=device-width,initial-scale=1.0,height=device-height,minimum-scale=1.0,maximum-scale=1.0">
    <meta name="theme-color" content="#682464">
    <title>Products</title>
    <link rel="canonical" href="https://www.chocolate.co.uk/collections/all">
    <link rel="preconnect" href="https://cdn.shopify.com">
    <link rel="dns-prefetch" href="https://productreviews.shopifycdn.com">
    <link rel="dns-prefetch" href="https://www.google-analytics.com">
    <link rel="preconnect" href="https://fonts.shopifycdn.com" crossorigin="">
    <link rel="preload" as="style" href="//www.chocolate.co.uk/cdn/shop/t/60/assets/theme.css?v=88009966438304226991661266159">
    <link rel="preload" as="script" href="//www.chocolate.co.uk/cdn/shop/t/60/assets/vendor.js?v=31715688253868339281661185416">
    <link rel="preload" as="script" href="//www.chocolate.co.uk/cdn/shop/t/60/assets/theme.js?v=165761096224975728111661185416">
    <meta property="og:type" content="website">
    <meta property="og:title" content="Products">
    <meta property="og:image" content="http://www.chocolate.co.uk/cdn/shop/files/Chocolate_Logo1_White-01-400-400_c4b78d19-83c5-4be0-8e5f-5be1eefa9386.png?v=1637350942">
    <meta property="og:image:secure_url" content="https://www.chocolate.co.uk/cdn/shop/files/Chocolate_Logo1_White-01-400-400_c4b78d19-83c5-4be0-8e5f-5be1eefa9386.png?v=1637350942">
    <meta property="og:image:width" content="1200">
    <meta property="og:image:height" content="628">
    <meta property="og:url" content="https://www.chocolate.co.uk/collections/all">
    <meta property="og:site_name" content="The Chocolate Society">
    <meta name="twitter:card" content="summary">
    <meta name="twitter:title" content="Products">
    <meta name="twitter:description" content="">
    <meta name="twitter:image" content="https://www.chocolate.co.uk/cdn/shop/files/Chocolate_Logo1_White-01-400-400_c4b78d19-83c5-4be0-8e5f-5be1eefa9386_1200x1200_crop_center.png?v=1637350942">
    <meta name="twitter:image:alt" content="">
</head>
</html>

...
...
...
...
Note that, in the above code, we use the Chrome WebDriver path to launch the browser. You can also use chromedrivermanager to easily manage and open the browser. See the below code:
from selenium import webdriver
from selenium.webdriver.chrome.service import Service
from webdriver_manager.chrome import ChromeDriverManager # Extra imported

driver = webdriver.Chrome(options=options, service=Service(
    ChromeDriverManager().install()))
Switching to Headless Mode
If you want to switch to headless Chrome, which runs without a graphical user interface (GUI) and is useful for automation and server-side tasks, you need to first create an Options object. Then, use the add_argument method on the Options object to set the --headless flag.
from selenium import webdriver
from webdriver_manager.chrome import ChromeDriverManager
from selenium.webdriver.chrome.service import Service
from selenium.webdriver.chrome.options import Options # Extra imported

options = Options()
options.add_argument("--headless")

driver = webdriver.Chrome(options=options, service=Service(
    ChromeDriverManager().install()))
Extracting Data
Let's update our scraper to extract the desired data. We'll do this by using class names and CSS selectors.
We’ll use the find_elements and find_element methods to locate specific elements. The find_elements method searches for and returns a list of all elements that match the given criteria, while the find_element method searches for and returns the first element that matches the criteria.
Find Product Selectors
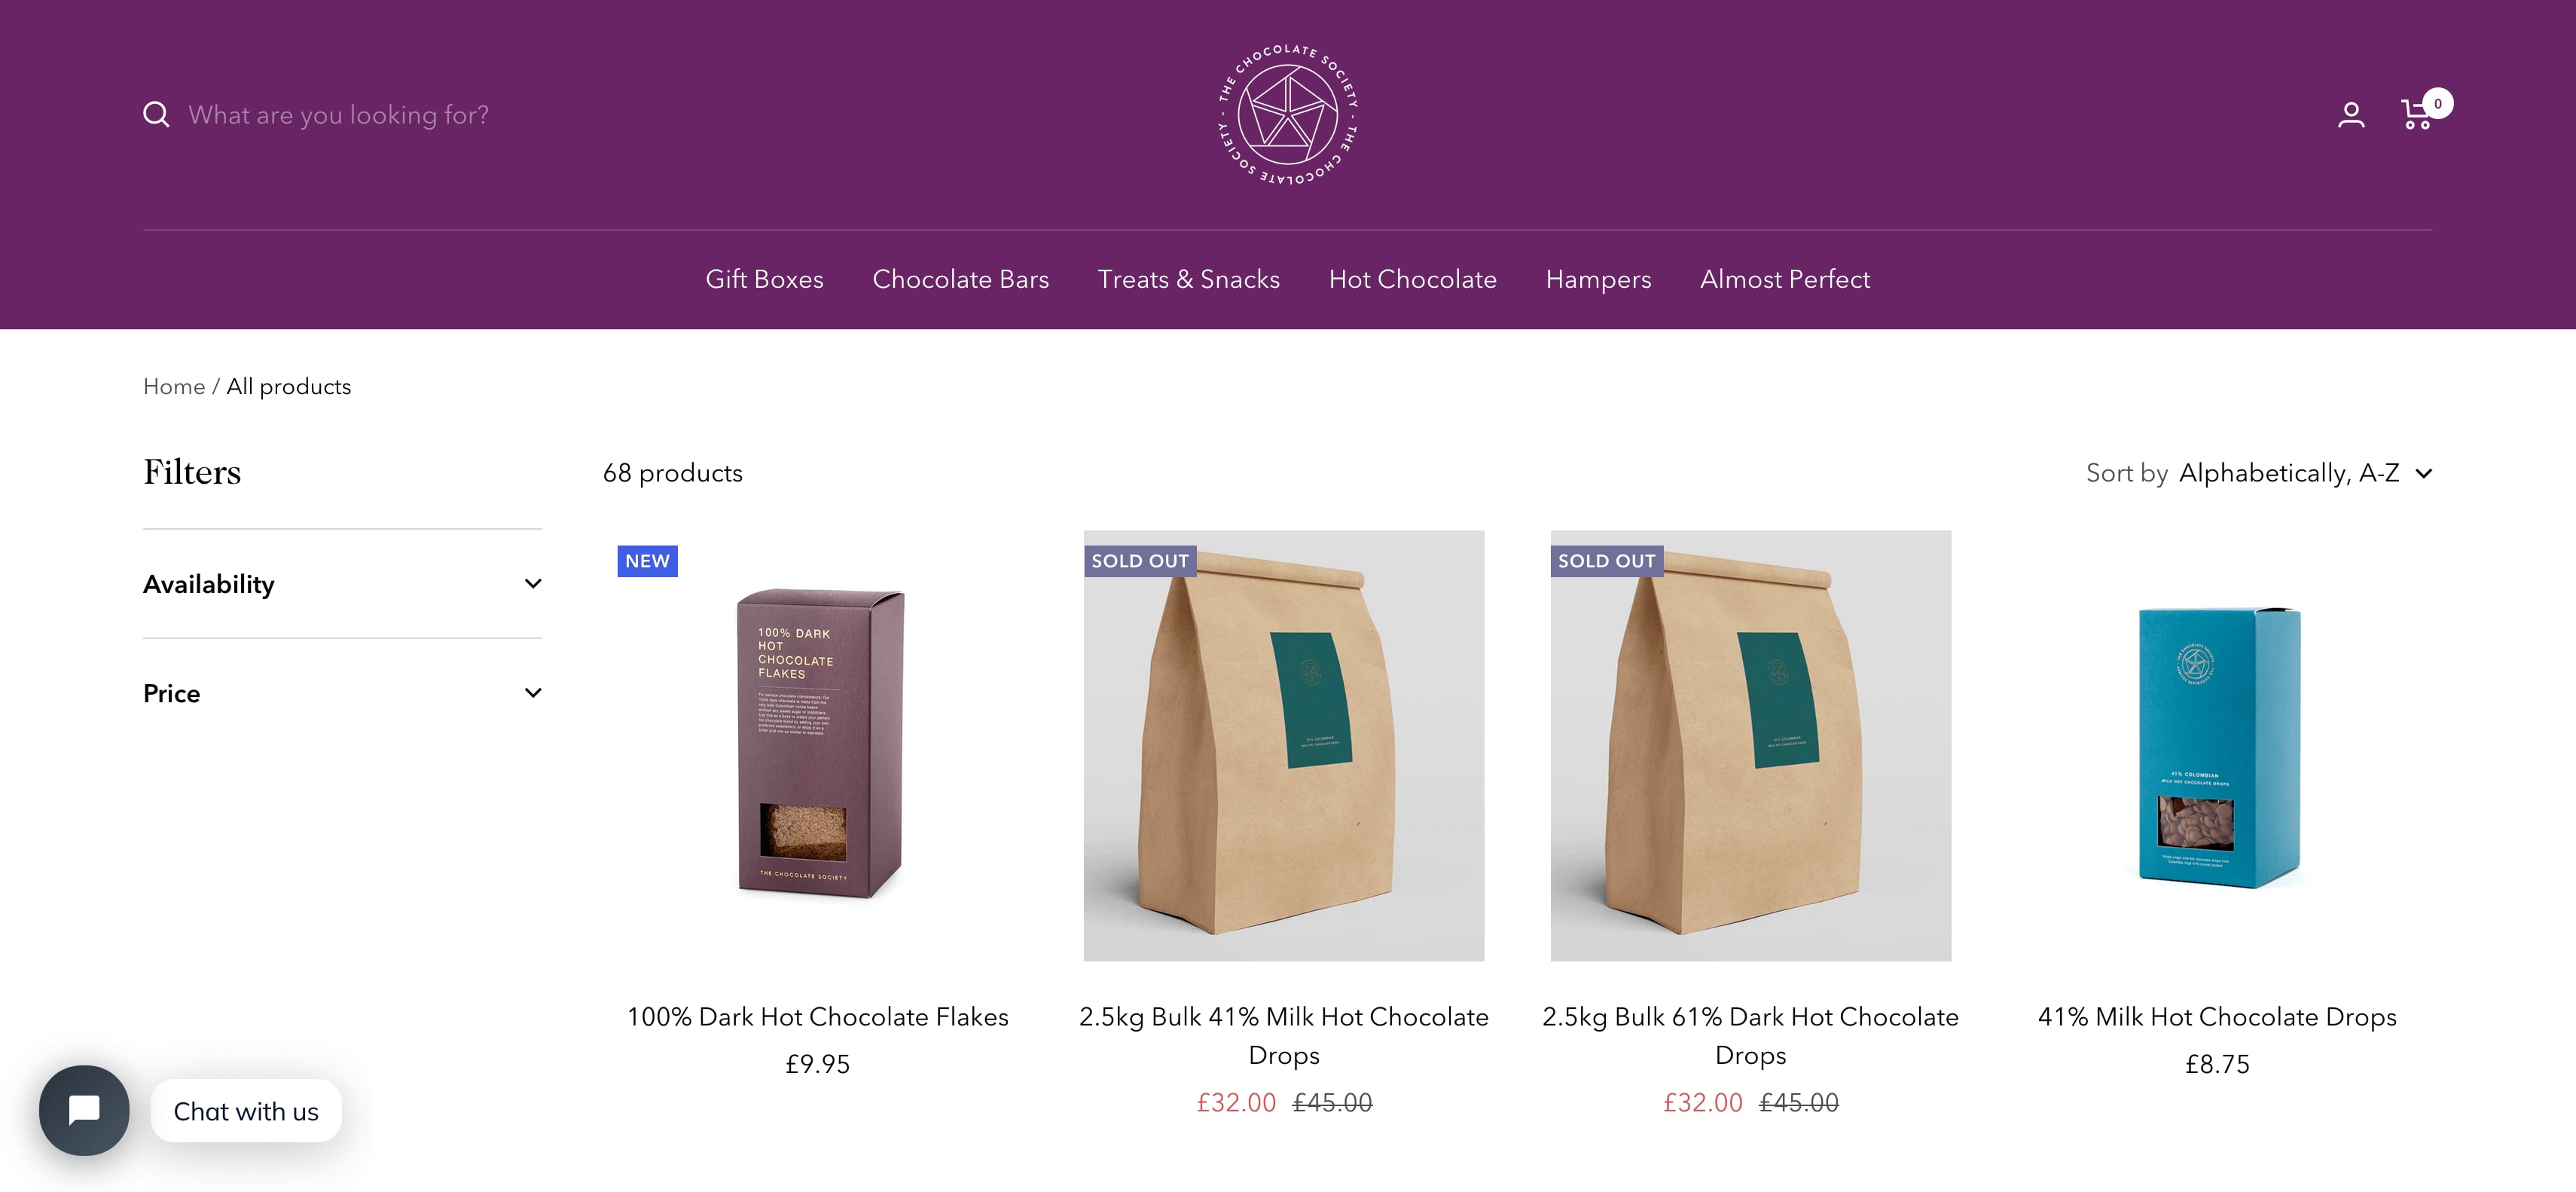
To extract product details using selectors, open the website and then open the developer tools console (right-click and choose "Inspect" or "Inspect Element").

Using the inspect element, hover over a product and examine its IDs and classes. Each product has its unique product-item component.
This line of code finds all the elements on the web page that have the class name product-item. The products variable stores a list of these elements. Currently, it holds 24 products, representing all products on the first page.
products = driver.find_elements(By.CLASS_NAME, "product-item")
print(len(products)) # 24
Extract Product Details
Now, let's extract the name, price, and URL of each item in the product list. We'll use the first product (products[0]) to test our CSS selectors while iterating through the list when updating the spider code.
Single Product: Get a single product from the list.
product = products[0]
Name: Get the name of the product with the product-item-meta__title class name.
name = product.find_element(By.CLASS_NAME, "product-item-meta__title").text
## --> '100% Dark Hot Chocolate Flakes'
Price: Get the price of the product with the price class name.
price = product.find_element(By.CLASS_NAME, "price").text
## --> 'Sale price\n£9.95
The price data contains some unwanted text. To remove this extra text, we can use the .replace() method. This method will replace both occurrences of unwanted text with empty quotes ‘’.
product.find_element(By.CLASS_NAME, "price").text.replace("Sale price\n£", "")
## --> '9.95'
Product URL: Now, let's see how to extract the product URL for each item. We can get this using the get_attribute("href") method.
product.find_element(By.CLASS_NAME, "product-item-meta__title").get_attribute("href")
## --> 'https://www.chocolate.co.uk/products/100-dark-hot-chocolate-flakes'
Updated Scraper
Now that we've identified the correct CSS selectors, let's update our scraper code. The updated code will look like this:
from selenium import webdriver
from selenium.webdriver.common.by import By
from webdriver_manager.chrome import ChromeDriverManager
from selenium.webdriver.chrome.service import Service
from selenium.webdriver.chrome.options import Options

options = Options()
options.add_argument("--headless")

driver = webdriver.Chrome(
    options=options, service=Service(ChromeDriverManager().install())
)

list_of_urls = [
    "https://www.chocolate.co.uk/collections/all",
]

scraped_data = []

def start_scrape():
    print("Scraping started...")
    for url in list_of_urls:
        driver.get(url)
        products = driver.find_elements(By.CLASS_NAME, "product-item")
        for product in products:
            name = product.find_element(
                By.CLASS_NAME, "product-item-meta__title").text

            price_text = product.find_element(By.CLASS_NAME, "price").text
            price = price_text.replace("Sale price\n£", "")

            url = product.find_element(
                By.CLASS_NAME, "product-item-meta__title"
            ).get_attribute("href")

            scraped_data.append({"name": name, "price": price, "url": url})

if __name__ == "__main__":
    start_scrape()
    print(scraped_data)
    driver.quit()
Our scraper performs the following steps:
- Load the target URL: It uses the
driver.get(url)to load the website's URL in the browser for further processing and data extraction. - Extract product elements: It finds all web elements containing the class name "product-item" using
driver.find_elements(By.CLASS_NAME, "product-item"). These elements represent individual product items on the webpage. - Iterate and extract data: It iterates through each product element and extracts the name, price, and URL.
- Store extracted data: It adds the extracted information to the
scraped_datalist, where it can be stored in a desired format like CSV, JSON, or a database.
When we run the scraper now, we should receive an output similar to this.
[{'name': '100% Dark Hot Chocolate Flakes', 'price': '9.95', 'url': 'https://www.chocolate.co.uk/products/100-dark-hot-chocolate-flakes'},
 {'name': '2.5kg Bulk 41% Milk Hot Chocolate Drops', 'price': '32.00', 'url': 'https://www.chocolate.co.uk/products/2-5kg-bulk-of-our-41-milk-hot-chocolate-drops'},
 {'name': '2.5kg Bulk 61% Dark Hot Chocolate Drops', 'price': '32.00', 'url': 'https://www.chocolate.co.uk/products/2-5kg-of-our-best-selling-61-dark-hot-chocolate-drops'},
 {'name': '41% Milk Hot Chocolate Drops', 'price': '8.75', 'url': 'https://www.chocolate.co.uk/products/41-colombian-milk-hot-chocolate-drops'},
 {'name': '61% Dark Hot Chocolate Drops', 'price': '8.75', 'url': 'https://www.chocolate.co.uk/products/62-dark-hot-chocolate'},
 {'name': '70% Dark Hot Chocolate Flakes', 'price': '9.95', 'url': 'https://www.chocolate.co.uk/products/70-dark-hot-chocolate-flakes'},
 {'name': 'Almost Perfect', 'price': '2.00', 'url': 'https://www.chocolate.co.uk/products/almost-perfect'},
 {'name': 'Assorted Chocolate Malt Balls', 'price': '9.00', 'url': 'https://www.chocolate.co.uk/products/assorted-chocolate-malt-balls'},
 {'name': 'Blonde Caramel', 'price': '5.00', 'url': 'https://www.chocolate.co.uk/products/blonde-caramel-chocolate-bar'},
 ...
 ...
 ...
]
Saving Data to CSV
In Part 4 of this beginner series, we'll dive deeper into saving data to various file formats and databases. But to start you off, let's create a simple function to save the data we've scraped and stored in scraped_data into a CSV file.
To do so, we'll create a function called save_to_csv(data, filename). This function takes two arguments: the scraped data and the desired filename for the CSV file.
Here’s the code snippet:
import csv

def save_to_csv(data_list, filename):
    keys = data_list[0].keys()
    with open(filename + '.csv', 'w', newline='') as output_file:
        dict_writer = csv.DictWriter(output_file, keys)
        dict_writer.writeheader()
        dict_writer.writerows(data_list)
And update our scraper to use this function:
from selenium import webdriver
from selenium.webdriver.common.by import By
from webdriver_manager.chrome import ChromeDriverManager
from selenium.webdriver.chrome.service import Service
from selenium.webdriver.chrome.options import Options
import csv

options = Options()
options.add_argument("--headless")  # Enables headless mode

# Using ChromedriverManager to automatically download and install Chromedriver
driver = webdriver.Chrome(
    options=options, service=Service(ChromeDriverManager().install())
)

list_of_urls = [
    "https://www.chocolate.co.uk/collections/all",
]

scraped_data = []

def start_scrape():
    print("Scraping started...")
    for url in list_of_urls:
        driver.get(url)
        products = driver.find_elements(By.CLASS_NAME, "product-item")
        for product in products:
            name = product.find_element(
                By.CLASS_NAME, "product-item-meta__title").text
            price_text = product.find_element(By.CLASS_NAME, "price").text
            price = price_text.replace("Sale price\n£", "")

            url = product.find_element(
                By.CLASS_NAME, "product-item-meta__title"
            ).get_attribute("href")

            scraped_data.append({"name": name, "price": price, "url": url})

def save_to_csv(data_list, filename):
    keys = data_list[0].keys()
    with open(filename + ".csv", "w", newline="") as output_file:
        dict_writer = csv.DictWriter(output_file, keys)
        dict_writer.writeheader()
        dict_writer.writerows(data_list)

if __name__ == "__main__":
    start_scrape()
    save_to_csv(scraped_data, "scraped_data")
    driver.quit()  # Close the browser window after finishing
After running the scraper, it will create a scraped_data.csv file containing all the extracted data.
Here's an example of what the output will look like:

💡DATA QUALITY: As you may have noticed in the CSV file above, the price for the 'Almost Perfect' product (line 8) appears to have a data quality issue. We'll address this in Part 2: Data Cleaning & Edge Cases.
Navigating to the "Next Page"
So far, the code works well, but it only retrieves products from the first page of the site specified in the list_of_urls list. The next logical step is to grab products from subsequent pages if they exist.
To accomplish this, we need to identify the correct CSS selector for the "next page" button and extract the URL from its href attribute.
driver.find_element(By.CSS_SELECTOR,"a[rel='next']").get_attribute("href")
We'll now update our scraper to identify and extract the URL for the next page, adding it to the list_of_urls for subsequent scraping. Here's the updated code:
from selenium import webdriver
from selenium.webdriver.common.by import By
from webdriver_manager.chrome import ChromeDriverManager
from selenium.webdriver.chrome.service import Service
from selenium.webdriver.chrome.options import Options
from selenium.webdriver.support.ui import WebDriverWait
from selenium.webdriver.support import expected_conditions as EC
import csv
import time

options = Options()
options.add_argument("--headless")  # Enables headless mode

# Using ChromedriverManager to automatically download and install Chromedriver
driver = webdriver.Chrome(
    options=options, service=Service(ChromeDriverManager().install())
)

list_of_urls = [
    "https://www.chocolate.co.uk/collections/all",
]

scraped_data = []


def start_scrape():
    print("Scraping started...")
    for url in list_of_urls:
        driver.get(url)
        wait = WebDriverWait(driver, 10)
        products = wait.until(EC.visibility_of_all_elements_located(
            (By.CLASS_NAME, "product-item")))
        for product in products:
            name = product.find_element(
                By.CLASS_NAME, "product-item-meta__title").text
            price_text = product.find_element(By.CLASS_NAME, "price").text
            price = price_text.replace("Sale price\n£", "")

            url = product.find_element(
                By.CLASS_NAME, "product-item-meta__title"
            ).get_attribute("href")
            scraped_data.append({"name": name, "price": price, "url": url})
        try:
            next_page = driver.find_element(By.CSS_SELECTOR, "a[rel='next']")
            if next_page:
                list_of_urls.append(next_page.get_attribute("href"))
                print("Scraped page", len(list_of_urls), "...")
                time.sleep(1)  # Add a brief pause between page loads
        except:
            print("No more pages found!")


def save_to_csv(data_list, filename):
    keys = data_list[0].keys()
    with open(filename + ".csv", "w", newline="") as output_file:
        dict_writer = csv.DictWriter(output_file, keys)
        dict_writer.writeheader()
        dict_writer.writerows(data_list)


if __name__ == "__main__":
    start_scrape()
    save_to_csv(scraped_data, "scraped_data")

    print("Scraping completed successfully!")
    driver.quit()  # Close the browser window after finishing

Node.js Axios/CheerioJS Beginners Series Part 1: Building Your First Scraper
When it comes to web scraping, Node.js is a popular choice due to its strong community, extensive libraries like Cheerio, and its integration with JavaScript.
Many online resources show how to create simple web scrapers in Node.js, but few guide you through building a production-ready scraper.
This 6-part Node.js Axios/CheerioJS Beginner Series will walk you through building a web scraping project from scratch, covering everything from creating the scraper to deployment and scheduling.
Node.js Axios/CheerioJS 6-Part Beginner Series
-
Part 1: Basic Node.js Cheerio Scraper - We'll learn the fundamentals of web scraping with Node.js and build your first scraper using Cheerio. (This article)
-
Part 2: Cleaning Unruly Data & Handling Edge Cases - Web data can be messy and unpredictable. In this part, we'll create a robust scraper using data structures and cleaning techniques to handle these challenges. (Part 2)
-
Part 3: Storing Scraped Data in AWS S3, MySQL & Postgres DBs - Explore various options for storing your scraped data, including databases like MySQL or Postgres, cloud storage like AWS S3, and file formats like CSV and JSON. We'll discuss their pros, cons, and suitable use cases. (Part 3)
-
Part 4: Managing Retries & Concurrency - Enhance your scraper's reliability and scalability by handling failed requests and utilizing concurrency. (Part 4)
-
Part 5: Faking User-Agents & Browser Headers - Learn how to create a production-ready scraper by simulating real users through user-agent and browser header manipulation. (Part 5)
-
Part 6: Using Proxies To Avoid Getting Blocked - Discover how to use proxies to bypass anti-bot systems by disguising your real IP address and location. (Part 6)
The code for this project is available on Github.
Series Approach:
For this beginner series, we'll focus on a simple scraping structure. We'll build a single scraper that takes a starting URL, fetches the website, parses and cleans data from the HTML response, and stores the extracted information - all within the same process.
This approach is ideal for personal projects and small-scale scraping tasks. However, larger-scale scraping, especially for business-critical data, may require more complex architectures.
Need help scraping the web?
Then check out ScrapeOps, the complete toolkit for web scraping.
Part 1: Basic Node.js Scraper
In this tutorial, Part 1: Basic Node.js Scraper we're going to cover:
- Our Node Web Scraping Stack
- How to Setup Our Node.js Environment
- Creating Your Node.js Scraper Project
- Laying Out our Node Scraper
- Retrieving The HTML From Website
- Extracting Data from HTML
- Saving Data to CSV
- Navigating to the "Next Page"
- Next Steps
For this series, we will be scraping the products from chocolate.co.uk as it will be a good example of how to approach scraping a e-commerce store. Plus, who doesn't like Chocolate!
Our Node Web Scraping Stack
Web scraping in Node.js involves two key components:
1. HTTP Client: This library sends requests to websites and retrieves their response data, typically HTML or JSON.
2. Parsing Library: This library extracts and processes the desired data from the received response.
Node.js offers a rich ecosystem of libraries for each component.
HTTP Clients:
- Axios: A popular Promise-based HTTP client known for its simplicity and clean syntax.
- SuperAgent: Another Promise-based library with support for various request features and configuration options.
- Got: A lightweight HTTP client focused on performance and ease of use.
Parsing Libraries:
- Cheerio: This library directly parses HTML using a familiar jQuery-like syntax, making it intuitive for developers familiar with JavaScript.
- JSDOM: A full-fledged DOM implementation that allows manipulation and parsing of HTML beyond simple extraction.
- htmlparser2: A high-performance streaming parser suitable for large and complex HTML structures.
Another alternative are headless browsers that combine requests and parsing. For Node.js the most popular are:
- Puppeteer: A library that controls a headless Chrome browser, allowing for dynamic rendering and complex scraping scenarios.
- Playwright: A newer framework offering browser automation across various browsers like Chrome, Firefox, and WebKit.
Choice for this Series:
For this beginner series, we'll utilize the Axios and Cheerio combination due to its simplicity and ease of learning.
This popular stack allows you to build efficient scrapers that fetch website content, extract relevant data, and store it in your desired format and location.
How to Setup Our Node.js Environment
Before diving into development, let's set up our Node.js environment.
Step 1 - Node.js and npm Installation
Ensure you have the latest Node.js version installed. You can check and download the appropriate installer for your operating system (Windows, macOS, or Linux) from the official website.
Run the installer and follow the prompts to install Node.js.
After installation, open a terminal or command prompt and run the following commands to verify that Node.js and npm are installed correctly:
node -v
npm -v
These commands should output the versions of Node.js and npm installed on your system. If you see version numbers, it means Node.js and npm are installed successfully.
Step 2 - Package Management
Node.js uses npm (Node Package Manager) for installing and managing dependencies. It comes bundled with Node.js by default.
npm allows you to install, manage, and share packages (libraries or modules) with other developers. It is used for dependency management in Node.js projects.
Step 3 - Project Directory
Create a new directory for your project. Open your terminal or command prompt and navigate to this directory.
mkdir my-node-project
cd my-node-project
Step 4 - Initialize Project (Optional)
While not strictly necessary, you can initialize an empty npm project using:
npm init -y
This creates a package.json file at the root of your project, which acts as a manifest for storing project information and dependencies.
Step 5 - Install Dependencies
We'll install the necessary libraries: Axios for HTTP requests and Cheerio for parsing. Use the following command in your terminal:
npm install axios cheerio
This downloads and installs the specified packages and their dependencies into your project's node_modules directory.
Creating Your First Node.js Scraper Project
Now that our environment is ready, let's create our first Node.js scraper!
1. Create a Project File:
In your project directory, create a new JavaScript file named chocolateScraper.js. This file will hold all the code for your scraper.
ChocolateScraper/
  |- chocolateScraper.js
2. Running the Scraper:
You can execute your scraper using the following command in your terminal:
node chocolateScraper.js
This command runs the JavaScript code in your chocolateScraper.js file, executing the scraping logic and potentially displaying the extracted data or saving it to a chosen format.
Laying Out our Node Scraper
Now that you have your chocolateScraper.js file created, let's begin building the scraper logic:
const axios = require("axios");
const cheerio = require("cheerio");

const listOfUrls = ["https://www.chocolate.co.uk/collections/all"];

const scrapedData = [];

async function scrape() {
  for (const url of listOfUrls) {
    console.log(`Scraping: ${url}`);
  }
}

(async () => {
  await scrape();
})();
Let's walk through what we've just written:
- Imported
axiosandcheeriousingrequireso that they can be used. - Defined a
listOfUrlscontaining the URLs to be scraped. - Created an empty array,
scrapeData, to store results in. - Defined an asynchronous
scrapemethod to do the work. - Created an Immediately Invoked Function Expression to start the program.
Now, if we run the script, we see the following output:
node chocolateScraper.js
> Scraping: https://www.chocolate.co.uk/collections/all
Retrieving The HTML From Website
With our basic logic in place, we need to begin requesting data from the target URLs. This is usually in the form of HTML or JSON.
We will use Axios to do this, let's make the following updates:
const axios = require("axios");
const cheerio = require("cheerio");

const listOfUrls = ["https://www.chocolate.co.uk/collections/all"];

const scrapedData = [];

async function scrape() {
  for (const url of listOfUrls) {
    const response = await axios.get(url);

    if (response.status == 200) {
      console.log(response.data);
    }
  }
}

(async () => {
  await scrape();
})();
You can see we've added a couple lines to our for loop. We use axios.get with the URL and if the status is equal to 200 we log the data. When you run the script you should see HTML that ends something like this
</div>
          </div></div>
    </div>
  </div>
</footer></div></body>
</html>
Extracting Data from HTML
Now that our scraper is successfully retrieving HTML pages from the website, we need to update our scraper to extract the data we want.
We will do this using the Cheerio library and CSS Selectors (another option are XPath Selectors).
XPath and CSS selectors are like little maps our scraper will use to navigate the DOM tree and find the location of the data we require.
First things first though, we need to load the HTML response into Cheerio so we can navigate the DOM. This can be done as follows:
if (response.status == 200) {
  const html = response.data;
  const $ = cheerio.load(html);
}
Find Product CSS Selectors
To find the correct CSS selectors to parse the product details we will first open the page in our browsers DevTools.
Open the website, then open the developer tools console (right click on the page and click inspect).

Using the inspect element, hover over the item and look at the id's and classes on the individual products.
In this case we can see that each box of chocolates has its own special component which is called product-item. We can just use this to reference our products (see above image). Now using the following code:
const $ = cheerio.load(html);
const productItems = $("product-item");
console.log("Number of product-item: " + productItems.length);
We can see that it finds elements matching the selector
node chocolateScraper.js
> Number of product-item: 24
Extract Product Details
Now that we have a list of product-item elements stored in the productItems let's extract the name, price and url of each product.
First, we can use inspector again to find the selectors for these values. We should learn that
.product-item-meta__titleis the title.priceis the price.product-item-meta__titlecontains an href for the URL
Using these selectors, we can extract that information from te web page.
for (const productItem of productItems) {
  const title = $(productItem).find(".product-item-meta__title").text();
  const price = $(productItem).find(".price").text();
  const url = $(productItem).find(".product-item-meta__title").attr("href");
}
But one small issue you may see with this, the price field needs to be cleaned up. In it's normal state, it looks like this
\n Sale price£32.00\n Regular price£45.00
\n Sale price£8.75
We want to focus purely on the sale price, to do that we will perform some operations rather than grab the text immediately.
const price = $(productItem)
  .find(".price")
  .first()
  .text()
  .replace("Sale price", "")
  .trim();
In the above code, we get all elements matching the .price selector. We know our "Sale price" will always be the first so we use .first(). Then, we can grab the text but it will still include some unwanted content so we use .replace() and finally, .trim() to remove extra whitespace and new lines.
Updated Scraper
Now that we've got the CSS selectors figured out and cleaned up the data some, let's take a look at the code we've got so far.
const axios = require("axios");
const cheerio = require("cheerio");

const listOfUrls = ["https://www.chocolate.co.uk/collections/all"];

const scrapedData = [];

async function scrape() {
  for (const url of listOfUrls) {
    const response = await axios.get(url);

    if (response.status == 200) {
      const html = response.data;
      const $ = cheerio.load(html);
      const productItems = $("product-item");
      for (const productItem of productItems) {
        const title = $(productItem).find(".product-item-meta__title").text();

        const price = $(productItem)
          .find(".price")
          .first()
          .text()
          .replace("Sale price", "")
          .trim();
        const url = $(productItem)
          .find(".product-item-meta__title")
          .attr("href");

        scrapedData.push({
          title,
          price,
          url,
        });
      }
    }
  }
}

(async () => {
  await scrape();
  console.log(scrapedData);
})();
In this code, we take the following steps:
- Make a request to the chocolate store from the URLs array
- Upon successful response, get all elements matching the
product-itemselector. - Loop through all product items and extract title, price and url.
- Append the extracted data to the
scrapedDataarray
After running that code, we should see an output similar to this (truncated for brevity):
[
    {
    title: 'Cinnamon Toast',
    price: '£5.00',
    url: '/products/cinnamon-toast-chocolate-bar'
  },
  {
    title: 'Collection of 4 of our Best Selling Chocolate Malt Balls',
    price: '£30.00',
    url: '/products/collection-of-our-best-selling-chocolate-malt-balls'
  },
  {
    title: 'Colombia 61%',
    price: '£5.00',
    url: '/products/colombian-dark-chocolate-bar'
  },
  {
    title: 'Crunchy Biscuit',
    price: '£5.00',
    url: '/products/crunchy-biscuit-blonde-chocolate-bar'
  },
  ...
]
Saving Data to CSV
In Part 4, we will go much more in-depth on how to save data in various formats and databases. But for now, we will stick to the simple and common CSV format.
We've already got out data being collected and stored in the array as objects, so now we just need to output it to a CSV file when we're done.
To start, we will write a new function that will do the work of saving the data
function saveAsCSV(data, filename) {
  const header = Object.keys(data[0]).join(",");
  const csv = [header, ...data.map((obj) => Object.values(obj).join(","))].join(
    "\n"
  );
  fs.writeFileSync(filename, csv);
}
This will use the native fs (File System) library to write data to a file. Make sure to add const fs = require("fs"); to the top of the file.
Now update the scraper to use that function with our data
const axios = require("axios");
const cheerio = require("cheerio");
const fs = require("fs");

const listOfUrls = ["https://www.chocolate.co.uk/collections/all"];

const scrapedData = [];

async function scrape() {
  for (const url of listOfUrls) {
    const response = await axios.get(url);

    if (response.status == 200) {
      const html = response.data;
      const $ = cheerio.load(html);
      const productItems = $("product-item");
      for (const productItem of productItems) {
        const title = $(productItem).find(".product-item-meta__title").text();

        const price = $(productItem)
          .find(".price")
          .first()
          .text()
          .replace("Sale price", "")
          .trim();
        const url = $(productItem)
          .find(".product-item-meta__title")
          .attr("href");

        scrapedData.push({
          title,
          price,
          url,
        });
      }
    }
  }
}

function saveAsCSV(data, filename) {
  const header = Object.keys(data[0]).join(",");
  const csv = [header, ...data.map((obj) => Object.values(obj).join(","))].join(
    "\n"
  );
  fs.writeFileSync(filename, csv);
}

(async () => {
  await scrape();
  saveAsCSV(scrapedData, "chocolate.csv");
})();
Now, after running the scraper, we should see a chocolate.csv file with all of our data. It should look something like this:
title,price,url
100% Dark Hot Chocolate Flakes,£9.95,/products/100-dark-hot-chocolate-flakes
2.5kg Bulk 41% Milk Hot Chocolate Drops,£32.00,/products/2-5kg-bulk-of-our-41-milk-hot-chocolate-drops
2.5kg Bulk 61% Dark Hot Chocolate Drops,£32.00,/products/2-5kg-of-our-best-selling-61-dark-hot-chocolate-drops
41% Milk Hot Chocolate Drops,£8.75,/products/41-colombian-milk-hot-chocolate-drops
61% Dark Hot Chocolate Drops,£8.75,/products/62-dark-hot-chocolate
...
Navigating to the "Next Page"
The code is working great but we're only getting the products from the first page of the website.
So the next logical step is to go to the next page if there is one and scrape the item data from that too! So here's how we do that.
To do so we need to find the correct CSS selector to get the next page button.
And then get the href attribute that contains the url to the next page. We can use
$("a[rel='next']").attr("href");
We've already got an array to store URLs that need to be scraped. We can utilize this by simply adding the "Next Page" link to this array:
const axios = require("axios");
const cheerio = require("cheerio");
const fs = require("fs");

const listOfUrls = ["https://www.chocolate.co.uk/collections/all"];

const scrapedData = [];

async function scrape() {
  for (const url of listOfUrls) {
    const response = await axios.get(url);

    if (response.status == 200) {
      const html = response.data;
      const $ = cheerio.load(html);
      const productItems = $("product-item");

      for (const productItem of productItems) {
        const title = $(productItem).find(".product-item-meta__title").text();

        const price = $(productItem)
          .find(".price")
          .first()
          .text()
          .replace("Sale price", "")
          .trim();
        const url = $(productItem)
          .find(".product-item-meta__title")
          .attr("href");

        scrapedData.push({
          title,
          price,
          url,
        });
      }

      const nextPage = $("a[rel='next']").attr("href");
      if (nextPage) {
        listOfUrls.push("https://www.chocolate.co.uk" + nextPage);
      }
    }
  }
}

function saveAsCSV(data, filename) {
  const header = Object.keys(data[0]).join(",");
  const csv = [header, ...data.map((obj) => Object.values(obj).join(","))].join(
    "\n"
  );
  fs.writeFileSync(filename, csv);
}

(async () => {
  await scrape();
  saveAsCSV(scrapedData, "chocolate.csv");
})();
Now, when we run our scraper, it will continue to add URLs when there are more pages available.

NodeJS Puppeteer Beginners Series Part 1 - First Puppeteer Scraper
In Part 1, we'll start by building a basic web scraper that extracts data from webpages using CSS selectors and saves it in CSV format.
In the following sections, we'll expand on this foundation, adding more features and functionality.
- Our Puppeteer Web Scraping Stack
- How to Set Up Our Node.js Environment
- Creating Our Scraper Project
- Laying Out Our Puppeteer Scraper
- Retrieving The HTML From Website
- Extracting Data From HTML
- Saving Data to CSV
- Navigating to the Next Page
- Next Steps
Node.js Playwright 6-Part Beginner Series
-
Part 1: Basic Node.js Playwright Scraper - We'll learn the fundamentals of web scraping with Node.js and build your first scraper using Cheerio. (This article)
-
Part 2: Cleaning Unruly Data & Handling Edge Cases - Web data can be messy and unpredictable. In this part, we'll create a robust scraper using data structures and cleaning techniques to handle these challenges. (Part 2)
-
Part 3: Storing Scraped Data in AWS S3, MySQL & Postgres DBs - Explore various options for storing your scraped data, including databases like MySQL or Postgres, cloud storage like AWS S3, and file formats like CSV and JSON. We'll discuss their pros, cons, and suitable use cases. (Part 3)
-
Part 4: Managing Retries & Concurrency - Enhance your scraper's reliability and scalability by handling failed requests and utilizing concurrency. (Part 4)
-
Part 5: Faking User-Agents & Browser Headers - Learn how to create a production-ready scraper by simulating real users through user-agent and browser header manipulation. (Part 5)
-
Part 6: Using Proxies To Avoid Getting Blocked - Discover how to use proxies to bypass anti-bot systems by disguising your real IP address and location. (Part 6)
For this series, we will be scraping products from an e-commerce website,chocolate.co.uk, using Puppeteer for its ability to handle JavaScript-heavy pages. Let's get started!

Need help scraping the web?
Then check out ScrapeOps, the complete toolkit for web scraping.
Our Puppeteer Web Scraping Stack
When it comes to web scraping stacks, two key components are necessary:
- HTTP Client: Sends a request to the website to retrieve the HTML/JSON response.
- Browser Automation Tool: Used to navigate and interact with web pages.
For our purposes, we will use Puppeteer, a Node.js library that provides a high-level API to control headless Chrome or Chromium. Puppeteer is particularly useful for scraping dynamic content that requires JavaScript to render.
Using Puppeteer, you can simulate a real user navigating through a website. This includes clicking on buttons, filling out forms, and waiting for dynamic content to load.
This makes it a powerful tool for web scraping, especially for modern websites that rely heavily on JavaScript.
How to Set Up Our Node.js Environment
Let's start by setting up our Node.js environment.
Step 1 - Setup Your Node.js Environment
Ensure you have Node.js installed on your machine. You can download it from nodejs.org.
Once installed, set up a new project and initialize a package.json file:
$ mkdir puppeteer_scraper
$ cd puppeteer_scraper
$ npm init -y
This creates a new directory for our project and initializes it with a default package.json file.
Step 2 - Install Puppeteer
Install Puppeteer using npm:
$ npm install puppeteer
Puppeteer will download a recent version of Chromium by default, which ensures that your scraper works out of the box with a known good version of the browser.
Creating Our Scraper Project
Now that we have our environment set up, we can start building our Puppeteer scraper. First, create a new file called chocolate_scraper.js in our project folder:
puppeteer_scraper
└── chocolate_scraper.js
This chocolate_scraper.js file will contain all the code we use to scrape the e-commerce website.
Laying Out Our Puppeteer Scraper
First, let's lay out the basic structure of our scraper.
const puppeteer = require('puppeteer');

const urls = [
    'https://www.chocolate.co.uk/collections/all'
];

let scrapedData = [];

const startScrape = async () => {
    const browser = await puppeteer.launch();
    const page = await browser.newPage();

    for (const url of urls) {
        await page.goto(url);

        // Parse Data

        // Add to Data Output
    }

    await browser.close();
    console.log(scrapedData);
};

startScrape();
- We imported Puppeteer which provides an API to control a browser programmatically.
- Then, defined a list of URLs (
urls) to scrape. - Next, an empty array (
scrapedData) is initialized to store the data that will be scraped from the website. - Finally, set up a basic function to start our scraping process.
If we run this script now using startScrape() then we should get a empty list as an output.
Retrieving The HTML From Website
The first step every web scraper must do is retrieve the HTML/JSON response from the target website so that it can extract the data from the response.
Let's update our scraper to navigate to the target URLs and retrieve the HTML content:
const puppeteer = require('puppeteer');

const urls = [
    'https://www.chocolate.co.uk/collections/all'
];

let scrapedData = [];

const startScrape = async () => {
    const browser = await puppeteer.launch();
    const page = await browser.newPage();

    for (const url of urls) {
        await page.goto(url, { waitUntil: 'networkidle2' });

        const html = await page.content();
    }

    await browser.close();
};

startScrape();
- Here, we navigate to each URL in our list using
page.goto(url, { waitUntil: 'networkidle2' }).- The
networkidle2option ensures that Puppeteer waits until there are no more than two network connections for at least 500 ms. - This is particularly useful for pages that load additional content dynamically.
- The
- We then retrieve the HTML content of the page with
page.content()and print it out for debugging purposes.
Extracting Data From HTML
Now that our scraper can retrieve HTML content, we need to extract the data we want.
This will be done using Puppeteer's page.evaluate() function, which allows us to execute JavaScript in the context of the page.
Find Product CSS Selectors
To identify the correct CSS selectors for parsing product details, start by opening the website in your browser.
Then, right-click anywhere on the page and select "Inspect" to open the developer tools console.

Using the inspect element, hover over the item and look at the id's and classes on the individual products.
In this case we can see that each box of chocolates has its own special component which is called product-item.
We can just use this to reference our products (see above image).
const puppeteer = require('puppeteer');

const urls = [
    'https://www.chocolate.co.uk/collections/all'
];

let scrapedData = [];

const startScrape = async () => {
    const browser = await puppeteer.launch();
    const page = await browser.newPage();

    for (const url of urls) {
        await page.goto(url, { waitUntil: 'networkidle2' });

        const products = await page.evaluate(() => {
            const items = document.querySelectorAll('.product-item');
            return Array.from(items).map(item => ({
                name: item.querySelector('.product-item-meta__title').innerText,
                price: item.querySelector('.price').innerText.replace('\nSale price', '').trim(),
                url: item.querySelector('.product-item-meta a').href
            }));
        });

        scrapedData.push(...products);
    }

    await browser.close();
    console.log(scrapedData);
};

startScrape();
- In this code, we use
page.evaluate()to execute a function in the context of the page. - This function selects all elements with the class
product-itemand maps them to an array of objects, each containing the product's name, price, and URL. - We then append this array to our
scrapedDataarray.
Saving Data to CSV
In Part 4 of this beginner series, we go through in much more detail how to save data to various file formats and databases.
However, as a simple example for part 1 of this series we're going to save the data we've scraped and stored in scraped_data into a CSV file once the scrape has been completed.
To do this, we need to install the csv-writer package:
$ npm install csv-writer
Now, update our scraper to include the CSV writing functionality:
const puppeteer = require('puppeteer');
const createCsvWriter = require('csv-writer').createObjectCsvWriter;

const urls = [
    'https://www.chocolate.co.uk/collections/all'
];

let scrapedData = [];

const startScrape = async () => {
    const browser = await puppeteer.launch();
    const page = await browser.newPage();

    for (const url of urls) {
        await page.goto(url, { waitUntil: 'networkidle2' });

        const products = await page.evaluate(() => {
            const items = document.querySelectorAll('.product-item');
            return Array.from(items).map(item => ({
                name: item.querySelector('.product-item-meta__title').innerText,
                price: item.querySelector('.price').innerText.replace('\nSale price', '').trim(),
                url: item.querySelector('.product-item-meta a').href
            }));
        });

        scrapedData.push(...products);
    }

    await browser.close();
    saveToCSV(scrapedData);
};

const saveToCSV = (data) => {
    const csvWriter = createCsvWriter({
        path: 'scraped_data.csv',
        header: [
            { id: 'name', title: 'Name' },
            { id: 'price', title: 'Price' },
            { id: 'url', title: 'URL' }
        ]
    });

    csvWriter.writeRecords(data).then(() => {
        console.log('CSV file was written successfully');
    });
};

startScrape();
- In this code, we define a
saveToCSVfunction that takes an array of data and writes it to a CSV file usingcsv-writer. - The
csvWriterobject is configured with the path to the output file and the headers for the CSV columns. - After scraping the data, we call
saveToCSV(scrapedData)to save the data to a file.
Navigating to the Next Page
So far the code is working great but we're only getting the products from the first page of the site, the URL which we have defined in the urls list.
So the next logical step is to go to the next page if there is one and scrape the item data from that too! So here's how we do that.
To handle pagination, we need to find the CSS selector for the "next page" button and scrape each page iteratively until there are no more pages.
document.querySelector('a[rel="next"]')
Now, we just need to update our scraper to extract this next page url and add it to our urls to scrape.
const puppeteer = require('puppeteer');
const createCsvWriter = require('csv-writer').createObjectCsvWriter;

const baseURL = 'https://www.chocolate.co.uk/collections/all';
let scrapedData = [];

const startScrape = async () => {
    const browser = await puppeteer.launch();
    const page = await browser.newPage();

    let nextPageExists = true;
    let currentPage = baseURL;

    while (nextPageExists) {
        await page.goto(currentPage, { waitUntil: 'networkidle2' });

        const products = await page.evaluate(() => {
            const items = document.querySelectorAll('.product-item');
            return Array.from(items).map(item => ({
                name: item.querySelector('.product-item-meta__title').innerText,
                price: item.querySelector('.price').innerText.replace('\nSale price', '').trim(),
                url: item.querySelector('.product-item-meta a').href
            }));
        });

        scrapedData.push(...products);

        nextPageExists = await page.evaluate(() => {
            const nextPage = document.querySelector('a[rel="next"]');
            return nextPage ? nextPage.href : null;
        });

        if (nextPageExists) {
            currentPage = nextPageExists;
        }


    }

    await browser.close();
    saveToCSV(scrapedData);
};

const saveToCSV = (data) => {
    const csvWriter = createCsvWriter({
        path: 'scraped_data.csv',
        header: [
            { id: 'name', title: 'Name' },
            { id: 'price', title: 'Price' },
            { id: 'url', title: 'URL' }
        ]
    });

    csvWriter.writeRecords(data).then(() => {
        console.log('CSV file was written successfully');
    });
};

startScrape();
- In this updated code, we use a
whileloop to keep scraping until there are no more pages. - We check for the presence of a "next page" link using
page.evaluate(), and if it exists, we setcurrentPageto the URL of the next page. - This process repeats until
nextPageExistsisnull, indicating there are no more pages to scrape.

NodeJS Playwright Beginner Series Part 1: How To Build Your First Playwright Scraper
This guide is your comprehensive, step-by-step journey to building a production-ready web scraper with Node.js and Playwright.
While many tutorials cover only the basics, this six-part series goes further, leading you through the creation of a well-structured scraper using object-oriented programming (OOP) principles.
This 6-part Node.js Playwright Beginner Series will walk you through building a web scraping project from scratch, covering everything from creating the scraper to deployment and scheduling.
You'll learn not just how to scrape data but also how to store and clean it, handle errors and retries, and optimize performance with Node.js concurrency modules. By the end of this guide, you'll be equipped to create a robust, efficient, and scalable web scraper.
Node.js Playwright 6-Part Beginner Series
-
Part 1: Basic Node.js Playwright Scraper - We'll learn the fundamentals of web scraping with Node.js and build your first scraper using Cheerio. (This article)
-
Part 2: Cleaning Unruly Data & Handling Edge Cases - Web data can be messy and unpredictable. In this part, we'll create a robust scraper using data structures and cleaning techniques to handle these challenges. (Part 2)
-
Part 3: Storing Scraped Data in AWS S3, MySQL & Postgres DBs - Explore various options for storing your scraped data, including databases like MySQL or Postgres, cloud storage like AWS S3, and file formats like CSV and JSON. We'll discuss their pros, cons, and suitable use cases. (Part 3)
-
Part 4: Managing Retries & Concurrency - Enhance your scraper's reliability and scalability by handling failed requests and utilizing concurrency. (Part 4)
-
Part 5: Faking User-Agents & Browser Headers - Learn how to create a production-ready scraper by simulating real users through user-agent and browser header manipulation. (Part 5)
-
Part 6: Using Proxies To Avoid Getting Blocked - Discover how to use proxies to bypass anti-bot systems by disguising your real IP address and location. (Part 6)
For this beginner series, we'll focus on a simple scraping structure. We'll build a single scraper that takes a starting URL, fetches the website, parses and cleans data from the HTML response, and stores the extracted information - all within the same process.
This approach is ideal for personal projects and small-scale scraping tasks. However, larger-scale scraping, especially for business-critical data, may require more complex architectures.
Need help scraping the web?
Then check out ScrapeOps, the complete toolkit for web scraping.
Part 1: Basic Node.js Scraper
In Part 1, we'll start by building a basic web scraper that extracts data from webpages using CSS selectors and saves it in CSV format. In the following sections, we'll expand on this foundation, adding more features and functionality.
- How to Setup Our Environment
- Creating Your Playwright Scraper Project
- Laying Out our Playwright Scraper
- Retrieving HTML From The Website
- Extracting Data from HTML
- Saving Data to CSV
- Navigating to the "Next Page"
- Next Steps
Most commercial web scrapers are typically used to collect data from e-commerce sites for competitive analysis.
To demonstrate this, we've chosen chocolate.co.uk—a simple, multi-page website that perfectly suits our needs.

Let's dive in!
How to Setup Our Environment
Before we start writing our code, we need to set up our environment. The requirements are:
- The latest version of Node.js
- Playwright
- A Chromium browser compatible with Playwright
To install Node.js, visit the official website and download the appropriate version for your operating system.
Node.js comes bundled with npm, a package manager that we will use to install Playwright and other dependencies. After installing Node.js, verify the installation with the following commands:
node -v && npm -v
These commands will print the version numbers of Node.js and npm, confirming that they were successfully installed.
For example, it might print:
v22.6.0
10.8.2
Your versions might be different, but that’s okay. Next, let's create a working directory named chocolateScraper and open it in your terminal.
Run the following command to create a package.json file, which will act as a configuration file and keep track of our project dependencies and other information:
npm init -y
After that, install Playwright using this command:
npm i playwright
This will successfully install Playwright.
It's important to note that Playwright doesn’t come with any browser pre-bundled, unlike Puppeteer. You’ll need to install Chromium, Firefox, or WebKit separately.
For our scraper, we’ll use Chromium, so let's install it with this command:
npx playwright install chromium
Creating Your Playwright Scraper Project
Now that we’ve finished setting up our environment, let's create an entry point to start writing our code.
Create a file named chocolateScraper.js, where our code will go.
After this, your directory structure will look like this:
chocolateScraper/
├── node_modules/          # Installed dependencies
├── chocolateScraper.js    # Main entry point
├── package.json           # Project metadata and dependencies
├── package-lock.json      # Lockfile for dependencies (auto-generated)
Laying Out our Playwright Scraper
In this section, we'll outline how to structure our scraper. Let’s take a look at the following code:
const { chromium } = require("playwright");

const listOfUrls = ["https://www.chocolate.co.uk/collections/all"];
const scrapedData = [];

async function scrape() {
  const browser = await chromium.launch({ headless: true });
  const context = await browser.newContext();
  const page = await context.newPage();

  for (let url of listOfUrls) {
    console.log(`Scraping: ${url}`);
  }

  await browser.close();
}

(async () => {
  await scrape();
})();

// Scraping: https://www.chocolate.co.uk/collections/all
In the code above, we:
- Imported the Chromium browser from the Playwright library.
- Created two data structures:
listOfUrlsto store the URLs that need to be scraped, andscrapedDatato store the important data we extract. - Defined a function
scrape()to hold our core scraping logic. - Inside the function, we looped through each URL and simply printed it out.
- Then, we closed the browser using
browser.close(). - Finally, we called the
scrape()function using an Immediately Invoked Function Expression (IIFE), ensuring it runs as soon as the script is executed.
Retrieving HTML From The Website
One of the most essential methods in Playwright is the page.goto() method, which is used to navigate to a given URL.
Let's extract the HTML content from the URLs in our listOfUrls array using the page.content() method:
const { chromium } = require("playwright");

const listOfUrls = ["https://www.chocolate.co.uk/collections/all"];
const scrapedData = [];

async function scrape() {
  const browser = await chromium.launch({ headless: true });
  const context = await browser.newContext();
  const page = await context.newPage();

  for (let url of listOfUrls) {
    await page.goto(url);

    const html = await page.content();
    console.log(html);
  }

  await browser.close();
}

(async () => {
  await scrape();
})();
The code above successfully fetches the HTML from the web page and displays it in the console. The output will look something like this
<!DOCTYPE html>
<html class="js" lang="en" dir="ltr"
  style="--announcement-bar-height: 30px; --header-height: 218.453125px; --header-height-without-bottom-nav: 152px; --window-height: 720px;">

<head>
  <meta charset="utf-8">
  <meta name="viewport"
    content="width=device-width, initial-scale=1.0, height=device-height, minimum-scale=1.0, maximum-scale=1.0">
  <meta name="theme-color" content="#682464">

  <title>Products</title>
... More
Extracting Data from HTML
Unlike Cheerio, Playwright doesn’t provide methods for querying plain HTML directly. Instead, you have to use methods that operate within the browser context, executed as client-side JavaScript.
Here are some important methods that you should become familiar with:
-
$eval(selector, callback): Selects a single element that matches a CSS selector and runs a callback function on it. The function’s result is returned.
-
$$eval(selector, callback): Similar to $eval, but it selects all elements that match the CSS selector, applies a callback function to each, and returns an array of results.
-
querySelector(selector): A standard DOM method that selects the first element matching a given CSS selector.
-
textContent: Retrieves the text content of an element, including all its descendants. It returns the text inside the element as a string.
-
getAttribute: Retrieves the value of a specified attribute on an element. If the attribute doesn’t exist, it returns null.
For example:
const title = await page.$eval('.product-title', element => element.textContent.trim());
console.log(title);
We will use these methods in the upcoming sections. There, you will see how to apply them in practice.
Find Product CSS Selectors
To identify the CSS selectors for target elements within the DOM, you can utilize the Inspect tool in Google Chrome's Developer Tools (or any browser of your choice).
Begin by opening the desired URL, then right-click on the page and select "Inspect". This will open the Inspect tab, which displays the HTML structure of the webpage.
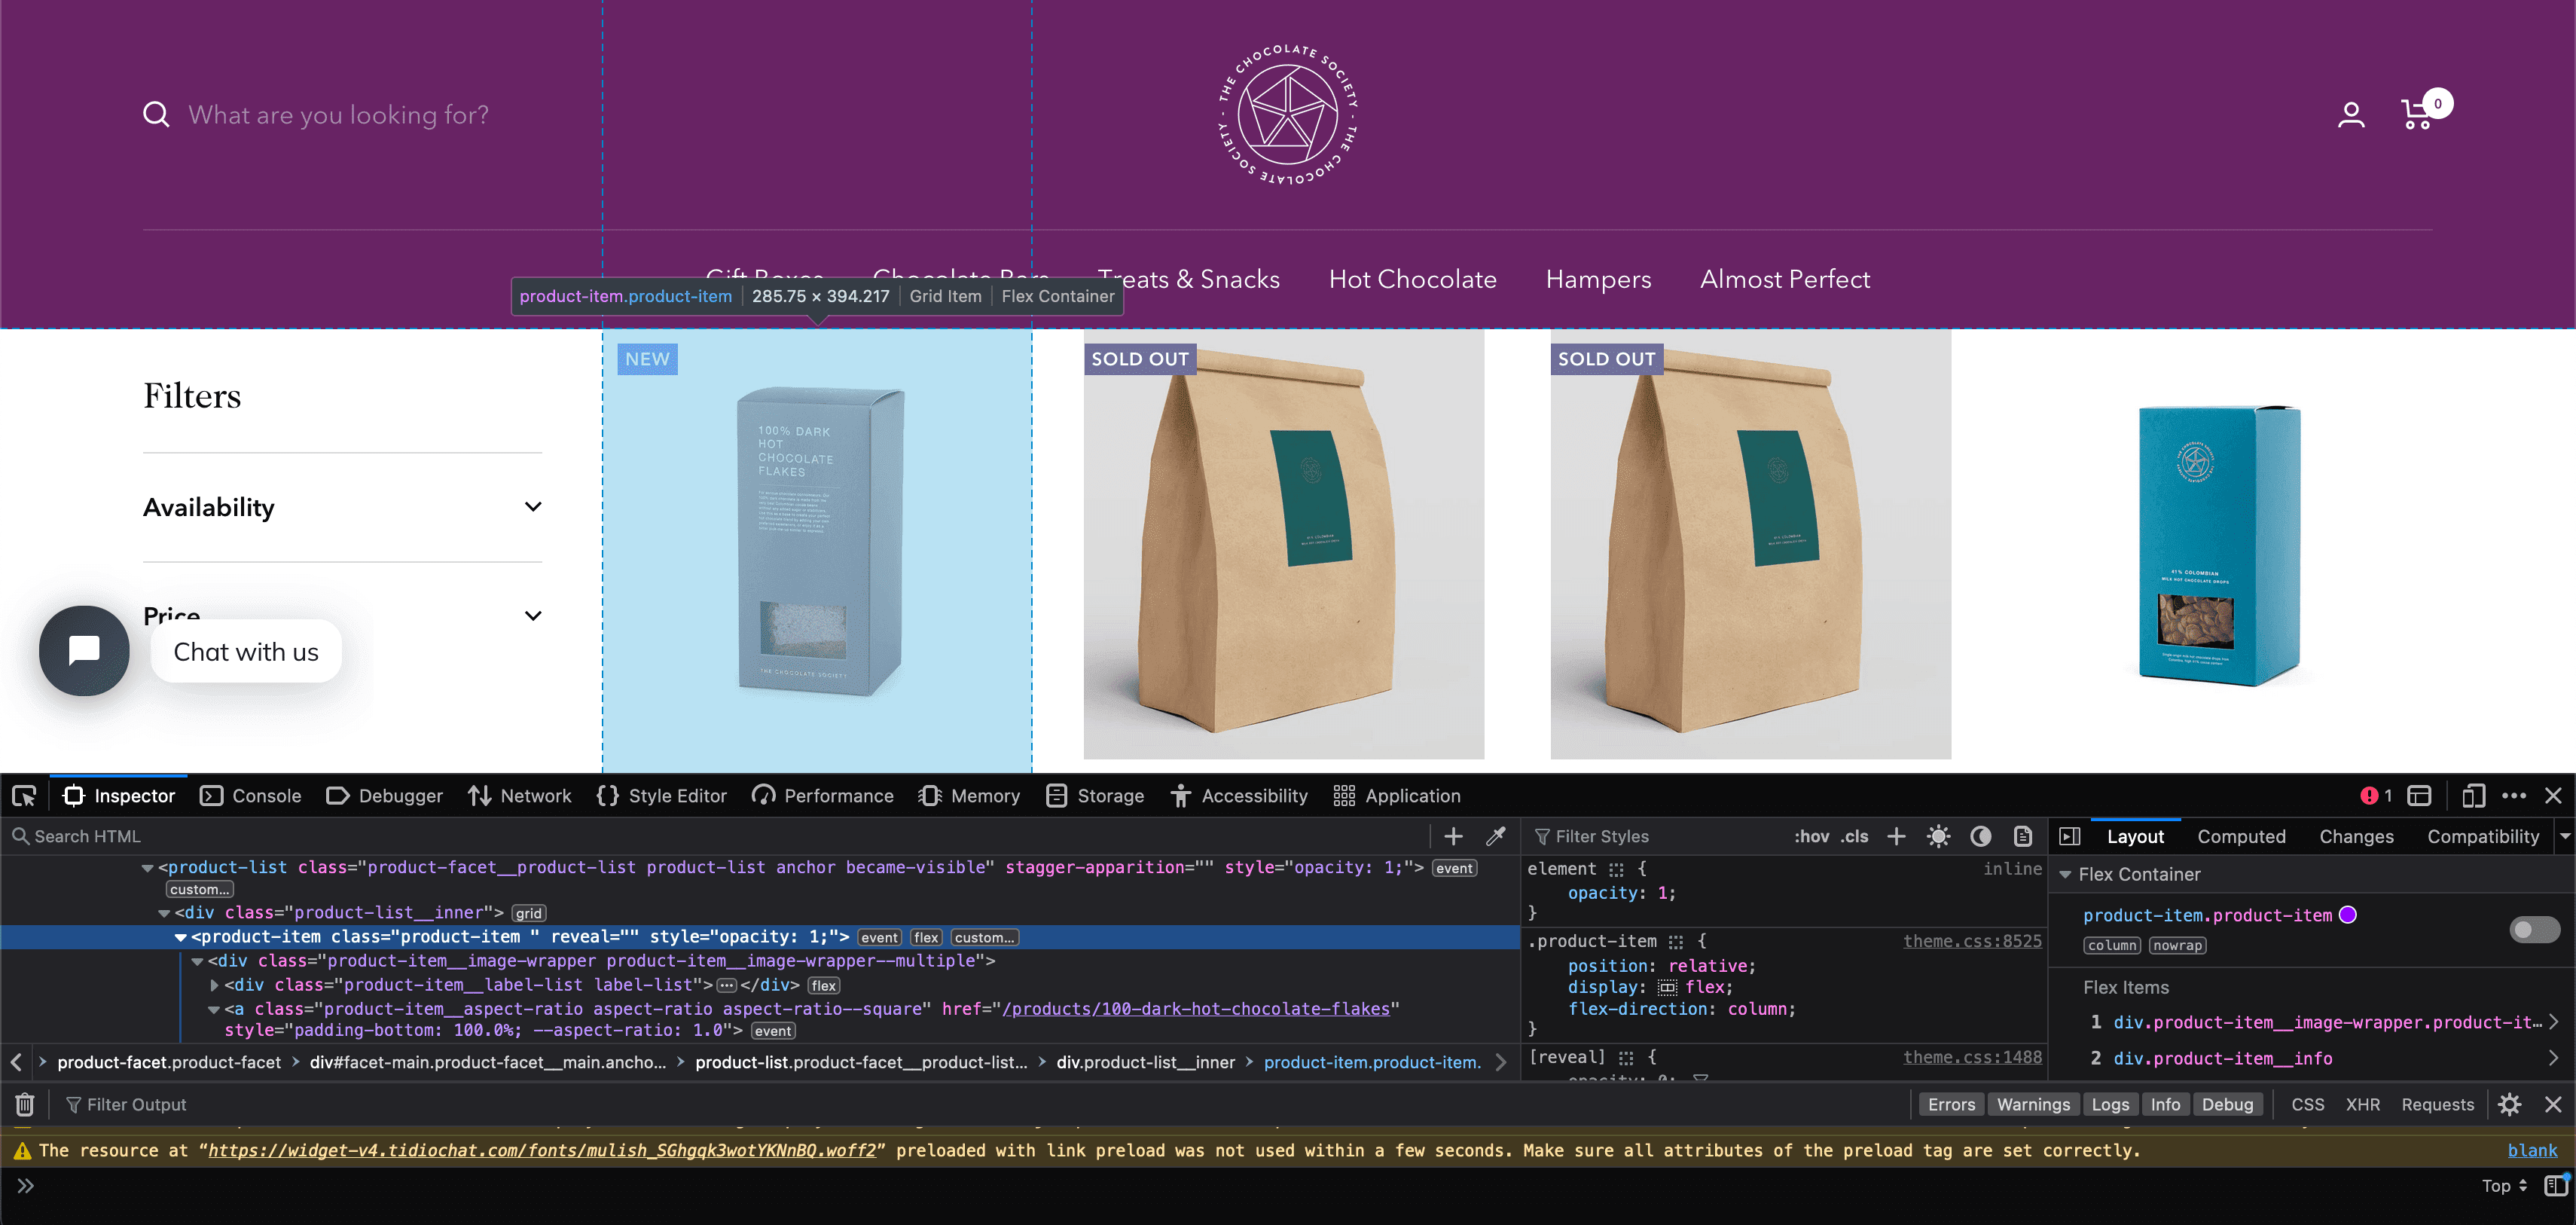
Within this tab, you can hover over or click on DOM elements to reveal their associated IDs, classes, and other attributes.
For example, if you're interested in identifying product items, you might find that their class is ".product-item".
Now, let's put this information to use by counting how many product elements, or product cards, exist on the webpage. The following code demonstrates how to do this using Playwright:
const { chromium } = require("playwright");

const listOfUrls = ["https://www.chocolate.co.uk/collections/all"];
const scrapedData = [];

async function scrape() {
  const browser = await chromium.launch({ headless: true });
  const context = await browser.newContext();
  const page = await context.newPage();

  for (let url of listOfUrls) {
    console.log(`Scraping: ${url}`);
    await page.goto(url);

    const productItems = await page.$$eval('.product-item', items => items.length);
    console.log(productItems);
  }

  await browser.close();
}

(async () => {
  await scrape();
})();

// Scraping: https://www.chocolate.co.uk/collections/all
// 24
In this code, we use the $$eval() function to select all elements matching the ".product-item" CSS selector and then run a callback function on the returned array to print its length, effectively counting the number of product cards on the page.
Extract Product Details
This is where the actual data extraction begins. Up to this point, we’ve just set up the structure of our code and explored some basic Playwright concepts. Now, we’ll focus on extracting the key details we need about each product.
Since we’ve already selected all the product elements, we can now use query selectors to extract specific information like the product title, price, and the URL.
But first, we need use inspector again to find the selectors for these values, which we identified as follows:
- title:
".product-item-meta__title" - price:
".price"
Let’s take a look at the code:
const { chromium } = require("playwright");

const listOfUrls = ["https://www.chocolate.co.uk/collections/all"];
const scrapedData = [];

async function scrape() {
  const browser = await chromium.launch({ headless: true });
  const context = await browser.newContext();
  const page = await context.newPage();

  for (let url of listOfUrls) {
    console.log(`Scraping: ${url}`);
    await page.goto(url);

    const productItems = await page.$$eval("product-item", items =>
      items.map(item => {
        const titleElement = item.querySelector(".product-item-meta__title");
        const priceElement = item.querySelector(".price");
        return {
          title: titleElement ? titleElement.textContent : null,
          price: priceElement ? priceElement.textContent : null,
          url: titleElement ? titleElement.getAttribute("href") : null
        };
      })
    );

    scrapedData.push(...productItems);
  }

  await browser.close();
  console.log(scrapedData);
}

(async () => {
  await scrape();
})();
[
   {
     title: '100% Dark Hot Chocolate Flakes',
     price: '\n              Sale price£9.95',
     url: '/products/100-dark-hot-chocolate-flakes'
   },
   {
     title: '2.5kg Bulk 41% Milk Hot Chocolate Drops',
     price: '\n              Sale price£45.00',
     url: '/products/2-5kg-bulk-of-our-41-milk-hot-chocolate-drops'
   },
... More
]
- In this code, we use
querySelector()to locate the title and price elements within each product element using their CSS selectors. - We then extract their text content, along with the URL from the title element, which is a clickable link (using
getAttribute('href')). - If any of this information is missing, we return
nullinstead. - Finally, we push all the extracted data into our
scrapedDataarray and print it out.
One thing you might have noticed in the output of the above code is that the price value isn't very clean.
It contains a newline character at the beginning and includes the text Sale price£, which we don't need as it could interfere with numeric calculations.
//price: '\n Sale price£45.00',
We'll cover how to clean this data thoroughly by implementing a proper Product class in Part 2.
But for now, let's apply a quick fix using the trim() method to remove any empty spaces and the replace() method to eliminate the Sale price£ text.
return {
  title: titleElement ? titleElement.textContent.trim() : null,
  price: priceElement ? priceElement.textContent.replace("Sale price£", "").trim() : null,
  url: titleElement ? titleElement.getAttribute("href") : null
};
Saving Data to CSV
Extracted data is most valuable when stored properly on your local disk. While there are several formats you can use—such as CSV, JSON, NoSQL databases like MongoDB, or SQL databases like PostgreSQL—we'll focus on saving data in CSV format for now. We'll explore other formats in Part 3 of this guide.
CSV (Comma-Separated Values) files organize data in a simple text format where each column is separated by a comma (,), and each row is separated by a newline (\n).
Here's an example:
title,price,url
Almost Perfect,3,/products/almost-perfect
To save data as a CSV file in Node.js, we can use the fs module. Let's walk through an example:
const { chromium } = require("playwright");
const fs = require("fs");

const listOfUrls = ["https://www.chocolate.co.uk/collections/all"];
const scrapedData = [];

async function scrape() {
  const browser = await chromium.launch({ headless: true });
  const context = await browser.newContext();
  const page = await context.newPage();

  for (let url of listOfUrls) {
    console.log(`Scraping: ${url}`);
    await page.goto(url);

    const productItems = await page.$$eval(".product-item", items =>
      items.map(item => {
        const titleElement = item.querySelector(".product-item-meta__title");
        const priceElement = item.querySelector(".price");
        return {
          title: titleElement ? titleElement.textContent.trim() : null,
          price: priceElement ? priceElement.textContent.replace("Sale price£", "").trim() : null,
          url: titleElement ? titleElement.getAttribute("href") : null
        };
      })
    );

    scrapedData.push(...productItems);
  }

  await browser.close();
  saveAsCSV(scrapedData, 'scraped_data.csv');
}

function saveAsCSV(data, filename) {
  if (data.length === 0) {
    console.log("No data to save.");
    return;
  }

  const header = Object.keys(data[0]).join(",");
  const csv = [header, ...data.map((obj) => Object.values(obj).join(","))].join("\n");
  fs.writeFileSync(filename, csv);
  console.log(`Data saved to ${filename}`);
}

(async () => {
  await scrape();
})();

// Scraping: https://www.chocolate.co.uk/collections/all
// Data saved to scraped_data.csv
In this code, we've created a new function saveAsCSV() that takes the scraped data and a filename as input.
- The data is formatted according to the CSV structure (with commas separating columns and newline characters separating rows) and then written to a file using the
writeFileSync()method. - The
writeFileSync()method is synchronous, meaning it will wait until all the data has been written to the file before proceeding to the next command.
Here’s how the CSV file would look after running this code:
 title,price,url
 100% Dark Hot Chocolate Flakes,9.95,/products/100-dark-hot-chocolate-flakes
 2.5kg Bulk 41% Milk Hot Chocolate Drops,45.00,/products/2-5kg-bulk-of-our-41-milk-hot-chocolate-drops
 2.5kg Bulk 61% Dark Hot Chocolate Drops,45.00,/products/2-5kg-of-our-best-selling-61-dark-hot-chocolate-drops
 ... More
As you might have noticed in the above CSV file, we seem to have a data quality issue with the price for the "Almost Perfect" perfect product. We will deal with this in the Part 2: Data Cleaning & Edge Cases
Navigating to the "Next Page"
In this section, we’ll enhance our scraper to handle pagination and scrape all the pages of a website. The "Next Page (→)" button, in our case is indicated by an arrow symbol, and is a link element with an href attribute containing the URL for the next page.
We can extract this URL, add it to our listOfUrls array, and let our loop process it in subsequent iterations. When the "Next Page" button is no longer present, it indicates that we've reached the last page.
The CSS selector for the "Next Page (→)" button is "a.pagination__nav-item:nth-child(4)".
Below is the updated code, which includes a new asynchronous function nextPage() to handle pagination. The function is asynchronous because locating the button may take some time.
const { chromium } = require("playwright");
const fs = require("fs");

const listOfUrls = ["https://www.chocolate.co.uk/collections/all"];
const scrapedData = [];

async function scrape() {
  const browser = await chromium.launch({ headless: true });
  const context = await browser.newContext();
  const page = await context.newPage();

  for (let url of listOfUrls) {
    console.log(`Scraping: ${url}`);
    await page.goto(url);

    const productItems = await page.$$eval("product-item", items =>
      items.map(item => ({
        title: item.querySelector(".product-item-meta__title")?.textContent.trim() || null,
        price: item.querySelector(".price")?.textContent.replace("Sale price£", "").trim() || null,
        url: item.querySelector(".product-item-meta__title")?.getAttribute("href") || null
      }))
    );

    scrapedData.push(...productItems);
    await nextPage(page);
  }

  await browser.close();
  saveAsCSV(scrapedData, 'scraped_data.csv');
}

function saveAsCSV(data, filename) {
  if (data.length === 0) {
    console.log("No data to save.");
    return;
  }

  const header = Object.keys(data[0]).join(",");
  const csv = [header, ...data.map((obj) => Object.values(obj).join(","))].join("\n");
  fs.writeFileSync(filename, csv);
  console.log(`Data saved to ${filename}`);
}

async function nextPage(page) {
  let nextUrl;
  try {
    nextUrl = await page.$eval("a.pagination__nav-item:nth-child(4)", item => item.href);
  } catch (error) {
    console.log('Last Page Reached');
    return;
  }
  listOfUrls.push(nextUrl);
}

(async () => {
  await scrape();
})();
 Scraping: https://www.chocolate.co.uk/collections/all
 Scraping: https://www.chocolate.co.uk/collections/all?page=2
 Scraping: https://www.chocolate.co.uk/collections/all?page=3
 Last Page Reached
 Data saved to scraped_data.csv
Here's a summary of the changes:
- The
nextPage()function locates the "Next Page (→)" button usingpage.$eval()(not$$eval(), since it’s a single element). It retrieves the href attribute and adds the URL to thelistOfUrlsarray. - The function uses a try-catch block to handle the absence of the "Next Page" button. If the button isn’t found, an error is thrown, indicating that we've reached the last page, and the function exits successfuly.
- As new URLs are added to
listOfUrls, the loop in ascrape()continues to navigate through all available pages, scraping data from each one.
This complete code sets up the scraper to automatically handle pagination, ensuring that all relevant data is collected across multiple pages.
Next Steps
You now have five fully functional “first scraper” examples-pick the stack that fits your project and clone its repo to explore the code:
-
Python Requests + BeautifulSoup https://github.com/Python-Web-Scraping-Playbook/Beginner-Series-Part-1-First-Scraper
-
Python Selenium https://github.com/ScrapeOps/python-scrapy-playbook/tree/master/1_Beginner_Series
-
Node.js Axios + Cheerio https://github.com/The-NodeJs-Web-Scraping-Playbook
-
Node.js Puppeteer https://github.com/The-NodeJs-Web-Scraping-Playbook
-
Node.js Playwright https://github.com/The-NodeJs-Web-Scraping-Playbook
In Part 2, we’ll tackle Data Cleaning & Edge‑Case Handling - you’ll learn how to normalize prices, deal with missing or malformed fields, build data‑class pipelines, and make your scraper robust against real‑world HTML quirks.
Click Here for Part 2 guide.
Need a Free Proxy? Then check out our Proxy Comparison Tool that allows to compare the pricing, features and limits of every proxy provider on the market so you can find the one that best suits your needs. Including the best free plans.