
Node.js Axios/CheerioJS Beginners Series Part 1: Building Your First Scraper
When it comes to web scraping, Node.js is a popular choice due to its strong community, extensive libraries like Cheerio, and its integration with JavaScript.
Many online resources show how to create simple web scrapers in Node.js, but few guide you through building a production-ready scraper.
This 6-part Node.js Axios/CheerioJS Beginner Series will walk you through building a web scraping project from scratch, covering everything from creating the scraper to deployment and scheduling.
Node.js Axios/CheerioJS 6-Part Beginner Series
-
Part 1: Basic Node.js Cheerio Scraper - We'll learn the fundamentals of web scraping with Node.js and build your first scraper using Cheerio. (This article)
-
Part 2: Cleaning Unruly Data & Handling Edge Cases - Web data can be messy and unpredictable. In this part, we'll create a robust scraper using data structures and cleaning techniques to handle these challenges. (Part 2)
-
Part 3: Storing Scraped Data in AWS S3, MySQL & Postgres DBs - Explore various options for storing your scraped data, including databases like MySQL or Postgres, cloud storage like AWS S3, and file formats like CSV and JSON. We'll discuss their pros, cons, and suitable use cases. (Part 3)
-
Part 4: Managing Retries & Concurrency - Enhance your scraper's reliability and scalability by handling failed requests and utilizing concurrency. (Part 4)
-
Part 5: Faking User-Agents & Browser Headers - Learn how to create a production-ready scraper by simulating real users through user-agent and browser header manipulation. (Part 5)
-
Part 6: Using Proxies To Avoid Getting Blocked - Discover how to use proxies to bypass anti-bot systems by disguising your real IP address and location. (Coming soon)
The code for this project is available on Github.
Series Approach:
For this beginner series, we'll focus on a simple scraping structure. We'll build a single scraper that takes a starting URL, fetches the website, parses and cleans data from the HTML response, and stores the extracted information - all within the same process.
This approach is ideal for personal projects and small-scale scraping tasks. However, larger-scale scraping, especially for business-critical data, may require more complex architectures.
Need help scraping the web?
Then check out ScrapeOps, the complete toolkit for web scraping.
Part 1: Basic Node.js Scraper
In this tutorial, Part 1: Basic Node.js Scraper we're going to cover:
- Our Node Web Scraping Stack
- How to Setup Our Node.js Environment
- Creating Your Node.js Scraper Project
- Laying Out our Node Scraper
- Retrieving The HTML From Website
- Extracting Data from HTML
- Saving Data to CSV
- Navigating to the "Next Page"
- Next Steps
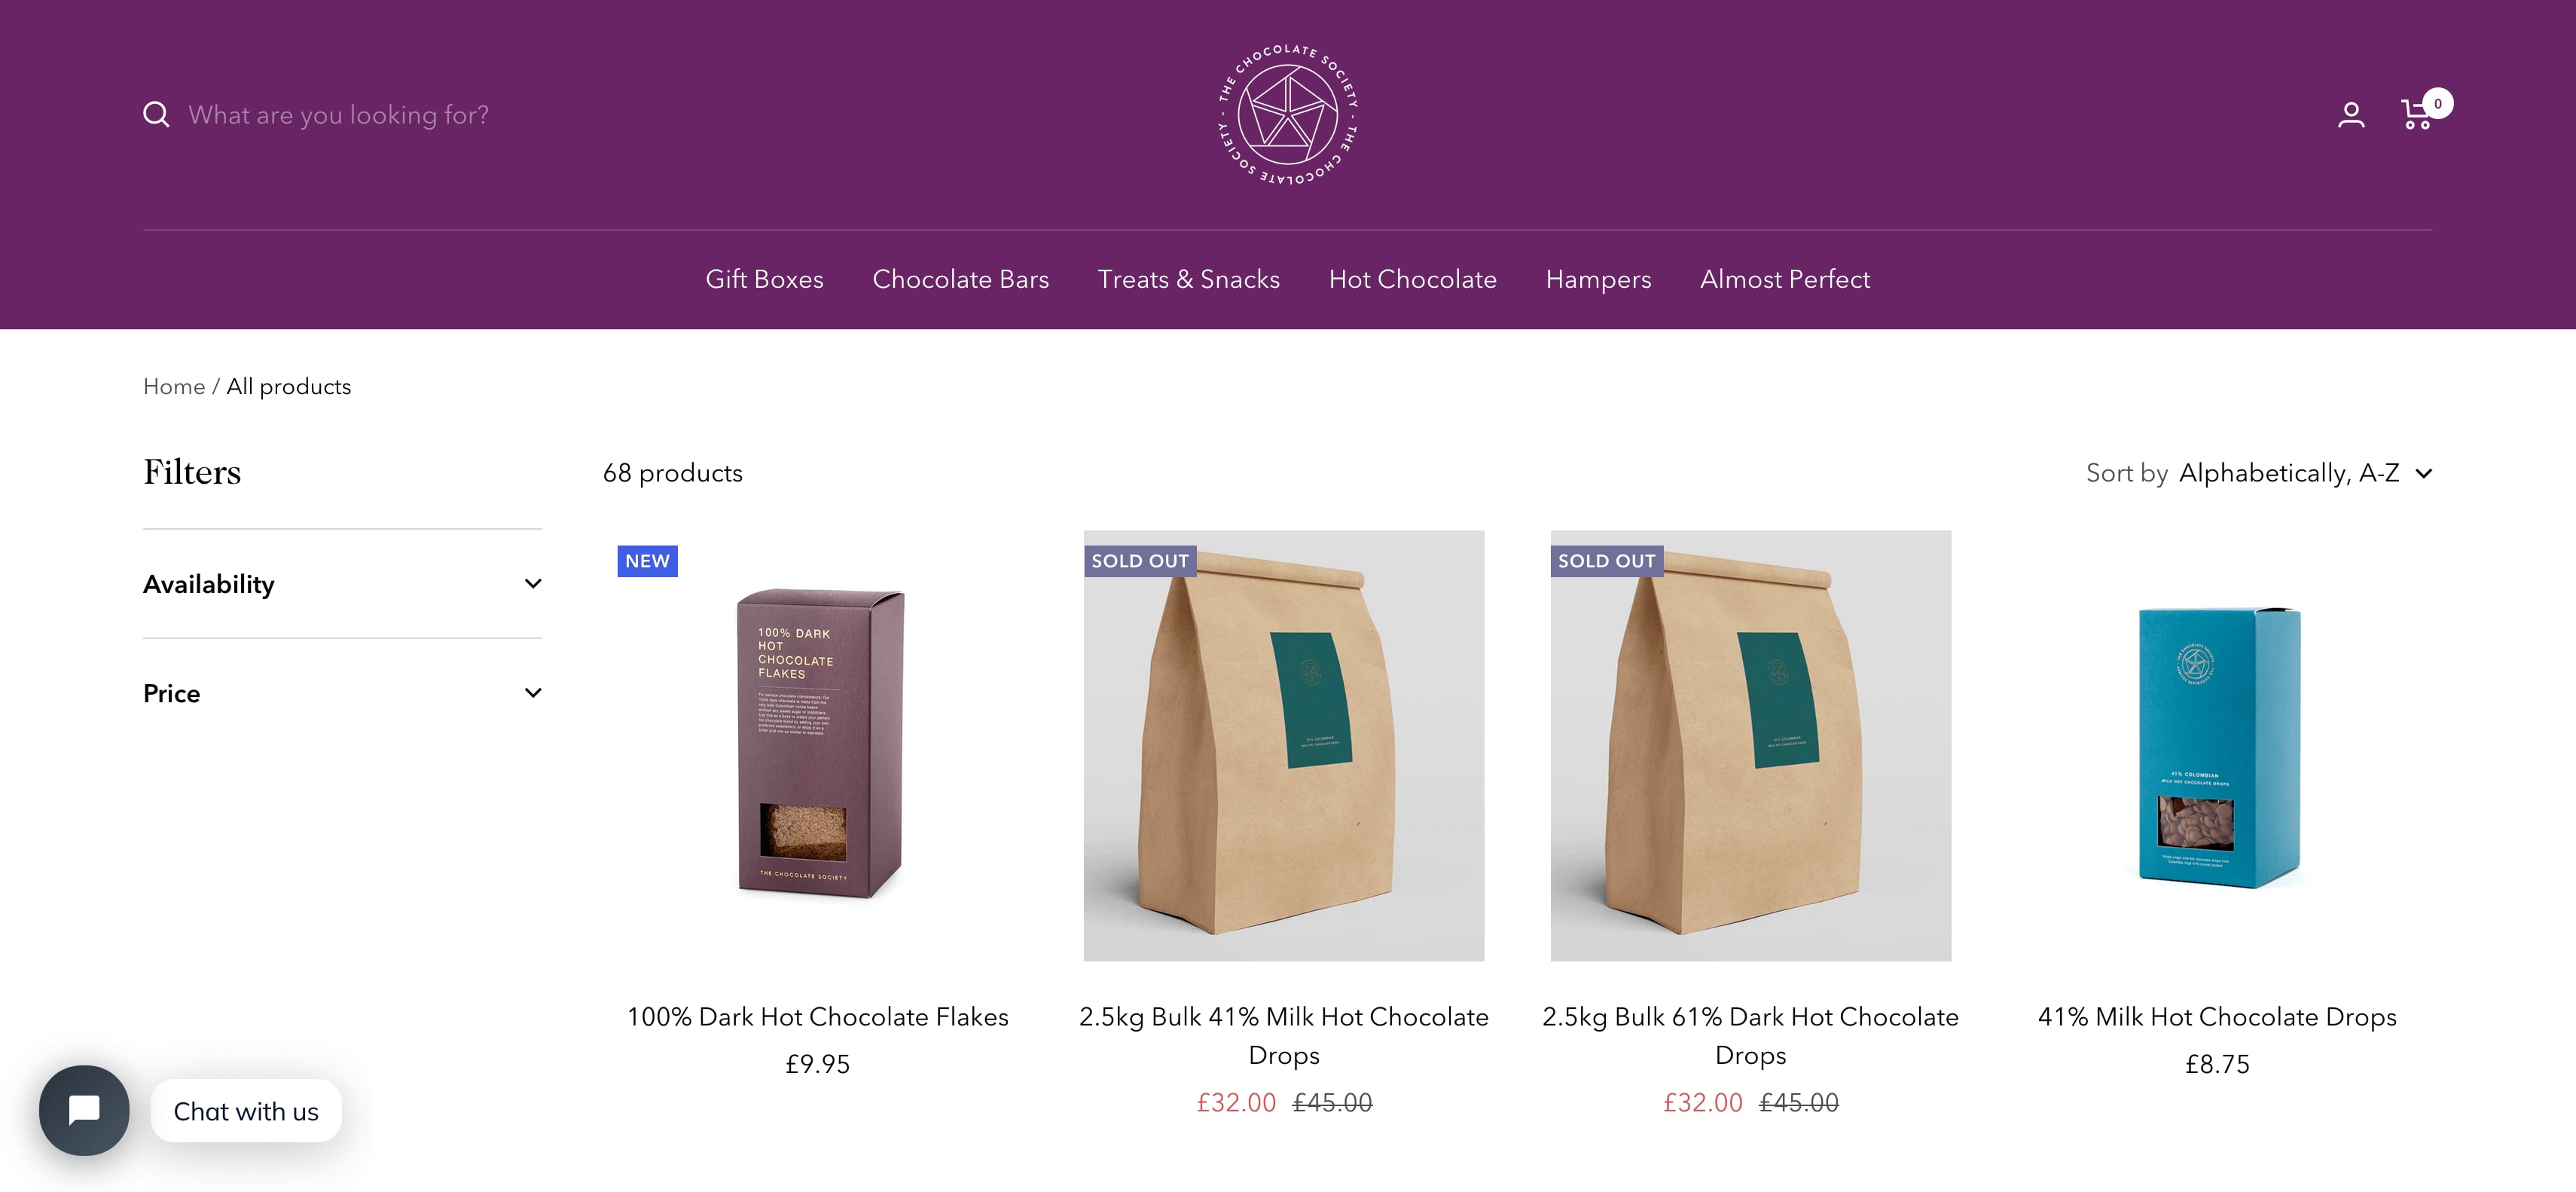
For this series, we will be scraping the products from chocolate.co.uk as it will be a good example of how to approach scraping a e-commerce store. Plus, who doesn't like Chocolate!
Our Node Web Scraping Stack
Web scraping in Node.js involves two key components:
1. HTTP Client: This library sends requests to websites and retrieves their response data, typically HTML or JSON.
2. Parsing Library: This library extracts and processes the desired data from the received response.
Node.js offers a rich ecosystem of libraries for each component.
HTTP Clients:
- Axios: A popular Promise-based HTTP client known for its simplicity and clean syntax.
- SuperAgent: Another Promise-based library with support for various request features and configuration options.
- Got: A lightweight HTTP client focused on performance and ease of use.
Parsing Libraries:
- Cheerio: This library directly parses HTML using a familiar jQuery-like syntax, making it intuitive for developers familiar with JavaScript.
- JSDOM: A full-fledged DOM implementation that allows manipulation and parsing of HTML beyond simple extraction.
- htmlparser2: A high-performance streaming parser suitable for large and complex HTML structures.
Another alternative are headless browsers that combine requests and parsing. For Node.js the most popular are:
- Puppeteer: A library that controls a headless Chrome browser, allowing for dynamic rendering and complex scraping scenarios.
- Playwright: A newer framework offering browser automation across various browsers like Chrome, Firefox, and WebKit.
Choice for this Series:
For this beginner series, we'll utilize the Axios and Cheerio combination due to its simplicity and ease of learning.
This popular stack allows you to build efficient scrapers that fetch website content, extract relevant data, and store it in your desired format and location.
How to Setup Our Node.js Environment
Before diving into development, let's set up our Node.js environment.
Step 1 - Node.js and npm Installation
Ensure you have the latest Node.js version installed. You can check and download the appropriate installer for your operating system (Windows, macOS, or Linux) from the official website.
Run the installer and follow the prompts to install Node.js.
After installation, open a terminal or command prompt and run the following commands to verify that Node.js and npm are installed correctly:
node -v
npm -v
These commands should output the versions of Node.js and npm installed on your system. If you see version numbers, it means Node.js and npm are installed successfully.
Step 2 - Package Management
Node.js uses npm (Node Package Manager) for installing and managing dependencies. It comes bundled with Node.js by default.
npm allows you to install, manage, and share packages (libraries or modules) with other developers. It is used for dependency management in Node.js projects.
Step 3 - Project Directory
Create a new directory for your project. Open your terminal or command prompt and navigate to this directory.
mkdir my-node-project
cd my-node-project
Step 4 - Initialize Project (Optional)
While not strictly necessary, you can initialize an empty npm project using:
npm init -y
This creates a package.json file at the root of your project, which acts as a manifest for storing project information and dependencies.
Step 5 - Install Dependencies
We'll install the necessary libraries: Axios for HTTP requests and Cheerio for parsing. Use the following command in your terminal:
npm install axios cheerio
This downloads and installs the specified packages and their dependencies into your project's node_modules directory.
Creating Your First Node.js Scraper Project
Now that our environment is ready, let's create our first Node.js scraper!
1. Create a Project File:
In your project directory, create a new JavaScript file named chocolateScraper.js. This file will hold all the code for your scraper.
ChocolateScraper/
  |- chocolateScraper.js
2. Running the Scraper:
You can execute your scraper using the following command in your terminal:
node chocolateScraper.js
This command runs the JavaScript code in your chocolateScraper.js file, executing the scraping logic and potentially displaying the extracted data or saving it to a chosen format.
Laying Out our Node Scraper
Now that you have your chocolateScraper.js file created, let's begin building the scraper logic:
const axios = require("axios");
const cheerio = require("cheerio");

const listOfUrls = ["https://www.chocolate.co.uk/collections/all"];

const scrapedData = [];

async function scrape() {
  for (const url of listOfUrls) {
    console.log(`Scraping: ${url}`);
  }
}

(async () => {
  await scrape();
})();
Let's walk through what we've just written:
- Imported
axiosandcheeriousingrequireso that they can be used. - Defined a
listOfUrlscontaining the URLs to be scraped. - Created an empty array,
scrapeData, to store results in. - Defined an asynchronous
scrapemethod to do the work. - Created an Immediately Invoked Function Expression to start the program.
Now, if we run the script, we see the following output:
node chocolateScraper.js
> Scraping: https://www.chocolate.co.uk/collections/all
Retrieving The HTML From Website
With our basic logic in place, we need to begin requesting data from the target URLs. This is usually in the form of HTML or JSON.
We will use Axios to do this, let's make the following updates:
const axios = require("axios");
const cheerio = require("cheerio");

const listOfUrls = ["https://www.chocolate.co.uk/collections/all"];

const scrapedData = [];

async function scrape() {
  for (const url of listOfUrls) {
    const response = await axios.get(url);

    if (response.status == 200) {
      console.log(response.data);
    }
  }
}

(async () => {
  await scrape();
})();
You can see we've added a couple lines to our for loop. We use axios.get with the URL and if the status is equal to 200 we log the data. When you run the script you should see HTML that ends something like this
</div>
          </div></div>
    </div>
  </div>
</footer></div></body>
</html>
Extracting Data from HTML
Now that our scraper is successfully retrieving HTML pages from the website, we need to update our scraper to extract the data we want.
We will do this using the Cheerio library and CSS Selectors (another option are XPath Selectors).
XPath and CSS selectors are like little maps our scraper will use to navigate the DOM tree and find the location of the data we require.
First things first though, we need to load the HTML response into Cheerio so we can navigate the DOM. This can be done as follows:
if (response.status == 200) {
  const html = response.data;
  const $ = cheerio.load(html);
}
Find Product CSS Selectors
To find the correct CSS selectors to parse the product details we will first open the page in our browsers DevTools.
Open the website, then open the developer tools console (right click on the page and click inspect).
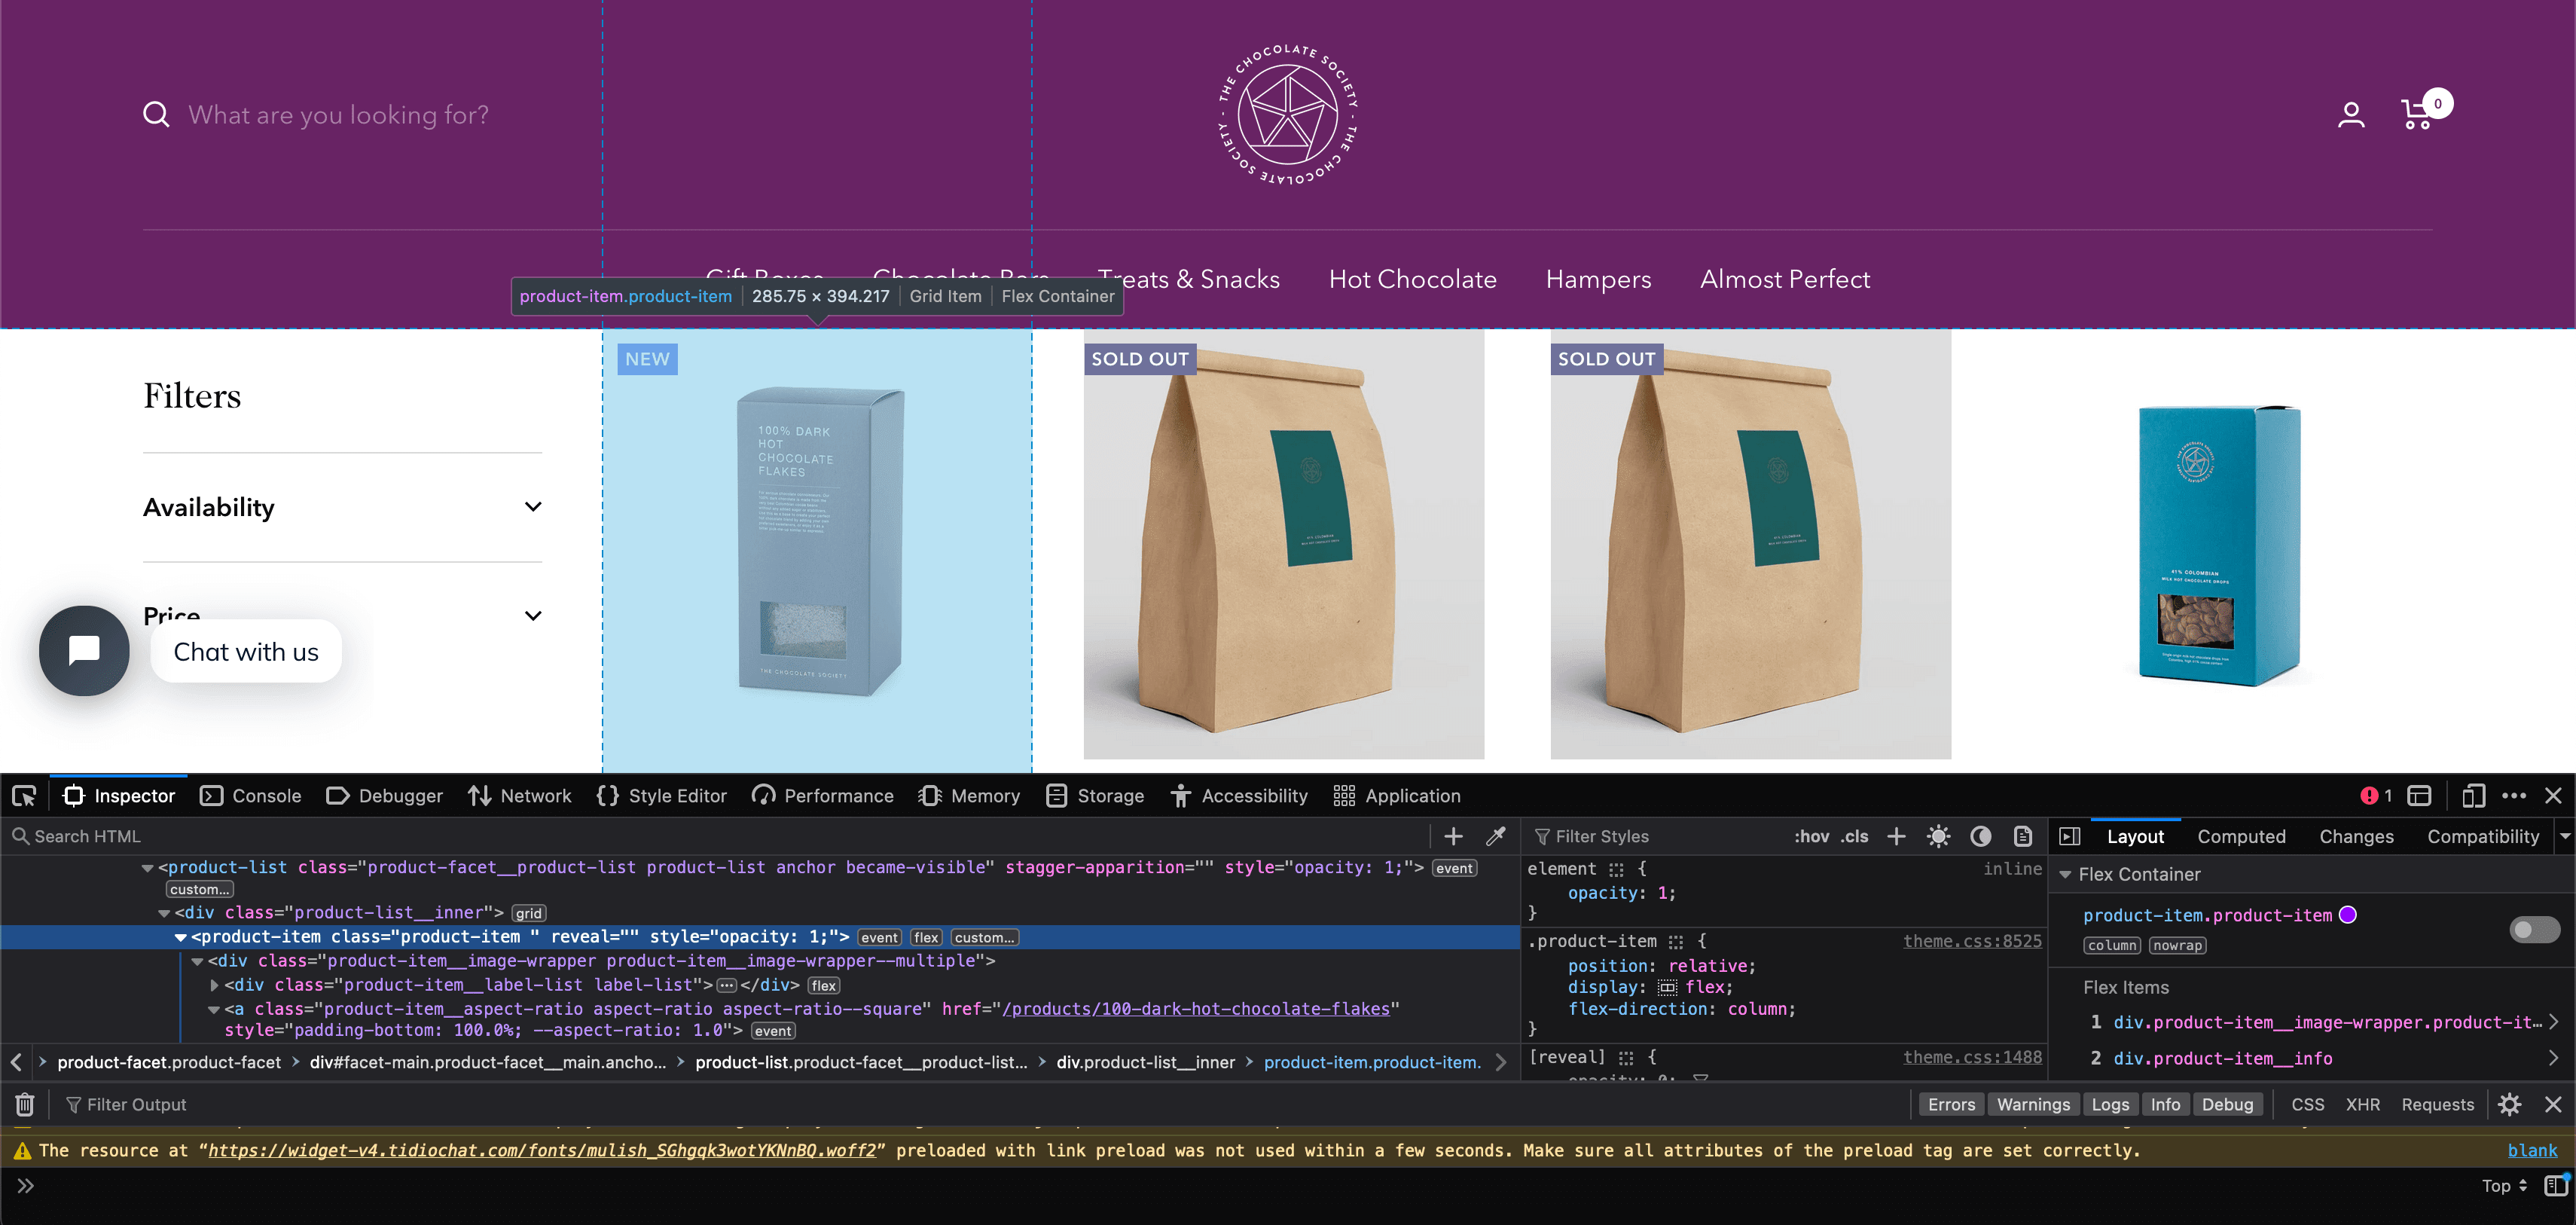
Using the inspect element, hover over the item and look at the id's and classes on the individual products.
In this case we can see that each box of chocolates has its own special component which is called product-item. We can just use this to reference our products (see above image). Now using the following code:
const $ = cheerio.load(html);
const productItems = $("product-item");
console.log("Number of product-item: " + productItems.length);
We can see that it finds elements matching the selector
node chocolateScraper.js
> Number of product-item: 24
Extract Product Details
Now that we have a list of product-item elements stored in the productItems let's extract the name, price and url of each product.
First, we can use inspector again to find the selectors for these values. We should learn that
.product-item-meta__titleis the title.priceis the price.product-item-meta__titlecontains an href for the URL
Using these selectors, we can extract that information from te web page.
for (const productItem of productItems) {
  const title = $(productItem).find(".product-item-meta__title").text();
  const price = $(productItem).find(".price").text();
  const url = $(productItem).find(".product-item-meta__title").attr("href");
}
But one small issue you may see with this, the price field needs to be cleaned up. In it's normal state, it looks like this
\n Sale price£32.00\n Regular price£45.00
\n Sale price£8.75
We want to focus purely on the sale price, to do that we will perform some operations rather than grab the text immediately.
const price = $(productItem)
  .find(".price")
  .first()
  .text()
  .replace("Sale price", "")
  .trim();
In the above code, we get all elements matching the .price selector. We know our "Sale price" will always be the first so we use .first(). Then, we can grab the text but it will still include some unwanted content so we use .replace() and finally, .trim() to remove extra whitespace and new lines.
Updated Scraper
Now that we've got the CSS selectors figured out and cleaned up the data some, let's take a look at the code we've got so far.
const axios = require("axios");
const cheerio = require("cheerio");

const listOfUrls = ["https://www.chocolate.co.uk/collections/all"];

const scrapedData = [];

async function scrape() {
  for (const url of listOfUrls) {
    const response = await axios.get(url);

    if (response.status == 200) {
      const html = response.data;
      const $ = cheerio.load(html);
      const productItems = $("product-item");
      for (const productItem of productItems) {
        const title = $(productItem).find(".product-item-meta__title").text();

        const price = $(productItem)
          .find(".price")
          .first()
          .text()
          .replace("Sale price", "")
          .trim();
        const url = $(productItem)
          .find(".product-item-meta__title")
          .attr("href");

        scrapedData.push({
          title,
          price,
          url,
        });
      }
    }
  }
}

(async () => {
  await scrape();
  console.log(scrapedData);
})();
In this code, we take the following steps:
- Make a request to the chocolate store from the URLs array
- Upon successful response, get all elements matching the
product-itemselector. - Loop through all product items and extract title, price and url.
- Append the extracted data to the
scrapedDataarray
After running that code, we should see an output similar to this (truncated for brevity):
[
    {
    title: 'Cinnamon Toast',
    price: '£5.00',
    url: '/products/cinnamon-toast-chocolate-bar'
  },
  {
    title: 'Collection of 4 of our Best Selling Chocolate Malt Balls',
    price: '£30.00',
    url: '/products/collection-of-our-best-selling-chocolate-malt-balls'
  },
  {
    title: 'Colombia 61%',
    price: '£5.00',
    url: '/products/colombian-dark-chocolate-bar'
  },
  {
    title: 'Crunchy Biscuit',
    price: '£5.00',
    url: '/products/crunchy-biscuit-blonde-chocolate-bar'
  },
  ...
]
Saving Data to CSV
In Part 4, we will go much more in-depth on how to save data in various formats and databases. But for now, we will stick to the simple and common CSV format.
We've already got out data being collected and stored in the array as objects, so now we just need to output it to a CSV file when we're done.
To start, we will write a new function that will do the work of saving the data
function saveAsCSV(data, filename) {
  const header = Object.keys(data[0]).join(",");
  const csv = [header, ...data.map((obj) => Object.values(obj).join(","))].join(
    "\n"
  );
  fs.writeFileSync(filename, csv);
}
This will use the native fs (File System) library to write data to a file. Make sure to add const fs = require("fs"); to the top of the file.
Now update the scraper to use that function with our data
const axios = require("axios");
const cheerio = require("cheerio");
const fs = require("fs");

const listOfUrls = ["https://www.chocolate.co.uk/collections/all"];

const scrapedData = [];

async function scrape() {
  for (const url of listOfUrls) {
    const response = await axios.get(url);

    if (response.status == 200) {
      const html = response.data;
      const $ = cheerio.load(html);
      const productItems = $("product-item");
      for (const productItem of productItems) {
        const title = $(productItem).find(".product-item-meta__title").text();

        const price = $(productItem)
          .find(".price")
          .first()
          .text()
          .replace("Sale price", "")
          .trim();
        const url = $(productItem)
          .find(".product-item-meta__title")
          .attr("href");

        scrapedData.push({
          title,
          price,
          url,
        });
      }
    }
  }
}

function saveAsCSV(data, filename) {
  const header = Object.keys(data[0]).join(",");
  const csv = [header, ...data.map((obj) => Object.values(obj).join(","))].join(
    "\n"
  );
  fs.writeFileSync(filename, csv);
}

(async () => {
  await scrape();
  saveAsCSV(scrapedData, "chocolate.csv");
})();
Now, after running the scraper, we should see a chocolate.csv file with all of our data. It should look something like this:
title,price,url
100% Dark Hot Chocolate Flakes,£9.95,/products/100-dark-hot-chocolate-flakes
2.5kg Bulk 41% Milk Hot Chocolate Drops,£32.00,/products/2-5kg-bulk-of-our-41-milk-hot-chocolate-drops
2.5kg Bulk 61% Dark Hot Chocolate Drops,£32.00,/products/2-5kg-of-our-best-selling-61-dark-hot-chocolate-drops
41% Milk Hot Chocolate Drops,£8.75,/products/41-colombian-milk-hot-chocolate-drops
61% Dark Hot Chocolate Drops,£8.75,/products/62-dark-hot-chocolate
...
Navigating to the "Next Page"
The code is working great but we're only getting the products from the first page of the website.
So the next logical step is to go to the next page if there is one and scrape the item data from that too! So here's how we do that.
To do so we need to find the correct CSS selector to get the next page button.
And then get the href attribute that contains the url to the next page. We can use
$("a[rel='next']").attr("href");
We've already got an array to store URLs that need to be scraped. We can utilize this by simply adding the "Next Page" link to this array:
const axios = require("axios");
const cheerio = require("cheerio");
const fs = require("fs");

const listOfUrls = ["https://www.chocolate.co.uk/collections/all"];

const scrapedData = [];

async function scrape() {
  for (const url of listOfUrls) {
    const response = await axios.get(url);

    if (response.status == 200) {
      const html = response.data;
      const $ = cheerio.load(html);
      const productItems = $("product-item");

      for (const productItem of productItems) {
        const title = $(productItem).find(".product-item-meta__title").text();

        const price = $(productItem)
          .find(".price")
          .first()
          .text()
          .replace("Sale price", "")
          .trim();
        const url = $(productItem)
          .find(".product-item-meta__title")
          .attr("href");

        scrapedData.push({
          title,
          price,
          url,
        });
      }

      const nextPage = $("a[rel='next']").attr("href");
      if (nextPage) {
        listOfUrls.push("https://www.chocolate.co.uk" + nextPage);
      }
    }
  }
}

function saveAsCSV(data, filename) {
  const header = Object.keys(data[0]).join(",");
  const csv = [header, ...data.map((obj) => Object.values(obj).join(","))].join(
    "\n"
  );
  fs.writeFileSync(filename, csv);
}

(async () => {
  await scrape();
  saveAsCSV(scrapedData, "chocolate.csv");
})();
Now, when we run our scraper, it will continue to add URLs when there are more pages available.
Next Steps
We hope you have enough of the basics to get up and running scraping a simple e-commerce site with the above tutorial.
If you would like the code from this example please check out on Github here.
In Part 2 of the series we will work on Cleaning Dirty Data & Dealing With Edge Cases. Web data can be messy, unstructured, and have lots of edge cases so will make our scraper robust to these edge cases, using DataClasses and Data Pipelines.